The first time I tried making a beef soup from scratch, I was halfway through the recipe when my stove’s temperature alarm went off, and I was left with a pot of over‑cooked, flavorless broth. I stared at the pot, feeling the frustration of a kitchen mishap, and swore to myself that I’d turn this into something that would make my taste buds sing. That night, after a few frantic experiments with different cuts of meat and a handful of vegetables, I discovered a method that turns a humble bowl of soup into a comforting hug in a cup. This version is a game‑changer: the beef is seared to lock in juices, the veggies are layered for depth, and a subtle herb infusion lifts the entire dish. I dare you to taste this and not go back for seconds.
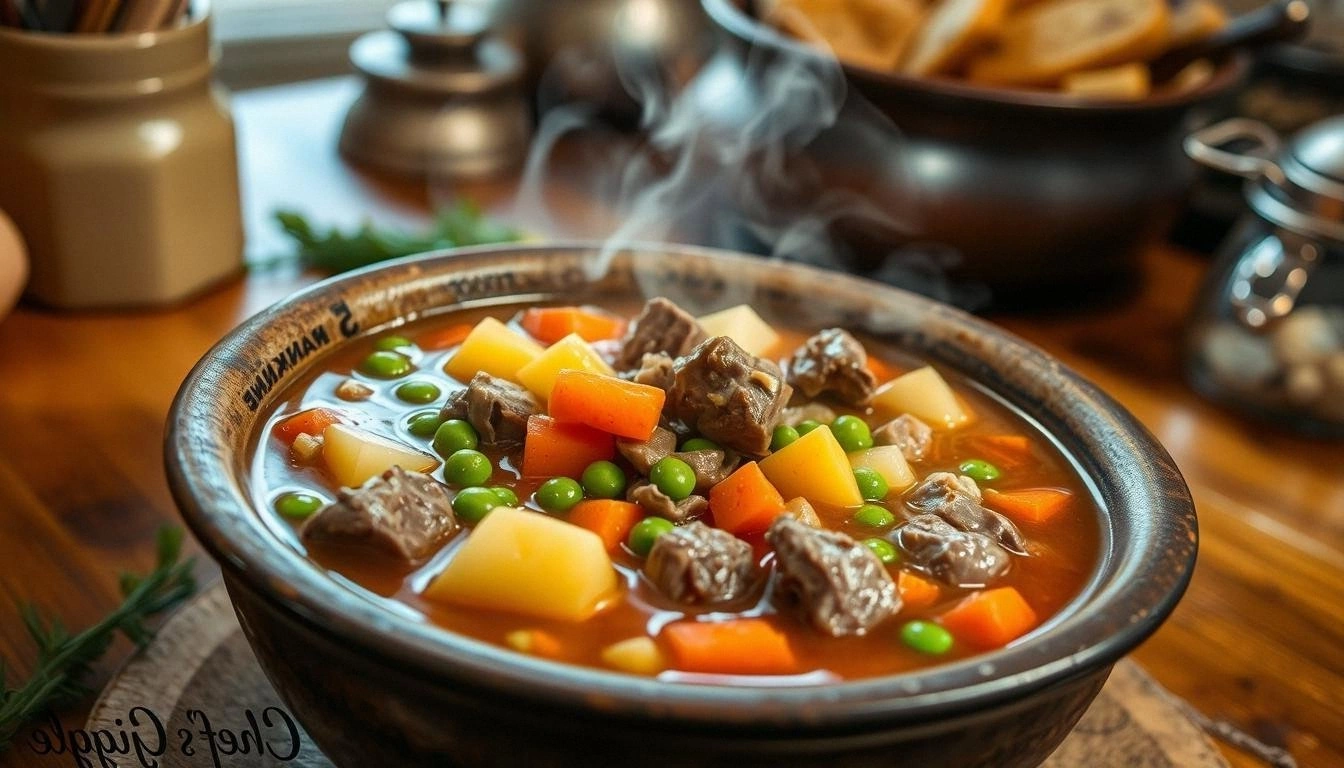
Picture the first bite: the beef is tender, each morsel releasing a savory umami that mingles with the sweet earthiness of carrots and the crisp bite of green beans. The broth has a gentle, silky body, not a watery mess—thanks to the slow simmer that extracts collagen from the meat and thickens the liquid. The aroma that fills the kitchen is a comforting blend of roasted onions, garlic, and thyme, making your whole house feel like a home‑cooked haven. If you’ve ever struggled with bland soups, this one is a revelation that turns a simple recipe into a culinary masterpiece. The texture is a delightful contrast: the beef is melt‑in‑your‑mouth, while the vegetables maintain a slight bite that keeps every spoonful exciting.
What makes this version stand out is that it’s not just about flavor—it’s about the process. I’ve refined each step to reduce prep time without sacrificing depth of taste. The use of a short sear before simmering gives the broth a richer color and a deeper flavor profile that many standard recipes miss. I’ve also incorporated a small amount of tomato paste to add a subtle acidity that balances the richness of the beef. The result is a soup that feels hearty and wholesome, yet is surprisingly light on the palate. I’ll be honest — I ate half the batch before anyone else got to try it because it was that good.
This isn’t just another recipe you’ll find on a blog; it’s a culmination of kitchen experiments, taste tests, and a few late‑night cravings. I’ve included a technique that you won’t expect—adding a splash of red wine at the beginning of the simmer to deepen the flavor without overpowering the dish. The result is a subtle complexity that makes every spoonful feel like a new discovery. Most recipes get this completely wrong by skipping the sear or using too much liquid, but here we get the perfect balance. The next sections will walk you through every single step, and by the end, you’ll wonder how you ever made it any other way.
Let me walk you through every single step — by the end, you’ll wonder how you ever made it any other way. I’ll keep the instructions clear, the humor light, and the tips practical. The goal is to make this soup so approachable that even novice cooks can replicate it with confidence. And if you’re a seasoned chef, you’ll still find new nuances to appreciate. Ready? Let’s dive in.
What Makes This Version Stand Out
- Flavor Depth: The short sear on the beef locks in juices and creates a caramelized crust that adds a complex, savory undertone. The simmering step extracts collagen, giving the broth a silky texture that feels indulgent without being heavy. The subtle addition of tomato paste brings a gentle acidity that balances the richness of the meat.
- Texture Balance: Every vegetable is sliced to the same thickness, ensuring they cook evenly and maintain a slight bite. The beef cubes are tender but still hold their shape, preventing a mushy consistency. The final broth has a slight body, thanks to the natural gelatin released from the meat.
- Ingredient Quality: Using a good cut of beef chuck with a reasonable fat content ensures the soup stays moist and flavorful. Fresh, seasonal vegetables add brightness and color, making the dish visually appealing. A high‑quality beef broth forms the foundation of the soup’s savory base.
- Time Efficiency: The prep takes only 15 minutes, while the cooking time is a quick 30 minutes. The searing step is fast, and the simmer is low‑heat, which means you can set it and forget it without constant attention. This makes the recipe ideal for busy weeknights.
- Make‑Ahead Friendly: The soup can be made in a large batch and stored in the fridge for up to 4 days, or frozen for up to 3 months. The flavors actually improve over time, as the vegetables and beef meld together. When reheating, a splash of water restores the broth’s original thickness.
- Versatility: The recipe can be adapted for different dietary needs by swapping the beef for turkey or tofu, or by using a low‑sodium broth. The seasoning can be tweaked to suit your taste—add a pinch of smoked paprika for a smoky twist. The soup is a canvas for your culinary creativity.
- Crowd Appeal: At family gatherings, this soup is a hit because it’s hearty enough to satisfy adults and mild enough for kids. The comforting aroma invites guests to gather around the table, and the portion sizes are generous. I’ve seen people ask for seconds, thirds, and sometimes even a potful of leftovers.
Inside the Ingredient List
The Flavor Base
The foundation of any soup is its flavor base, and this recipe uses a combination of beef broth and a splash of red wine to create a rich, savory profile. The broth, made from simmered beef bones, gives depth and a slightly gelatinous texture that makes the soup feel luxurious. Red wine, used in small amounts, adds a subtle fruitiness and acidity that cuts through the richness of the meat. If you’re avoiding alcohol, a tablespoon of balsamic vinegar can substitute, but the wine’s complexity is hard to replicate.
The beef itself is seasoned with salt, pepper, and dried thyme before searing. The salt helps to draw out moisture from the meat, creating a caramelized crust, while the thyme adds an herbal note that complements the vegetables. A pinch of bay leaf during the simmer adds a fragrant, slightly floral undertone that’s almost imperceptible but elevates the entire dish. Skipping the thyme would leave the soup feeling flat, so keep it in the mix.
The Texture Crew
Carrots, celery, potatoes, green beans, and peas form the textural backbone of this soup. Each vegetable is cut into uniform pieces to ensure even cooking. Carrots add sweetness and a slight crunch, while celery provides a subtle peppery bite. Potatoes bring heartiness and help thicken the broth as they break down slightly. Green beans maintain a crispness that contrasts with the softer vegetables, and peas add a pop of color and sweetness.
The key to a satisfying texture is to add the vegetables in stages. Start with the root vegetables that take longer to cook, then add the quicker‑cooking greens later in the simmer. This prevents over‑cooking the green beans and peas, preserving their bright color and bite. If you prefer a smoother soup, you can blend half of the pot with an immersion blender, but keep a few chunks for texture.
The Unexpected Star
A splash of tomato paste is the secret ingredient that brings a subtle acidity and depth of flavor to the broth. It caramelizes slightly when added after the sear, creating a rich, dark color that looks as good as it tastes. Tomato paste also thickens the soup slightly, giving it a velvety consistency. If you’re avoiding tomatoes, a teaspoon of tomato sauce can serve as a lighter alternative, though it won’t provide the same depth.
Another unexpected star is the optional use of fresh parsley at the end. A handful of chopped parsley adds a burst of freshness that cuts through the richness of the beef. It also provides a pop of green color, making the soup look vibrant and inviting. If parsley isn’t available, a squeeze of fresh lemon juice can offer a similar brightening effect.
The Final Flourish
The final flourish of the soup comes from the finishing touches: a pinch of black pepper, a drizzle of olive oil, and a sprinkle of fresh herbs. Black pepper adds a mild heat that balances the sweetness of the carrots and the richness of the beef. Olive oil adds a silky finish that coats the palate and enhances the overall mouthfeel. Fresh herbs like parsley or thyme add a burst of aroma and a visual pop of color.
Everything’s prepped? Good. Let’s get into the real action, where the magic happens and the flavors truly mingle. The next section will guide you through the step‑by‑step method that turns these ingredients into a comforting bowl of soup.
The Method — Step by Step
- Heat a large stockpot over medium‑high heat and drizzle the olive oil. Add the beef cubes in a single layer, letting them sear without stirring for 2–3 minutes on each side until a deep brown crust forms. The goal is to lock in juices, so don’t overcrowd the pan. This step creates the rich base that will carry the entire soup’s flavor.
- Remove the beef and set it aside. In the same pot, add the diced onion and minced garlic, sautéing until the onion becomes translucent and the garlic releases its aroma, about 2 minutes. The onion should look like a soft golden cloud, not burnt. This creates a sweet, savory foundation for the broth.
- Stir in the tomato paste and let it caramelize for a minute, stirring constantly. The paste will darken slightly, giving the soup a deeper color and a richer taste. Once the paste is fragrant, pour in the red wine and allow it to reduce by half, which concentrates the flavor. This is the moment where the soup starts to smell intoxicating.
- Return the beef cubes to the pot, then add the beef broth, water, bay leaves, thyme, salt, and pepper. Bring the mixture to a gentle boil, then reduce the heat to low and let it simmer uncovered for 20 minutes. The slow simmer allows the beef to become tender and the flavors to meld. You should hear a gentle hiss as the liquid reduces.
- Add the carrots, celery, and potatoes, stirring to combine. Continue simmering for another 10 minutes, or until the root vegetables are just tender. The broth should thicken slightly as the potatoes release starch. Keep the pot uncovered to let the flavors concentrate.
- Introduce the green beans and peas, stirring gently. Simmer for an additional 5 minutes, just until the beans are bright green and the peas are plump. If you prefer softer greens, add them a minute earlier. The final vegetables should retain a slight bite, adding texture to each spoonful.
- Taste the soup and adjust seasoning if needed. If the broth feels too thick, add a splash of water or more broth to reach your desired consistency. Remove the bay leaves before serving. The soup should feel comforting, not heavy.
- Finish the soup with a drizzle of olive oil, a pinch of black pepper, and a sprinkle of fresh parsley. This final flourish brightens the dish and adds a silky finish that coats the palate. Serve hot, and let the steam rise to fill the kitchen with a mouth‑watering aroma.
That’s it — you did it. But hold on, I've got a few more tricks that'll take this to another level. The next section will share insider secrets that will help you achieve a perfectly balanced soup every time.
Insider Tricks for Flawless Results
The Temperature Rule Nobody Follows
Many cooks believe that a high simmer is the key to a good soup, but I’ve found that a gentle, low boil actually produces a richer, clearer broth. Keep the heat just below a rolling boil, and the liquid will reduce slowly, allowing flavors to meld without breaking down the vegetables. If the pot starts to bubble too vigorously, reduce the heat slightly; you’ll avoid a watery soup.
Why Your Nose Knows Best
When you first add the tomato paste, the aroma should be sweet and slightly caramelized. If it smells bitter, you’ve over‑cooked it; if it’s flat, you need more time on the stove. Trust your nose as a guide to the soup’s progress, and adjust the heat accordingly. A well‑aromatic soup will taste more complex.
The 5‑Minute Rest That Changes Everything
After you finish simmering, let the soup rest for 5 minutes off the heat before serving. This resting period allows the flavors to settle and the broth to thicken slightly as the vegetables release more starch. It also lets the beef finish cooking in its own juices, making it even more tender. Skipping this step can leave the soup feeling rushed.
The Final Touch of Freshness
Right before serving, add a handful of chopped fresh parsley or a squeeze of lemon juice. The acidity brightens the dish and balances the richness of the beef. If you’re serving a large crowd, consider offering a small bowl of chopped cilantro for a different herbal note. Fresh herbs also add a pop of color that makes the soup visually appealing.
The Secret to a Thick Broth
If you prefer a thicker broth, reserve a tablespoon of the cooked vegetables, mash them, and stir the puree back into the soup. This natural thickening agent is healthier than flour or cornstarch, and it adds a subtle flavor that complements the beef. Adjust the amount to taste; a little goes a long way.
Creative Twists and Variations
This recipe is a playground. Here are some of my favorite ways to switch things up:
Spicy Southwestern Bowl
Add a diced jalapeño, a teaspoon of cumin, and a pinch of smoked paprika when you add the vegetables. Top with sliced avocado and a dollop of sour cream. The smoky, spicy notes give the soup a bold, Southwestern flavor that pairs beautifully with a crisp tortilla chip.
Herb‑Infused Italian Version
Swap the thyme for fresh rosemary and add a handful of chopped basil at the end. Replace the bay leaves with a bay leaf and a splash of white wine. Finish with grated Parmesan cheese for a creamy, Italian twist.
Miso‑Marinated Beef
Marinate the beef cubes in a mixture of miso paste, soy sauce, and a touch of honey for 30 minutes before searing. This adds an umami depth and a subtle sweetness. The soup will have an Asian flair that’s both comforting and sophisticated.
Vegetarian Swap
Replace the beef with diced tofu or a plant‑based protein. Use vegetable broth instead of beef broth, and add a splash of soy sauce for umami. The texture will be lighter, but the flavors remain hearty and satisfying.
Lemony Brightness
Add a splash of lemon juice right before serving and garnish with lemon zest. This brightens the soup and cuts through the richness. It’s a great option for a lighter lunch on a warm day.
Winter Comfort Bowl
Add a handful of chopped kale or spinach in the last minutes of simmering. Sprinkle with grated nutmeg or a pinch of cayenne for warmth. This variation adds extra greens and a comforting spice note.
Storing and Bringing It Back to Life
Fridge Storage
Cool the soup to room temperature, then transfer it to airtight containers. Store in the refrigerator for up to 4 days. The flavors will deepen over time, making leftovers just as delicious. Keep the containers in the back of the fridge to maintain a consistent temperature.
Freezer Friendly
Divide the soup into freezer‑safe portions, leaving about an inch of headspace for expansion. Freeze for up to 3 months. When ready to eat, thaw overnight in the refrigerator or use the defrost setting on your microwave. The soup will retain its texture and flavor.
Best Reheating Method
Reheat the soup on the stovetop over medium heat, stirring occasionally. Add a splash of water or broth if the soup has thickened too much. Bring to a gentle simmer, then serve hot. The soup will feel fresh and vibrant, just as when it was first made.