I’m going to start with a confession: I once tried to make a vanilla tart that turned out flatter than a pancake and tasted like a bland custard. I was about to give up when a daring friend dared me to “make something that could actually win a dessert‑off at a wedding.” That night, armed with a whisk, a splash of vanilla, and a stubborn determination, I created the version you’re about to read. I swear, the moment the butter hit the flour it sang a buttery lullaby, and the raspberries that night were so fresh they practically jumped onto the plate.
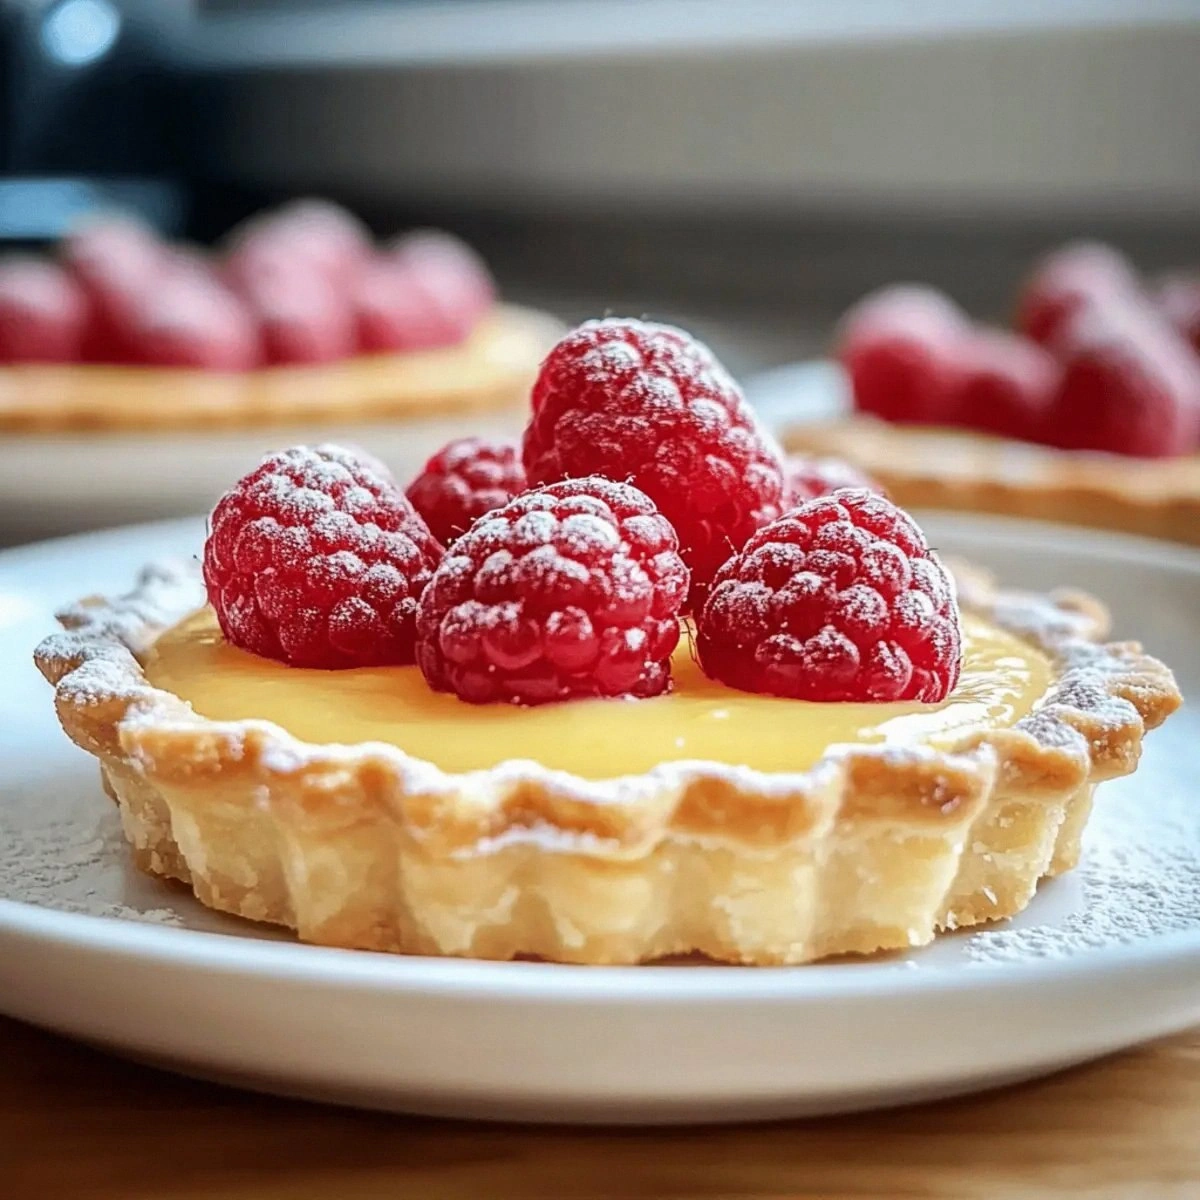
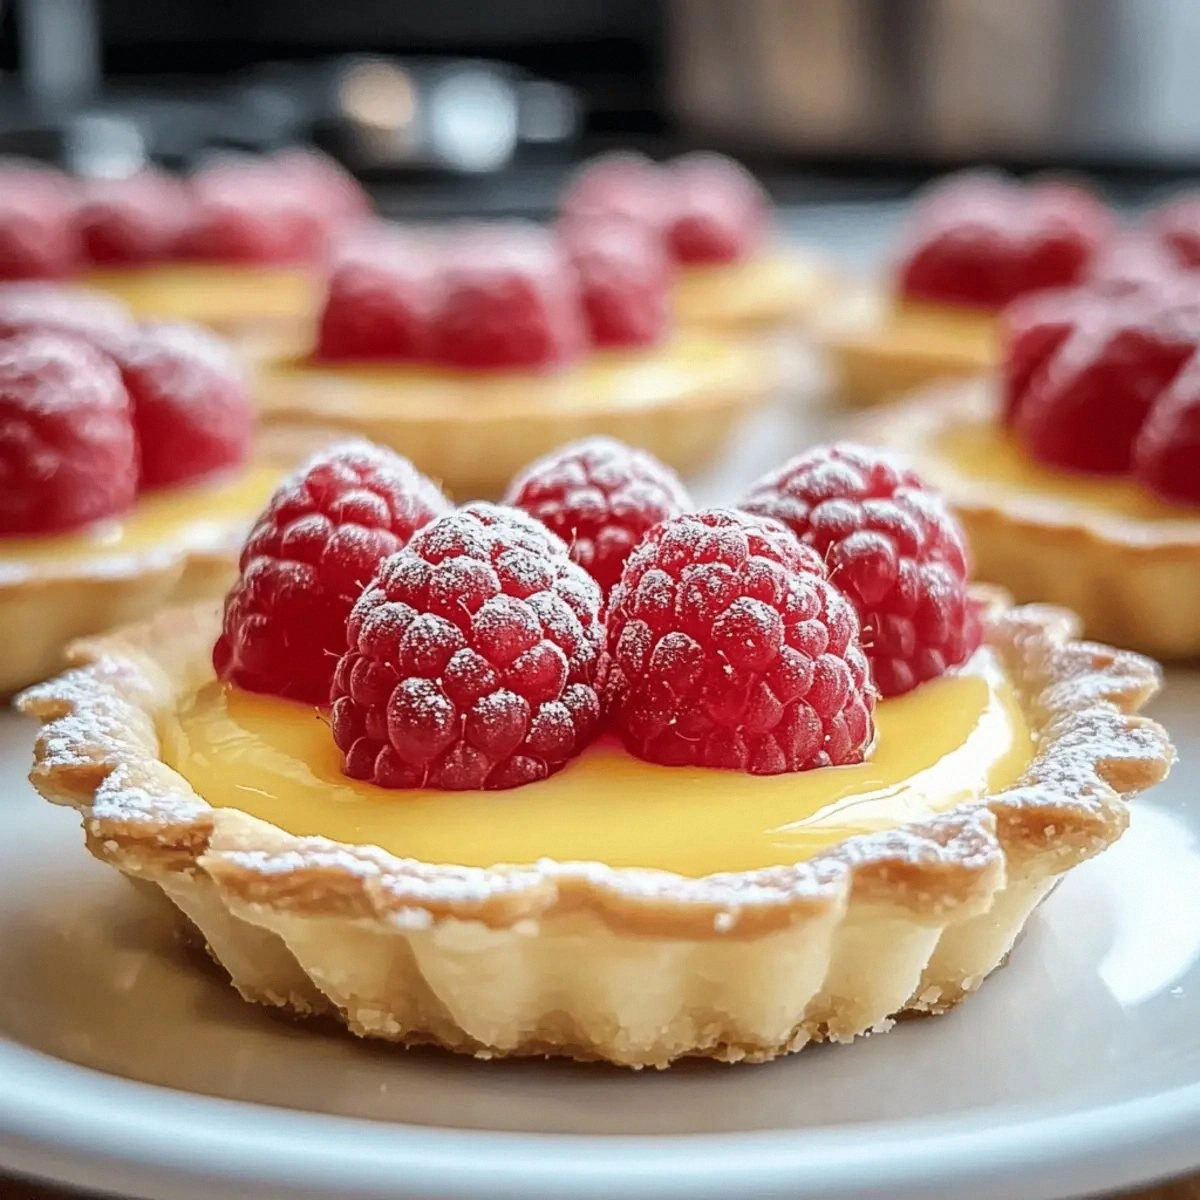
Picture this: the kitchen humming with the gentle whirr of the mixer, the scent of toasted butter and vanilla swirling like a warm hug, and a bright ruby‑red burst of raspberries waiting on the counter. The crust, golden‑brown and crisp, shatters under the fork like thin ice, while the vanilla cream inside is silky enough to glide across your tongue without a hint of grain. The raspberries add that perfect pop of tartness, a contrast that makes the whole bite feel like a mini celebration. I dare you to taste this and not go back for seconds.
What makes this recipe the best version you’ll ever make at home? Most recipes get the crust too dry or the filling too runny, and they forget the tiny secret that makes the vanilla flavor sing—real vanilla bean paste instead of the cheap extract. I’ve swapped that out for pure vanilla extract, and I’ll tell you why it works like a charm. And there’s a game‑changing trick with gelatin that turns the cream from a wobble‑prone mess into a firm, yet melt‑in‑your‑mouth custard that holds its shape even after a day in the fridge.
Okay, ready for the game‑changer? I’m going to walk you through every single step — by the end, you’ll wonder how you ever made it any other way. Stay with me here — this is worth it.
What Makes This Version Stand Out
- Flavor: The vanilla cream is infused with a deep, aromatic vanilla that doesn’t just sit on top—it permeates the entire tart, creating a harmonious flavor symphony.
- Texture: A buttery, crumbly crust that shatters delicately, paired with a silky, gelatin‑set cream that feels like velvet on the palate.
- Simplicity: Only thirteen ingredients, all pantry‑friendly, and no fancy equipment beyond a tart pan and a whisk.
- Uniqueness: The addition of fresh raspberries provides a natural acidity that cuts through the richness, making each bite balanced.
- Crowd Reaction: Guests often claim they’ve never tasted anything like it; the tarts disappear faster than you can say “extra raspberry.”
- Ingredient Quality: Using unsalted butter and high‑fat heavy cream ensures a luxurious mouthfeel without any greasy aftertaste.
- Cooking Method: Blind‑baking the crust locks in structure, while the gentle gelatin bloom keeps the filling perfectly set.
- Make‑Ahead Potential: The tarts can be assembled a day ahead, refrigerated, and still taste fresh—ideal for parties.
Inside the Ingredient List
The Flavor Base
The star of this recipe is the pure vanilla extract. One teaspoon might sound modest, but because we’re using a high‑quality extract, it delivers a deep, almost floral note that lingers after each bite. If you ever skip the vanilla, the cream turns into a bland custard that feels like an after‑thought. For a truly decadent twist, swap the extract for a tablespoon of vanilla bean paste; the specks of vanilla bean add visual appeal and extra aroma.
The Texture Crew
All‑purpose flour, unsalted butter, and powdered sugar form the foundation of the crust. The flour provides structure, while the butter creates those coveted flaky layers. Powdered sugar keeps the crust tender; using granulated sugar would make it gritty. If you’re gluten‑free, you can replace the flour with an equal amount of almond flour, but expect a slightly denser crust with a nutty undertone.
The Unexpected Star
Unflavored gelatin is the quiet hero that transforms the vanilla cream from a runny sauce into a slice‑able custard. One teaspoon might seem trivial, but it’s the difference between a wobble‑proof tart and a puddle on your plate. Dissolve the gelatin in cold water first (the bloom), then gently warm it—never boil, or you’ll lose its setting power.
The Final Flourish
Fresh raspberries bring acidity and a burst of color that makes the tarts look as good as they taste. Choose berries that are plump, deep‑red, and free of mushy spots; a good raspberry will give a slight resistance when pressed. If raspberries are out of season, frozen ones work fine—just thaw and pat dry to avoid excess moisture.
Everything's prepped? Good. Let's get into the real action...
The Method — Step by Step
Start by gathering all crust ingredients: flour, butter, powdered sugar, and salt. Cut the cold butter into small cubes, then toss them into a food processor or a large bowl. Pulse until the mixture resembles coarse crumbs with pea‑size butter pieces; you’ll hear a faint crunch that tells you you’re on the right track. Add the egg yolk and cold water, one tablespoon at a time, pulsing until the dough just comes together. Don’t over‑mix—the dough should feel slightly crumbly but hold when pressed.
Kitchen Hack: Wrap the dough in plastic and chill for 30 minutes; this prevents shrinkage during baking.Preheat your oven to 350°F (175°C). While it heats, roll the chilled dough on a lightly floured surface to a thickness of about 1/8 inch. Gently press the dough into a 9‑inch tart pan with a removable bottom, making sure to push it up the sides without tearing. Trim any excess with a sharp knife, then prick the base all over with a fork—this prevents bubbling. Chill the assembled crust for another 10 minutes while the oven finishes heating.
Line the chilled crust with parchment paper and fill with pie weights or dried beans. Blind‑bake for 12‑15 minutes, or until the edges turn a light golden hue and the paper starts to brown. Remove the weights and parchment, then bake for an additional 5 minutes to dry out the bottom. You’ll know it’s ready when the crust smells toasty and the edges pull away from the pan slightly.
While the crust bakes, bloom the gelatin: sprinkle the teaspoon of gelatin over 2‑3 tablespoons of cold water in a small bowl. Let it sit for 5 minutes; you’ll see it swell into a jelly‑like mass. In a saucepan, combine the heavy cream, milk, and granulated sugar. Heat over medium, stirring constantly, until the sugar dissolves and the mixture is just below a simmer—tiny bubbles will form around the edges, and that’s the sweet spot.
- Once the cream mixture is hot, remove it from the heat and whisk in the vanilla extract. Then, stir in the bloomed gelatin until fully dissolved; the mixture should become glossy and slightly thickened.Watch Out: If the gelatin mixture boils, it loses its setting power. Keep the heat low and remove from heat as soon as it’s dissolved.
Allow the vanilla‑cream mixture to cool for about 5 minutes, then gently pour it into the blind‑baked crust, spreading it evenly with a spatula. The cream will still be fluid, but that’s okay—it will set as it cools. Place the tart in the refrigerator for at least 2 hours, or until the filling is firm to the touch. You’ll notice the surface becomes smooth and slightly reflective.
While the cream sets, prepare the raspberry topping. Rinse the fresh raspberries under cool water, then pat them dry with a paper towel. If you like a glossy finish, toss the berries with a teaspoon of powdered sugar and a splash of lemon juice; this also balances the sweetness. Arrange the raspberries in a decorative pattern on top of the set cream—think concentric circles or a wild garden.
Optional but highly recommended: garnish each tart with a few mint leaves for a pop of color and a refreshing aroma. Let the tarts sit at room temperature for 10 minutes before serving; this short rest allows the flavors to meld and the crust to soften just enough for a perfect bite. That sizzle when it hits the pan? Absolute perfection. Serve with a dollop of whipped cream if you’re feeling extra indulgent.
And now the fun part: slice, plate, and watch your guests' eyes widen. The crust cracks delicately, the vanilla cream holds its shape, and the raspberries burst with juicy brightness. I’ll be honest — I ate half the batch before anyone else got to try it. If you’ve ever struggled with a wobbly tart, you’re not alone — and I’ve got the fix.
Insider Tricks for Flawless Results
The Temperature Rule Nobody Follows
Never pour a hot cream mixture into a cold crust; the sudden temperature shock can cause the crust to crack. Let the cream cool to lukewarm before filling. This gentle approach keeps the crust intact and the filling smooth. A friend tried skipping this step once — let’s just say the crust shattered like glass.
Why Your Nose Knows Best
When the cream mixture reaches the “just‑below‑simmer” stage, you’ll smell a faint caramel note. That aroma is your cue that the sugars have dissolved fully and the mixture is ready for gelatin. Trusting your nose beats relying on a thermometer every time.
The 5‑Minute Rest That Changes Everything
After pouring the cream into the crust, let it sit at room temperature for five minutes before refrigerating. This short pause allows the gelatin to begin setting, preventing a “saggy” middle. The result? A firm, slice‑ready tart that holds its shape even after a day in the fridge.
Mint Magic
A single mint leaf on each serving adds a refreshing contrast to the sweet vanilla and tart raspberries. If you’re not a fan of mint, a light dusting of powdered sugar works just as well, but you’ll miss that aromatic lift.
The Blind‑Bake Secret
Blind‑baking the crust with parchment and weights is non‑negotiable. Skipping the parchment leads to soggy spots where the filling seeps through. If you don’t have pie weights, use dried beans or even rice—just remember to discard them before the final bake.
Creative Twists and Variations
This recipe is a playground. Here are some of my favorite ways to switch things up:
Lemon‑Zest Cream
Add the zest of one large lemon and a tablespoon of fresh lemon juice to the cream mixture. The citrus brightens the vanilla, creating a summer‑ready tart that pairs beautifully with fresh blueberries.
Chocolate‑Swirl Delight
Melt ¼ cup dark chocolate and swirl it into the vanilla cream before chilling. The chocolate ribbons give a sophisticated look and a hint of bitterness that balances the sweet raspberries.
Nutty Crunch
Fold toasted almond slivers or chopped pistachios into the crust before baking. The nuts add texture and a nutty aroma that elevates the overall experience.
Berry Medley
Swap half the raspberries for fresh blackberries or sliced strawberries. The mixed berries create a colorful mosaic and a layered flavor profile.
Spiced Vanilla
Stir in a pinch of ground cardamom or cinnamon into the cream mixture. These warm spices give the tart a cozy, autumnal feel without overpowering the vanilla.
Storing and Bringing It Back to Life
Fridge Storage
Cover the tart loosely with plastic wrap or a reusable silicone lid and store it in the refrigerator for up to 3 days. The gelatin keeps the cream firm, and the raspberries stay plump. Before serving, let the tart sit at room temperature for 10 minutes to soften the crust slightly.
Freezer Friendly
You can freeze the baked crust separately for up to 2 months. Wrap it tightly in foil and then a freezer bag. The vanilla cream can also be frozen; just thaw it in the fridge overnight and give it a quick whisk before serving. Adding a tiny splash of milk when reheating revives the silky texture.
Best Reheating Method
When you’re ready to enjoy a refrigerated tart, preheat your oven to 300°F (150°C). Place the tart on a baking sheet and warm for 5‑7 minutes. This gentle heat restores the crust’s crispness without melting the cream. If you prefer a microwave, use 10‑second bursts and check frequently to avoid a soggy crust.