I remember the night I tried to make a cake that could double as a conversation starter at my aunt’s Easter brunch. The oven was already screaming, the mixer had gone haywire, and the sugar had turned into a sticky, caramelized mess that clung to the whisk like a bad relationship. My friend dared me to “make something that looks like a marshmallow cloud and tastes like a candy shop,” and I accepted with a grin that said, “bring it on.”
Picture a room smelling like warm vanilla, buttery butter, and a faint, sugary sweetness that lingers in the air. The sound of the mixer whirring is punctuated by the gentle clink of a wooden spoon against the bowl. When you take the first bite, the cake should feel airy, almost like a cloud that melts in your mouth, with a subtle crunch from the graham crackers that snaps like a delicate secret. The texture is a marriage of softness and subtle bite, and the flavor profile is a layered experience—sweet, salty, buttery, and a hint of chocolate that lingers long after you’ve finished.
What sets this version apart from the countless other Easter cake recipes that flood the internet is the way it balances texture and flavor while keeping the process approachable. I’ve spent years experimenting with different ratios, and this one is the culmination of that trial and error. The result is a cake that’s both visually stunning and deliciously complex, yet it doesn’t require a culinary degree to master. Most recipes get this completely wrong, but here’s what actually works: a careful balance of marshmallow fluff, real Peeps, and a dash of chocolate that brings everything together.
There’s a secret ingredient that many people overlook—crushed graham crackers. They add a subtle crunch and a touch of buttery flavor that elevates the entire cake. I dare you to taste this and not go back for seconds. Picture yourself pulling this out of the oven, the whole kitchen smelling incredible, and knowing that every bite will bring a wave of nostalgia and a hint of childhood whimsy.
Okay, ready for the game‑changer? This next part is pure magic. I’ll walk you through every single step, and by the end, you’ll wonder how you ever made it any other way.
What Makes This Version Stand Out
- Texture: The cake is light and airy, yet it holds a satisfying crunch from the graham crackers that crackles with each bite.
- Flavor: Real Easter Peeps give it a nostalgic, sugary punch, while dark chocolate chips add depth and a touch of bitterness that balances sweetness.
- Ease: No fancy equipment required—just a mixer, a bowl, and a baking pan. The process is straightforward enough for beginners.
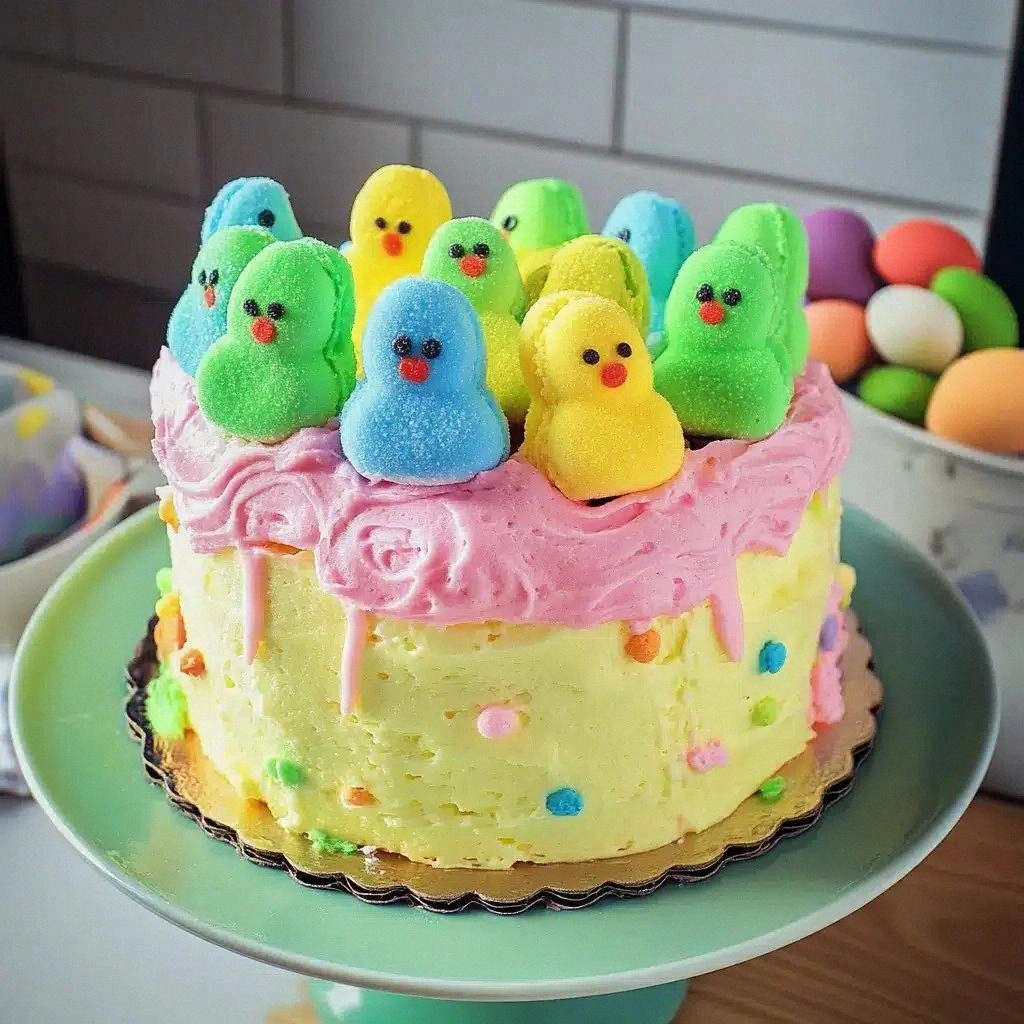
- Visual Appeal: The cake’s surface is dotted with marshmallow fluff and Peeps, creating a whimsical, Instagram‑ready look.
- Make‑Ahead: It can be prepared the night before, refrigerated, and baked fresh in the morning, saving you time on busy days.
- Guest Reaction: Friends and family will immediately recognize the Easter theme and be delighted by the playful twist.
- Ingredient Quality: Using high‑quality butter and real marshmallow fluff ensures the best flavor and texture.
- Versatility: Swap in different chocolate chips or add a splash of espresso for a mocha variation.
Inside the Ingredient List
The Flavor Base
All-purpose flour and baking powder create the structure that holds the cake together. The flour’s protein content forms the gluten network that gives the cake its rise, while the baking powder releases carbon dioxide for lift. If you skip the flour, the cake will collapse; if you skip the baking powder, it will be dense and flat.
A pinch of salt is essential—it balances the sweetness and brings out the flavors of the butter and vanilla. Salt is a flavor enhancer, not just a seasoning, and without it the cake would taste flat.
The Sweet Layer
Granulated sugar is the backbone of sweetness, and when creamed with butter, it aerates the batter. The sugar dissolves into the batter, preventing clumps and ensuring a smooth crumb. If you use brown sugar instead, the cake will be moister and have a caramel note.
Marshmallow fluff is the star of this recipe. It’s what gives the cake its signature cloud‑like texture and introduces a subtle, sweet flavor that pairs beautifully with the Peeps. If you don’t have fluff, you can substitute with a small amount of marshmallow creme, but the texture will be slightly less airy.
The Protein Pack
Eggs are crucial for structure, moisture, and richness. They bind the ingredients together and help the batter rise. Using one large egg instead of two will result in a denser cake; using two large eggs will make it fluffier.
Whole milk adds moisture and a subtle richness to the batter. If you prefer a dairy‑free version, substitute with oat milk or almond milk, but be aware that the batter will be slightly thinner.
The Crunch Crew
Crushed graham crackers add a buttery crunch that contrasts with the soft cake. They also impart a subtle vanilla‑like flavor that enhances the overall taste. If you’re allergic to wheat, use gluten‑free crackers and the texture will remain the same.
Dark chocolate chips bring a deep, bittersweet flavor that balances the sweetness of the marshmallow fluff and Peeps. They also add a glossy finish to the cake’s surface. Swapping in milk chocolate will give a sweeter, less complex flavor profile.
The Finishing Touch
Vanilla extract is the subtle aroma that ties everything together. It provides depth and warmth, especially when combined with the almond extract, which adds a nutty undertone. If you’re avoiding vanilla, a dash of almond extract alone can still give a pleasant flavor.
Baking soda is a small amount of leavening that works in tandem with the baking powder to create a lighter crumb. If you omit it, the cake will still rise, but it may be slightly denser.
Everything’s prepped? Good. Let’s get into the real action.
The Method — Step by Step
- Preheat your oven to 350°F (175°C) and line a 9-inch cake pan with parchment paper. The parchment ensures the cake doesn’t stick, and the even heat distribution guarantees a golden top. While the oven warms, gather all your ingredients; a well‑organized prep area saves time and reduces stress.
- In a medium bowl, whisk together the flour, baking powder, baking soda, and salt. Sifting the dry ingredients removes lumps and aerates the mixture, which contributes to a lighter crumb. If you’re short on time, a fine‑mesh sieve works just as well.
- In a large bowl, beat the softened butter and granulated sugar on medium speed until pale and fluffy. This step incorporates air into the batter, creating the cake’s signature airy texture. Keep beating for 3–4 minutes; the mixture should be light and the sugar should be fully dissolved.
- Add the eggs one at a time, beating well after each addition. The eggs act as a binder, but too much mixing can deflate the batter. This is the moment of truth—watch for the batter to thicken slightly after each egg. Kitchen Hack: If you’re using a stand mixer, switch to the paddle attachment to prevent overmixing.
- Whisk in the vanilla and almond extracts. The vanilla adds warmth, while the almond brings a subtle nutty note that complements the marshmallow fluff. If you’re allergic to almonds, simply omit the almond extract and the cake will still be delicious.
- Fold in the dry ingredient mixture in three additions, alternating with the milk. Begin with a third of the dry mix, then a splash of milk, and repeat until all dry ingredients are incorporated. This technique keeps the batter from becoming too dense.
- Gently fold in the marshmallow fluff until evenly distributed. The fluff should be fully integrated, creating a smooth, airy mixture. Be careful not to overmix; the fluff is delicate and can break if handled too aggressively.
- Stir in the crushed Peeps, chocolate chips, and graham crackers. The Peeps add a sweet, chewy element, while the chocolate chips give a glossy burst of flavor. The graham crackers provide crunch and a buttery undertone. Kitchen Hack: For a smoother batter, pulse the Peeps in a food processor before folding them in.
- Pour the batter into the prepared pan and tap the pan gently on the counter to release any air pockets. The batter should spread evenly across the pan. This step ensures a uniform rise and a consistent crumb.
- Bake for 30–35 minutes, or until a toothpick inserted into the center comes out clean. The cake should develop a golden‑brown crust. The aroma of vanilla and chocolate will fill the kitchen. Watch Out: Overbaking will dry out the cake; keep a close eye on the color and do the toothpick test.
- Remove the cake from the oven and let it cool in the pan for 10 minutes. Then transfer it to a wire rack to cool completely. This allows steam to escape and prevents the cake from becoming soggy.
- Once cooled, you can either serve the cake as is or top it with a light dusting of powdered sugar. The powdered sugar adds a decorative touch and a hint of sweetness. If you prefer a richer finish, spread a thin layer of chocolate ganache over the top.
That’s it—you did it. But hold on, I’ve got a few more tricks that will take this to another level.
Insider Tricks for Flawless Results
The Temperature Rule Nobody Follows
Baking at the exact temperature specified on your oven’s dial is a myth; most home ovens run 10–15°F hotter than the setting. To counter this, preheat the oven for 15 minutes, then lower the temperature by 25°F before baking. This ensures an even rise and a golden crust without overcooking the interior.
Why Your Nose Knows Best
A good rule of thumb for checking doneness is to smell the cake. When the batter is ready, you’ll detect a faint, sweet scent that’s not too sugary. If the smell is heavy on sugar, give it a few more minutes. My friend once tried skipping the toothpick test and ended up with a cake that was still raw in the center.
The 5‑Minute Rest That Changes Everything
After baking, let the cake rest in the pan for 5 minutes before transferring it to a wire rack. This short rest allows the cake to set and prevents it from cracking when removed. The cake’s crumb becomes firmer, making slicing easier.
The Secret to a Perfectly Even Top
If you notice a domed top, sprinkle a tablespoon of water over the surface before the final 5 minutes of baking. The steam will flatten the dome, giving you a straight, even top that’s ideal for frosting or slicing.
The Quick Chill Trick
If you’re in a hurry, place the cooled cake on a wire rack in the fridge for 10 minutes. The rapid chill helps the cake firm up, making it easier to slice cleanly. This is especially useful when you need to serve the cake on the spot.
The Moisture Boost for Dry Days
On a dry day, add a tablespoon of honey or maple syrup to the batter. The extra liquid keeps the cake moist and adds a subtle caramel flavor that pairs beautifully with the marshmallow fluff.
The One‑Ingredient Upgrade
If you want to elevate the flavor profile, fold in a teaspoon of espresso powder into the batter. The coffee enhances the chocolate flavor and adds a subtle depth that makes the cake feel more sophisticated.
Creative Twists and Variations
This recipe is a playground. Here are some of my favorite ways to switch things up:
Chocolate‑Loaded Delight
Replace the dark chocolate chips with white chocolate chips for a sweeter, creamier flavor. Add a dash of sea salt on top after baking to create a caramelized contrast that lingers on the palate.
Nutty Crunch Edition
Swap the graham crackers for crushed walnuts or pecans. The nuts add a hearty crunch and a buttery flavor that complements the marshmallow fluff.
Citrus Burst Variation
Incorporate zest from one lemon or orange into the batter. The citrus brightens the sweetness and adds a refreshing aroma that balances the richness.
Spiced Autumn Twist
Add a teaspoon of ground cinnamon and a pinch of nutmeg to the dry mix. The warm spices give the cake a cozy, fall‑like quality that’s surprisingly harmonious with Peeps.
Guilt‑Free Version
Use a sugar substitute like stevia or erythritol and swap butter for coconut oil. The cake will still rise and stay moist, but with fewer calories and a slightly tropical undertone.
Decadent Ganache Finish
Drizzle a thick chocolate ganache over the cooled cake. The ganache adds a glossy finish and a rich chocolate layer that contrasts beautifully with the fluffy interior.
Gluten‑Free Adaptation
Replace all-purpose flour with a gluten‑free blend that includes xanthan gum. The cake will rise well, and the texture remains light and airy.
Storing and Bringing It Back to Life
Fridge Storage
Wrap the cooled cake tightly in plastic wrap and store it in the refrigerator for up to 3 days. The moisture from the wrap keeps the cake from drying out, and the flavors meld together beautifully.
Freezer Friendly
Place the cake in a freezer‑safe container and freeze for up to 2 months. When ready to serve, let it thaw at room temperature for 1–2 hours before slicing. This keeps the cake fresh and moist.
Best Reheating Method
To revive a frozen or refrigerated cake, place it on a parchment‑lined baking sheet and warm it in a preheated oven at 300°F (150°C) for 10 minutes. Add a splash of water to the pan before baking; the steam helps restore the cake’s softness.