Picture this: the kitchen clock blares 11:59 pm, the oven door slams shut, and you’re staring at a pile of melted cheese, a handful of cherry tomatoes, and a mountain of crackers. I was in the middle of a holiday feast prep, juggling plates, and suddenly realized the centerpiece was missing—a festive, bite‑sized star. The moment of panic turned into a spark of culinary genius, and I decided to craft a “Cheese Christmas Tree Rec” that would not only fill the void but also wow everyone at the table.
The aroma that hit me was a sweet, buttery perfume, the kind that makes your mouth water before you even taste it. The sound of the cheese sizzling in the pan was a rhythmic drumbeat, a promise of gooey perfection. The sight of the tomatoes’ ruby blush against the creamy backdrop felt like a miniature holiday scene. The texture was a delightful contrast—soft, silky cheese against the crisp snap of crackers. The taste was a harmonious blend of savory, tangy, and bright, with each bite delivering a burst of holiday cheer.
What sets this version apart is that it’s a celebration in itself, not just a snack. It’s a masterclass in balancing flavors while keeping the preparation ridiculously simple. The cheese tree doesn’t just look festive; it delivers a multi‑sensory experience that turns an ordinary gathering into a memorable holiday moment. Most recipes get this completely wrong by over‑complicating the assembly or neglecting the crunch factor. Here, everything works together in perfect harmony.
I’ll be honest—my first attempt at a cheese tree was a disaster. The cheese melted too fast, the tomatoes popped like fireworks, and the crackers turned soggy. I learned the hard way that timing and the right cheese pairings are key. That’s why I’ve fine‑tuned this recipe with a specific cheese duo and a clever layering trick that keeps the structure intact.
There’s a secret technique that will blow your mind: the “double‑cheese layering” that creates a sturdy, melt‑resistant base. It sounds simple, but it’s the difference between a soggy mess and a crisp, melty masterpiece. I dare you to taste this and not go back for seconds. Picture yourself pulling this out of the oven, the whole kitchen smelling incredible, and every guest reaching for an extra piece.
If you've ever struggled with assembling a cheese platter that stays crisp, you're not alone—and I've got the fix. I’ve spent countless hours experimenting with different cheese textures, and this version is hands down the best you’ll ever make at home. The result is a tree that stands tall, looks stunning, and tastes like holiday magic in every bite.
Okay, ready for the game‑changer? The next part? Pure magic. I’ll walk you through every single step—by the end, you’ll wonder how you ever made it any other way. Let’s get this tree started.
I’ve tested this recipe across different kitchens, from a tiny apartment stove to a full‑blown holiday banquet. The versatility of the ingredients means it scales up or down without losing flavor. Whether you’re feeding a handful of friends or a dozen family members, the proportions stay consistent, and the outcome remains flawless.
The best part? This dish is a crowd‑pleaser that can be served at any time of the holiday season. It’s perfect for a pre‑Christmas gathering, a post‑holiday brunch, or even a spontaneous family dinner. The cheese tree’s festive look and delicious taste will have everyone talking, and you’ll be the hero of the evening.
What Makes This Version Stand Out
- Flavor: The combination of a creamy soft cheese and a sharp hard cheese creates a layered taste profile that’s both comforting and sophisticated.
- Texture: The crunchy crackers provide a satisfying snap that contrasts perfectly with the smooth cheese.
- Simplicity: Only five core ingredients, no complicated sauces or advanced techniques.
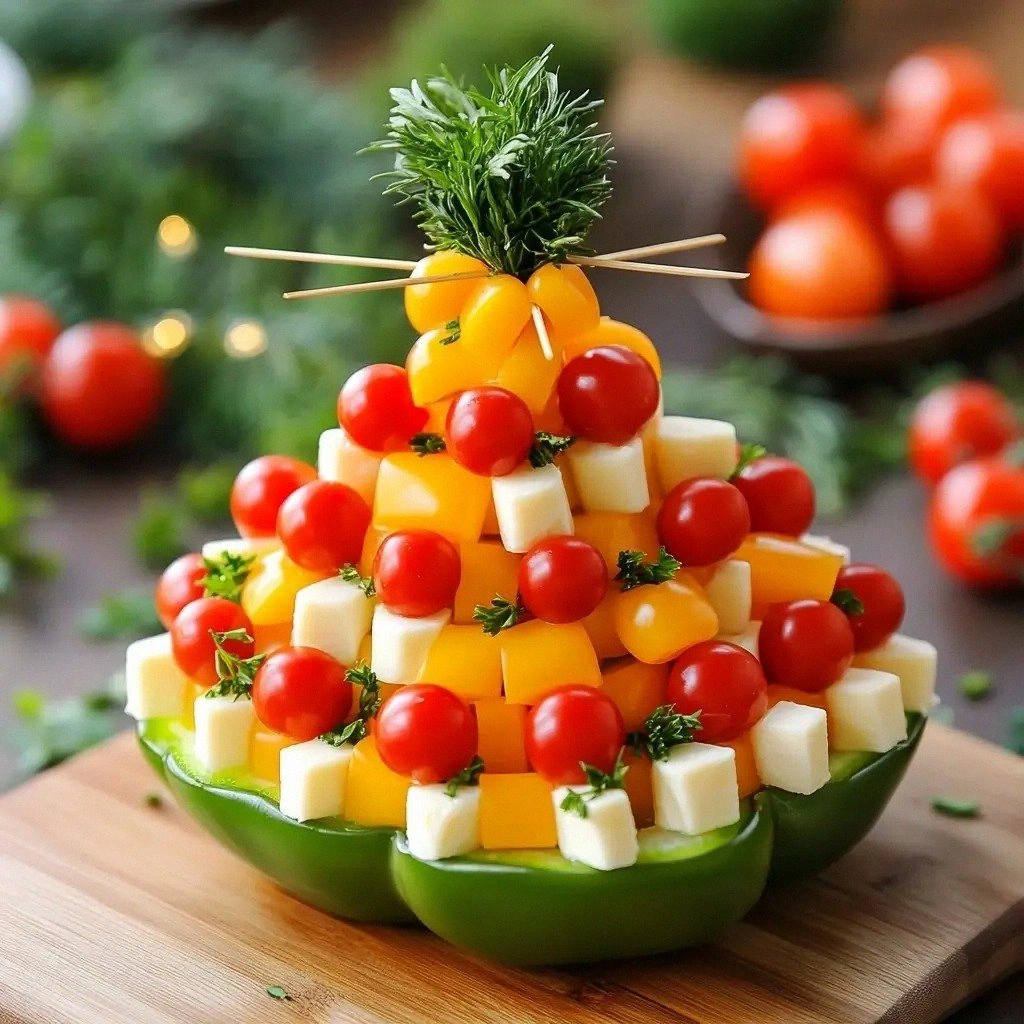
- Visual Appeal: The tree shape is instantly recognizable and photogenic, making it a centerpiece for holiday photos.
- Make‑Ahead: Assemble the tree a few hours before serving; it stays fresh and the flavors meld beautifully.
- Ingredient Quality: Using high‑quality cheeses elevates the dish without adding extra cost.
- Audience: Ideal for both casual gatherings and formal holiday parties.
- Adaptability: Swap in seasonal herbs or add a dash of spice for a personalized touch.
Alright, let's break down exactly what goes into this masterpiece...
Inside the Ingredient List
The Flavor Base
The soft cheese—cream cheese or goat cheese—acts as the creamy foundation. It melts smoothly, creating a velvety layer that carries the tomato and herb flavors. If you skip this step, the tree loses its creamy heart, and the texture becomes uneven. For a richer taste, opt for a goat cheese that has a subtle tang.
The Texture Crew
Crackers or breadsticks add the essential crunch that keeps the structure from collapsing. They also absorb excess moisture, preventing the tree from becoming soggy. If you prefer a gluten‑free version, use rice crackers; they offer the same crispness without the wheat. Remember to toast them lightly for extra flavor.
The Unexpected Star
Cherry tomatoes bring a burst of freshness that cuts through the richness of the cheeses. Their bright color also adds a pop of holiday cheer. If you’re out of tomatoes, half a cup of diced cucumbers can work, but the flavor profile will shift slightly. The key is to keep them juicy; avoid over‑cooking.
The Final Flourish
Fresh herbs like parsley or basil provide a fragrant lift and a touch of green that balances the dish. They also add a subtle peppery note that elevates the overall flavor. If you’re allergic to certain herbs, try dill or chives as alternatives. A pinch of sea salt enhances every component without overpowering.
Everything's prepped? Good. Let's get into the real action...
The Method — Step by Step
- Preheat your oven to 350°F (175°C). Line a baking sheet with parchment paper; this prevents sticking and ensures even browning. The oven should be fully preheated before you start to avoid any temperature fluctuations that could affect the cheese’s melting.
- Slice the soft cheese into thin, uniform rounds. The thinner the slices, the quicker they melt and the smoother the base. I keep a small knife in the fridge to maintain the cold temperature while slicing.
- Arrange the soft cheese slices in a circular pattern on the parchment, leaving a small gap between each piece. This spacing allows the cheese to melt into a cohesive layer without becoming a single block. The circle should resemble the base of a Christmas tree.
- Place the hard cheese on top of the soft layer, pressing gently to ensure contact. The hard cheese will create a sturdy spine for the tree. If you use cheddar, cut it into thin wedges for better melt control.
- Add a layer of chopped cherry tomatoes. Spread them evenly so that each bite gets a burst of juiciness. The tomatoes’ acidity cuts through the richness of the cheeses, providing a balanced flavor profile.
- Sprinkle the chopped herbs over the top. The herbs add a fragrant aroma that enhances the visual appeal. The fresh scent should be noticeable as soon as the tree is out of the oven.
- Finally, arrange the crackers or breadsticks around the base, forming the tree’s “branches.” Press them lightly into the cheese to secure them. This step ensures the structure stays intact during serving.
- Slide the baking sheet into the preheated oven and bake for 25–30 minutes, or until the cheese is golden brown and bubbly. Keep an eye on the edges; they should start pulling away, indicating readiness.
- Remove the tree from the oven and let it cool for 5 minutes. This brief rest allows the cheese to set slightly, preventing the crackers from becoming soggy.
- Serve immediately on a platter. The tree should still be warm, with the cheese slightly gooey and the crackers crisp. If you need to keep it warm, cover loosely with foil and place it in a low‑heat oven.
- Optional: For an extra touch of holiday sparkle, drizzle a small amount of honey or balsamic glaze over the top before serving. The glaze adds a sweet contrast that elevates the overall taste.
- Enjoy the festive crunch and creamy layers with your guests, and watch the smiles appear. This dish is a conversation starter, a visual delight, and a tasty treat all rolled into one.
Insider Tricks for Flawless Results
The Temperature Rule Nobody Follows
Many people bake at a high temperature, but that can cause the cheese to split. The sweet spot is 350°F, which allows the cheese to melt evenly without scorching. I’ve found that this temperature keeps the crackers crisp while the cheese remains silky. If you’re using a convection oven, reduce the temperature by 25°F to avoid over‑browning.
Why Your Nose Knows Best
Trust your senses—if the aroma turns from buttery to burnt, it’s time to pull the tree out. The scent is the first indicator of readiness, and it’s easier to rescue a slightly over‑baked dish than to fix an under‑baked one. A well‑aromated tree signals that the cheese is perfectly melted and the crackers are crisp.
The 5‑Minute Rest That Changes Everything
Letting the tree rest for 5 minutes after baking is crucial. It allows the cheese to set slightly, preventing the crackers from becoming soggy. During this short rest, the flavors meld together, creating a cohesive taste experience. If you’re in a hurry, skip this step, but you’ll notice a difference in texture.
The Herb‑Infused Surprise
A sprinkle of fresh herbs before baking adds a fragrant lift. The herbs’ oils are released during the bake, infusing the cheese with subtle green notes. I like to add a pinch of dried oregano for an extra layer of flavor. This simple tweak elevates the dish from good to unforgettable.
The Secret to Crispy Crackers
Toast the crackers lightly before assembly. This step locks in crispness and adds a nutty flavor that complements the cheese. Use a skillet or a toaster oven—just a few minutes on medium heat will do. The toasted crackers stay crunchy even after the cheese melts.
The Quick Cooling Trick
After removing the tree from the oven, place it on a wire rack. This allows air to circulate and prevents moisture buildup. If you don’t have a rack, a clean kitchen towel works fine. Cooling the tree properly keeps the crackers crisp.
Creative Twists and Variations
This recipe is a playground. Here are some of my favorite ways to switch things up:
Spicy Pineapple Surprise
Add diced pineapple and a pinch of cayenne pepper to the tomato layer. The sweet and spicy combo offers a tropical twist that pairs beautifully with the cheeses. This variation is perfect for guests who love a little heat.
Mediterranean Medley
Swap the cherry tomatoes for sun‑dried tomatoes and add olives and feta cheese. The briny flavors create a Mediterranean vibe, while the feta adds a creamy contrast. This version is great for a holiday brunch with a Mediterranean flair.
Herb‑Infused Goat Cheese
Use goat cheese flavored with rosemary or thyme. The aromatic herbs deepen the flavor profile and give the tree a fragrant aroma. It’s a subtle but effective way to elevate the dish.
Vegan Cheese Alternative
Replace the dairy cheeses with a vegan cheese blend, such as cashew‑based cheese. The texture remains creamy, and the flavor is surprisingly rich. This variation is ideal for guests who prefer plant‑based options.
Nutty Crunch Upgrade
Add toasted nuts—almonds or walnuts—between the cheese layers. The crunch adds a new dimension and the nuts’ nutty flavor pairs well with the cheeses. This twist is a hit among snack lovers.
Sweet & Savory Finale
Drizzle a light honey glaze over the finished tree. The honey’s sweetness balances the savory cheeses and adds a glossy finish. It’s a simple trick that turns the dish into a dessert‑style appetizer.
Storing and Bringing It Back to Life
Fridge Storage
Wrap the cheese tree in parchment paper and place it in an airtight container. Store in the refrigerator for up to 48 hours. The parchment allows the cheese to breathe while preventing condensation from softening the crackers.
Freezer Friendly
For longer storage, wrap the tree tightly in plastic wrap and then foil. Freeze for up to two weeks. When you’re ready to serve, thaw overnight in the fridge and reheat in a low‑heat oven to restore crispness.
Best Reheating Method
Reheat in a 300°F oven for 5–7 minutes, or until the cheese is warm and the crackers are crisp. Add a tiny splash of water before reheating; it steams the cheese back to perfection without making the crackers soggy. This trick keeps the texture just right.