Picture this: I was halfway through a weeknight dinner, the timer was ticking, and I realized I had no idea how to salvage the soggy, overcooked chicken I’d just tossed into the skillet. The kitchen smelled of burnt garlic and a faint hint of disappointment. I stared at the pan, wondering if I’d ever recover from that culinary catastrophe. Then, a friend texted me a recipe for a chicken parm protein bowl that promised crisp, cheesy perfection. I was skeptical, but the moment I saw the glossy marinara and the promise of a protein-packed bowl, I knew I had to try.
The first thing that caught my eye was the golden crust of the chicken, its surface glistening like a sunlit loaf of bread. When I lifted a piece, the aroma hit me—a savory blend of Parmesan, garlic, and a whisper of oregano. The sauce that followed was a velvety red river, thick enough to coat the noodles but light enough to keep the bowl airy. The crunch of the breadcrumbs was unmistakable, popping softly as I chewed, while the melted mozzarella formed a silky blanket over each bite. The final touch was a sprinkle of fresh basil, releasing a bright, herbal note that cut through the richness like a cool breeze.
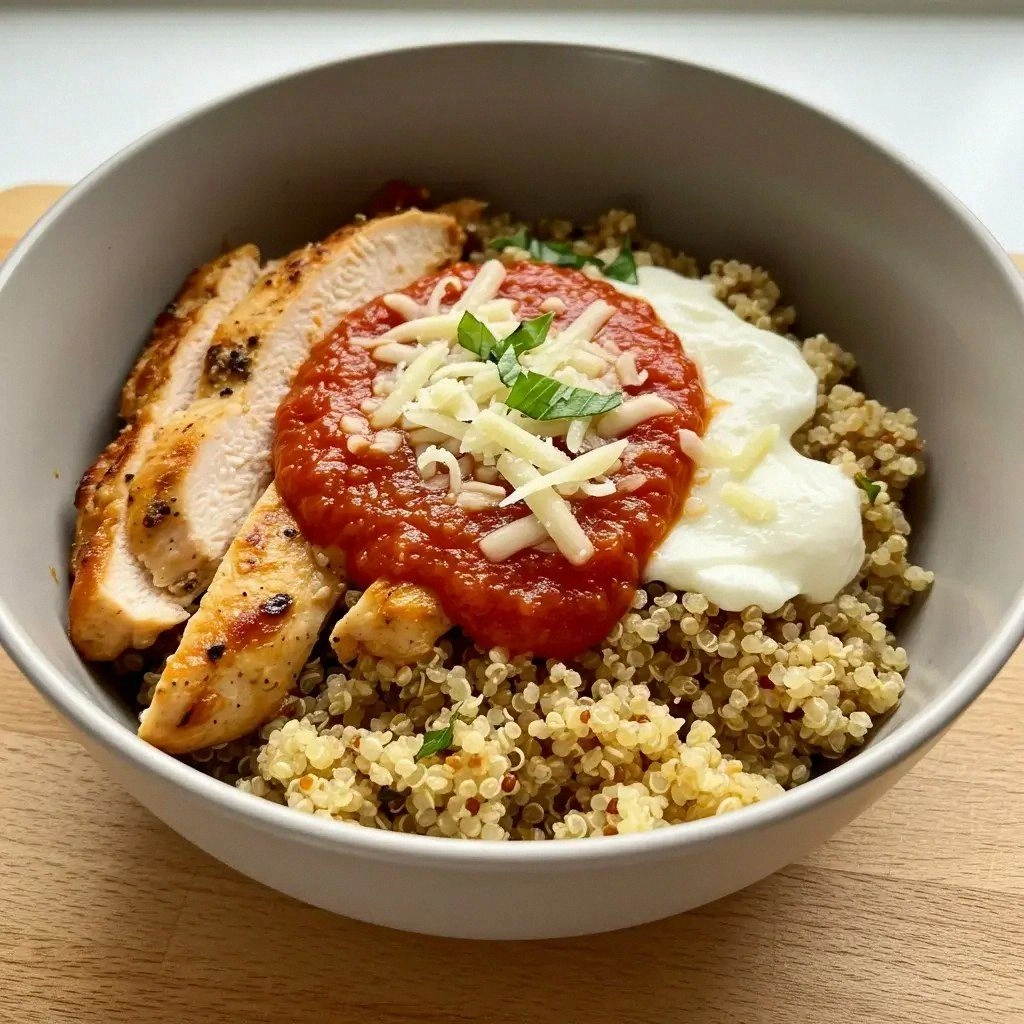
What makes this version stand out is that it takes the classic comfort of chicken parm and transforms it into a one-bowl, protein-packed powerhouse. It balances the hearty texture of baked chicken with the lightness of quinoa and the crunch of fresh veggies. The sauce is a game-changer, thickened with a touch of tomato paste and seasoned to depth, so it coats every grain of quinoa like velvet. And the crispy breadcrumb coating is achieved with panko, giving an extra crunch that shatters like thin ice when you bite. All of this comes together in a dish that is both filling and surprisingly low in carbs, making it a perfect weeknight meal that feels indulgent without the guilt.
But the secret that elevates this bowl beyond the ordinary is the use of a lemon zest-infused breadcrumb mixture. The citrus brightens the flavor profile, cutting through the richness of the cheese. Another unexpected twist is the addition of sautéed mushrooms, which add umami and a subtle earthy sweetness. If you’re a fan of a little heat, a pinch of red pepper flakes in the sauce gives a gentle kick that lingers. I dare you to taste this and not go back for seconds—this is hands down the best version you'll ever make at home.
Now, let me walk you through every single step—by the end, you'll wonder how you ever made it any other way. I’ll share the tricks, the timing, and the exact proportions that make this dish sing. So grab your apron, preheat the oven, and let’s dive into the heart of this culinary masterpiece. You’ll be amazed at how simple yet sophisticated this bowl can be. Ready? Let’s get cooking.
What Makes This Version Stand Out
- Flavor: The sauce is a rich, tomato-based blend that’s thickened with a splash of tomato paste, giving it a velvety texture that clings to every grain of quinoa. The subtle heat from red pepper flakes keeps the dish exciting without overwhelming the palate.
- Crispness: Panko breadcrumbs create a light, airy crunch that shatters like thin ice when you bite. The searing step locks in moisture, ensuring the chicken remains juicy beneath the golden crust.
- Protein Power: Four boneless skinless chicken breasts provide a substantial protein hit, while quinoa adds a plant-based protein boost and a pleasant nutty flavor that balances the richness of the cheese.
- Low Carb: Replacing pasta with quinoa cuts carbohydrates while still delivering a satisfying bite. The vegetables add fiber and essential nutrients without adding bulk.
- One-Pan Simplicity: The chicken bakes in the same pan you use to sauté the veggies, reducing cleanup and keeping the cooking process streamlined.
- Crowd-pleaser: The familiar taste of chicken parm combined with fresh, vibrant ingredients makes this dish a hit at family gatherings, even with picky eaters.
- Make-Ahead Friendly: The assembled bowl can be refrigerated for up to three days, and reheating restores the crispness of the chicken with a quick oven blast.
Inside the Ingredient List
The Flavor Base
Marinara sauce is the heart of this dish, thickened with a spoonful of tomato paste to give it body and a subtle sweetness that balances the savory elements. A splash of red wine during the simmer adds a layer of complexity, but if you prefer to keep it simple, a dash of balsamic vinegar will do the trick. The sauce is seasoned with oregano, basil, and a pinch of crushed red pepper to keep the heat in check. The key is to let it bubble gently for at least ten minutes so the flavors marry. If you’re short on time, a ready-made marinara works fine—just make sure it’s low in added sugars.
The Texture Crew
Panko breadcrumbs give the chicken a light, airy crunch that feels almost like a whisper against the tongue. Grated Parmesan mixed into the breadcrumb blend adds a salty, nutty undertone that complements the cheese. Shredded mozzarella provides that gooey, melty finish that makes every bite feel indulgent. The quinoa offers a subtle chew and a nutty flavor that grounds the bowl, while the broccoli and mushrooms add a satisfying snap and earthy depth. Together, they create a medley of textures that keeps each mouthful exciting.
The Unexpected Star
Lemon zest is the unsung hero that lifts the entire dish, brightening the rich sauce and cutting through the heaviness of the cheese. It also brings a subtle citrus note that pairs beautifully with the fresh basil. Sautéed mushrooms add umami, creating a depth that mimics the savory depth of a classic meat sauce. A drizzle of olive oil before searing the chicken seals in moisture and gives the skin a glossy finish. These small touches transform an ordinary bowl into a gourmet experience.
The Final Flourish
Fresh basil and parsley are added at the end to provide a burst of green that contrasts the warm sauce. A sprinkle of grated Parmesan on top gives an extra layer of flavor and a slightly crunchy finish. A dash of lemon zest ties the dish together, adding a bright, citrusy note that lifts the heaviness of the cheese. The combination of herbs creates a harmonious balance that keeps the dish from feeling too heavy. The final garnish also adds a pop of color that makes the bowl visually appealing.
The Method — Step by Step
- Preheat and Prep: Set your oven to 425°F (220°C) and line a baking sheet with parchment paper. Pat the chicken breasts dry with paper towels; this step ensures the coating adheres properly. Season both sides with salt, pepper, Italian seasoning, and garlic powder. Let the chicken rest while you prepare the breadcrumb mixture. This foundational seasoning sets the stage for the rest of the dish.
- Breadcrumb Blend: In a shallow dish, combine panko breadcrumbs, grated Parmesan, shredded mozzarella, and lemon zest. Toss the mixture until evenly coated. This blend gives the chicken its signature crispy, cheesy crust. The lemon zest adds brightness that cuts through the richness. A pinch of red pepper flakes is optional but recommended for a subtle heat.
- Coat the Chicken: Press each chicken breast into the breadcrumb mixture, ensuring the coating is firm and even. The pressure helps the crumbs stick and creates a uniform crust. Shake off any excess crumbs to prevent a greasy result. This step is critical for achieving that perfect crunch.
- Sear the Chicken: Heat olive oil in a large skillet over medium-high heat. Add the coated chicken breasts and sear for 3–4 minutes per side until golden brown. The searing step locks in juices and builds flavor. Watch the edges; they should start to pull away from the pan as they brown. This quick sear sets the foundation for a juicy interior.
- Transfer to Oven: Move the skillet (if oven-safe) or the chicken onto the prepared baking sheet. Bake for 15–18 minutes, or until the internal temperature reaches 165°F (74°C). The oven finishes the cooking, ensuring even heat distribution. The chicken should feel firm yet moist. This step is where the magic happens—your chicken becomes a crispy, tender masterpiece.
- Watch Out: Avoid overbaking; once the chicken hits 165°F, remove it immediately to prevent dryness. The oven can quickly push the chicken past the ideal moisture level. Use a meat thermometer for precision. If you’re prone to overcooking, set a timer and check the temperature early. The result will be a juicy, flavorful piece that stays moist.
- Sauté Veggies: While the chicken finishes, add a splash of olive oil to the skillet and toss in broccoli florets and sliced mushrooms. Cook for 5–7 minutes until tender and slightly caramelized. The veggies add crunch and a pop of color to the bowl. The mushrooms contribute umami, enhancing the overall depth of flavor. Keep the heat moderate to avoid burning.
- Warm the Sauce: In a small saucepan, heat the marinara sauce over medium-low heat. Stir in basil, parsley, and a splash of water if it’s too thick. Let it simmer gently for 5 minutes, allowing the flavors to meld. The sauce should be silky and aromatic. A touch of salt can be added to taste.
- Assemble the Bowl: Layer cooked quinoa as the base, then top with sautéed veggies, baked chicken, and a generous pour of sauce. Sprinkle extra Parmesan and fresh herbs on top. The arrangement of colors makes the bowl visually enticing. The combination of textures—from the crunchy crust to the creamy sauce—creates a memorable eating experience. This is the moment where everything comes together.
- Final Touch: Give the bowl a final drizzle of olive oil and a sprinkle of red pepper flakes if desired. Let it sit for a minute to allow the flavors to meld. Serve immediately for the best texture. If you prefer a warm, comforting meal, wrap the bowl in foil and reheat for a minute. This finishing step adds a glossy sheen and a subtle crunch.
- Enjoy: Plate your creation and watch the steam rise. The aroma alone is enough to make anyone salivate. Take a bite and feel the harmony of crispy, cheesy chicken, nutty quinoa, and fresh veggies. This is pure comfort food reimagined. You’ve just crafted a dish that’s as beautiful as it is delicious.
That’s it—you did it. But hold on, I’ve got a few more tricks that will take this bowl to another level and keep it from ever feeling ordinary again.
Insider Tricks for Flawless Results
The Temperature Rule Nobody Follows
Many cooks rely on visual cues alone, but a thermometer is the ultimate cheat sheet. Checking the chicken at 160°F and then waiting for a few minutes ensures it hits the perfect 165°F without drying out. I once left a chicken on the stove for an extra minute and the result was a dry, unappetizing mess. Consistency is key, and a thermometer guarantees it.
Why Your Nose Knows Best
Smell is a powerful indicator of doneness. When the chicken is ready, the aroma will shift from raw to a deep, savory scent. I’ve learned to trust my nose more than my eyes, especially when the heat is high. The scent of melted cheese and toasted breadcrumbs signals that the crust is perfect. Trusting your senses saves you from overcooking.
The 5-Minute Rest That Changes Everything
Letting the chicken rest for five minutes after baking allows the juices to redistribute. A quick rest prevents the juices from spilling out when you cut into the meat, keeping it moist. I used to cut straight away and the result was a dry center. Resting is simple but transforms the texture dramatically.
Keep the Crust Crispy
If you’re reheating leftovers, place the chicken in a preheated oven at 375°F for 5 minutes instead of microwaving. This method restores the crunch without sogginess. I’ve found that microwaving leaves the crust soggy and the chicken rubbery. The oven trick keeps it fresh and crispy.
Make the Sauce Stickier
Add a tablespoon of tomato paste to the marinara before simmering. The paste thickens the sauce and gives it a glossy finish that clings to the quinoa. I experimented with a splash of balsamic vinegar, and it added a delightful tang. This small tweak elevates the sauce from ordinary to extraordinary.
Creative Twists and Variations
Spicy Thai Chicken Bowl
Swap the marinara for a coconut curry sauce, add sliced bell peppers, and top with crushed peanuts. This version introduces a tropical flavor profile that pairs well with the chicken. It’s perfect for those who love a bit of heat and exotic spices.
Greek-Style Protein Bowl
Replace quinoa with farro, use a tzatziki sauce instead of marinara, and add sliced cucumbers and feta. The cool, creamy yogurt sauce balances the savory chicken, creating a Mediterranean twist. It’s a refreshing alternative for warmer evenings.
Vegan Chicken Parm Bowl
Use a plant-based chicken substitute, vegan breadcrumbs, and dairy-free mozzarella. Keep the marinara and veggies the same. This version retains the classic flavor while making it entirely plant-based.
Breakfast-Style Protein Bowl
Serve the chicken with a side of scrambled eggs, sautéed spinach, and a drizzle of hollandaise. The addition of eggs transforms the dish into a hearty breakfast, ideal for weekend mornings. It’s a protein-packed start to the day.
Low-FODMAP Version
Omit the garlic powder, replace the marinara with a homemade sauce using low-FODMAP tomatoes, and use gluten-free breadcrumbs. This adaptation keeps the dish safe for sensitive stomachs while preserving the comforting elements.
Storing and Bringing It Back to Life
Fridge Storage
Place the assembled bowl in an airtight container and refrigerate for up to three days. The quinoa will keep its texture, and the chicken stays juicy. Keep the sauce separate if you prefer a crispier crust.
Freezer Friendly
Freeze the chicken and quinoa separately to prevent sogginess. Wrap each component tightly in foil, then place in a freezer bag. This method ensures maximum freshness and flavor upon thawing.
Best Reheating Method
To reheat, preheat the oven to 350°F (175°C) and bake the bowl for 10–12 minutes, or until heated through. Add a splash of water before reheating to steam the quinoa back to life, keeping it fluffy. This technique preserves the texture and flavor of the dish.