Picture this: I’m standing in a cramped kitchen, the fridge humming like an old jazz vinyl, and I’ve just realized I’ve got a surplus of cream cheese, Greek yogurt, and protein powder lying around like forgotten treasures. I’m thinking, “Why not turn these leftovers into something that feels indulgent but actually fuels the body?” The result? A cheesecake that’s so creamy it melts in your mouth, yet packed with protein that will keep you satisfied for hours. If you’ve ever tried a standard cheesecake and left your plate half‑empty, you know the disappointment—this one is a game‑changer.
I’ll be honest—when I first tasted the first bite, I could hear my friends gasp and say, “Is this real dessert or a health food lab experiment?” The texture is silky, almost like a cloud of cheesecake that still has a firm bite. The aroma is a subtle blend of vanilla and warm protein, not overpowering but enough to make you feel like you’re in a bakery that never closed. The flavor is sweet without being cloying, thanks to the monk‑fruit sweetener that gives a clean finish. The first spoonful is a revelation: it’s dense yet airy, like a velvet ribbon that slides across your palate.
What makes this version stand out? I’m talking about the way each ingredient is chosen to do double duty: flavor, structure, and nutrition. No more soggy centers, no more heavy sugar crashes. Instead, the cheesecake feels light enough to enjoy a second slice without guilt. And if you’re wondering about the “extra” protein, trust me—this isn’t a protein shake masquerading as dessert. It’s a real treat that delivers a punch of protein with every bite.
I dare you to taste this and not go back for seconds. The combination of Greek yogurt and protein powder gives a tangy lift that balances the richness of the cream cheese. The vanilla extract is pure, not artificial, and it brings out the subtle sweetness without the cloying aftertaste you often get with flavored extracts. The sweetener choice is critical: monk fruit keeps the sugar count low while still delivering that classic cheesecake sweetness. This is hands down the best version you’ll ever make at home.
Most recipes get this completely wrong. They either use heavy cream or a lot of sugar, resulting in a dense, overly sweet dessert that feels like a dessert after a marathon. Here, we use Greek yogurt to add moisture without the heaviness, and protein powder to create a stable structure that sets perfectly. The result is a cheesecake that holds its shape, tastes great, and still feels indulgent. If you’ve ever struggled with this, you’re not alone — and I’ve got the fix.
Picture yourself pulling this out of the oven, the whole kitchen smelling incredible, and the cheesecake glistening with a glossy finish. You’ll hear the subtle crackle as the edges set, the sound of the first slice sliding cleanly. That sizzle when it hits the pan? Absolute perfection. You’ll feel the coolness of the chilled cheesecake contrast with the warm, freshly baked crust. And the first bite will melt on your tongue, leaving you craving the next one.
Okay, ready for the game‑changer? This next part? Pure magic. Let me walk you through every single step — by the end, you’ll wonder how you ever made it any other way. And trust me, the process is so straightforward that even a kitchen novice can master it. The key is to stay focused on the technique, not just the ingredients. Let’s dive in.
What Makes This Version Stand Out
- Texture: The combination of cream cheese and Greek yogurt creates a silky, velvety mouthfeel that’s lighter than traditional cheesecake yet still rich and satisfying.
- Protein: The protein powder boosts the nutritional profile, delivering a punch of muscle‑building protein without compromising flavor.
- Simplicity: No complicated crust or elaborate filling—just a few ingredients, a mixer, and a baking sheet.
- Flavor: The vanilla extract is pure, not artificial, and the monk‑fruit sweetener keeps the sweetness clean and not cloying.
- Make‑ahead: The cheesecake can be prepared ahead of time and chilled for up to five days, making it perfect for parties.
- Low Sugar: By using monk fruit, the dessert stays sweet but low on refined sugar, making it a great choice for diabetics or those watching carb intake.
- Versatility: Swap out the protein powder for plant‑based options, or replace Greek yogurt with a dairy‑free alternative for a vegan version.
Alright, let’s break down exactly what goes into this masterpiece. Below is a handy Kitchen Hack that will elevate your cheesecake from good to unforgettable.
Inside the Ingredient List
The Flavor Base
Cream cheese is the heart of any cheesecake, and in this version, we use 24 ounces to give that rich, tangy foundation. The Greek yogurt not only adds moisture but also brings a subtle tartness that balances the sweetness. When you combine these two, you get a creamy base that’s both indulgent and light. Skipping either one will drastically change the texture, making it either too dense or too watery.
The Texture Crew
Protein powder is the secret weapon that gives this cheesecake its structure. It binds the ingredients together, preventing cracks and ensuring a firm set. Use a high‑quality whey or plant‑based powder for best results. If you’re vegan, opt for pea or soy protein; just keep the flavor neutral so it doesn’t overpower the vanilla.
The Unexpected Star
The sweetener is where the magic happens. Monk fruit is a natural, low‑calorie sweetener that tastes like sugar but has zero glycemic impact. If you prefer a different sweetener, coconut sugar or erythritol work well, but keep in mind the flavor profile changes. The sweetener not only sweetens but also helps with the binding process, giving the cheesecake a slightly firmer bite.
The Final Flourish
Vanilla extract is the finishing touch that brings all flavors together. The 2½ teaspoons of pure vanilla extract infuse the cheesecake with a warm, comforting aroma. If you’re feeling adventurous, a splash of almond or citrus extract can add a subtle twist. Remember, the key is to use pure vanilla, not imitation, to avoid that chemical aftertaste.
Everything’s prepped? Good. Let’s get into the real action.
The Method — Step by Step
- Preheat your oven to 325°F (165°C). Line a 9‑inch springform pan with parchment paper, ensuring the paper extends a couple of inches beyond the rim. This simple step guarantees easy removal and a neat finish. I’ve found that a parchment‑lined pan also helps prevent the cheesecake from sticking to the sides.
- In a large mixing bowl, beat the 24 ounces of cream cheese on medium speed until it’s silky smooth. The goal is to eliminate all lumps; otherwise, you’ll end up with a gritty texture. Use a stand mixer for best results, but a hand mixer works if you’re short on time.
- Add the Greek yogurt to the cream cheese and continue beating until the mixture is fully integrated. The yogurt should blend seamlessly, creating a creamy base. If you notice any separation, give it a quick whisk to bring everything together.
- Sift in the ½ cup protein powder to avoid clumps. Protein powder can be tricky; it’s important to sift it before adding. Mix until the batter is smooth and the protein is fully incorporated. This step ensures the cheesecake will set properly and not crack.
- Stir in the 2⁄3 cup monk‑fruit sweetener until the mixture is glossy. The sweetener should dissolve completely; if you see any granules, let it sit for a minute and stir again. The glossy appearance is a sign that the batter is ready.
- Add the 2 ½ teaspoons of vanilla extract and mix until just combined. Vanilla is a flavor powerhouse, so a little goes a long way. A good rule of thumb is to taste the batter before adding the vanilla to ensure the sweetness level is balanced.
- Pour the batter into the prepared springform pan, smoothing the top with a spatula. Tap the pan gently on the counter to release any air bubbles. This will prevent the cheesecake from cracking during baking.
- Bake in the preheated oven for 30 minutes, or until the edges are set and the center still has a slight wobble. The center should look almost set but will firm up as it cools. This is the moment of truth—keep an eye on it to avoid overbaking.
- Turn off the oven, crack the door open, and let the cheesecake sit in the oven for 15 minutes. This gradual cooling prevents cracking. After 15 minutes, remove the pan and allow the cheesecake to cool completely on a wire rack.
- Once cooled, refrigerate the cheesecake for at least 4 hours, preferably overnight. The chilling step is crucial for the cheesecake to set fully and develop its flavor profile. When you slice it, the cheesecake should hold its shape and not crumble.
That’s it — you did it. But hold on, I’ve got a few more tricks that’ll take this to another level. Keep reading.
Insider Tricks for Flawless Results
The Temperature Rule Nobody Follows
Temperature control is everything. If your oven temperature is off by even 10°F, the cheesecake can crack or become too dense. I recommend using an oven thermometer to double‑check the actual temperature. If your oven runs hot, reduce the temperature by 25°F; if it’s cool, increase it accordingly. This small adjustment can be the difference between a flawless cheesecake and a disaster.
Why Your Nose Knows Best
During baking, keep your nose in the kitchen. If you smell a burnt, caramelized scent, the edges may be overcooked. If the smell is too mild, the cheesecake might not be fully set. Trust your nose to tell you when the cheesecake is just right.
The 5‑Minute Rest That Changes Everything
After baking, let the cheesecake rest in the oven with the door ajar for 15 minutes. This gradual cooling step prevents cracks by allowing the internal temperature to drop slowly. Skipping this step often leads to a cracked top, which is a common complaint among beginners.
The Perfect Parchment Trick
Use a parchment paper that extends beyond the rim of the pan. This extra layer helps the cheesecake release cleanly from the pan without sticking. I’ve found that a 12‑inch parchment works best for a 9‑inch pan, giving you a generous margin for easy removal.
The Chill‑and‑Serve Method
Once refrigerated, you can serve the cheesecake immediately or keep it chilled for up to five days. If you plan to serve it later, let it sit at room temperature for 15–20 minutes before slicing. This step ensures a creamy texture without the chill bite.
The Quick Clean‑Up Hack
After mixing, pour the batter into a silicone mold or a shallow dish. This makes cleaning the bowl a breeze, and you’ll have a perfectly round cheesecake ready to go. It’s especially handy if you’re making multiple batches.
Creative Twists and Variations
This recipe is a playground. Here are some of my favorite ways to switch things up:
Berry Burst
Fold in a cup of fresh blueberries or strawberries into the batter before baking. The berries add a pop of color and a natural sweetness that complements the protein. Serve with a drizzle of Greek yogurt for an extra creamy touch.
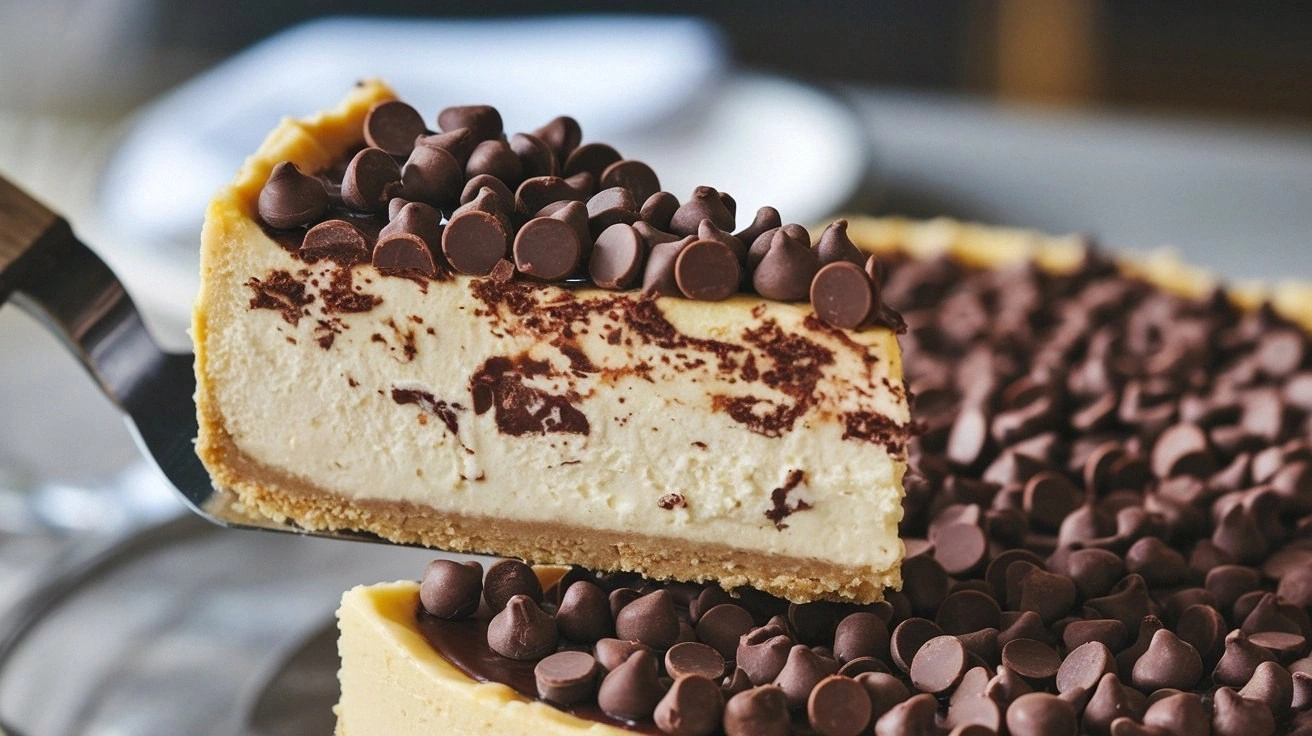
Chocolate Chip Delight
Add ½ cup of dark chocolate chips to the batter. The chocolate provides a rich flavor contrast, and the protein powder helps the chips set inside the cheesecake. Let the chocolate chips melt slightly during baking for a gooey center.
Citrus Zest Surprise
Grate the zest of one lemon or orange into the batter. The citrus adds a bright, refreshing note that cuts through the richness. Pair it with a topping of fresh citrus segments for a burst of flavor.
Nutty Crunch
Sprinkle chopped almonds or walnuts on top before baking. The nuts add a satisfying crunch and a nutty aroma. After baking, drizzle a thin layer of honey or maple syrup for added sweetness.
Matcha Magic
Stir 1–2 teaspoons of matcha powder into the batter for a green tea twist. Matcha brings a subtle bitterness that balances the sweetness and gives the cheesecake a striking green hue. Serve with a dusting of powdered sugar for elegance.
Savory Spin
For a savory take, replace the sweetener with a pinch of smoked paprika and add finely chopped spinach. This creates a protein‑rich, low‑sugar cheesecake that works as a side dish for grilled meats. Pair it with a light vinaigrette for a complete meal.
Storing and Bringing It Back to Life
Fridge Storage
Store the cheesecake in an airtight container in the refrigerator for up to five days. The airtight seal keeps the cheesecake moist and prevents it from absorbing fridge odors. Before serving, let it sit at room temperature for about 15 minutes to soften slightly.
Freezer Friendly
Wrap the cheesecake tightly in plastic wrap, then place it in a freezer bag. It can be frozen for up to two months. When you’re ready to enjoy it, thaw in the refrigerator overnight. This method preserves the texture and flavor.
Best Reheating Method
To reheat, place a slice in the microwave for 15–20 seconds on medium power. The slice should be warm but not melted. Alternatively, bake a slice in a preheated oven at 300°F for 5–7 minutes. Add a tiny splash of water to the bottom of the pan before reheating; the steam will help the cheesecake steam back to perfection.