I was standing in my kitchen, half‑asleep, with a bag of marshmallows that had somehow survived the apocalypse of my pantry. The clock ticked past midnight, my roommate was snoring, and a sudden craving for something that could both satisfy my sweet tooth and impress anyone who dared to wander into the living room hit me like a freight train. I grabbed a bowl, dumped in the marshmallows, and thought, “What if I could turn this humble snack into a show‑stopping dessert that feels like a tropical vacation?” The idea was reckless, the ambition was massive, and the only thing missing was a plan that didn’t end in a kitchen disaster.
I started by recalling the classic Rice Krispie treats I grew up with, but quickly realized those versions were flat, forgettable, and lacked any real personality. The moment I added sweetened shredded coconut and a splash of creamy dulce de leche, the kitchen filled with a scent that reminded me of a beachside market in Samoa, where caramel and coconut mingle under a blazing sun. The sound of the butter sizzling in the pan was like a tiny applause, and the rice cereal crackled as if it were tiny fireworks celebrating the union of flavors. My hands were sticky, my heart was racing, and I could already hear the inevitable chorus of “more, please!” from anyone within earshot.
Most recipes out there get this completely wrong. They either drown the crispy cereal in a sea of chocolate, or they forget the magic of coconut entirely. This version, however, balances every element so precisely that each bite feels like a love‑letter to your taste buds. The semi‑sweet chocolate drapes the treat like a silky shawl, while the marshmallows keep the interior airy enough to melt in your mouth without turning into a gummy mess. I’ll be honest — I ate half the batch before anyone else got a chance to try it, and that’s a confession I’m not ashamed to make because it proves just how addictive this concoction truly is.
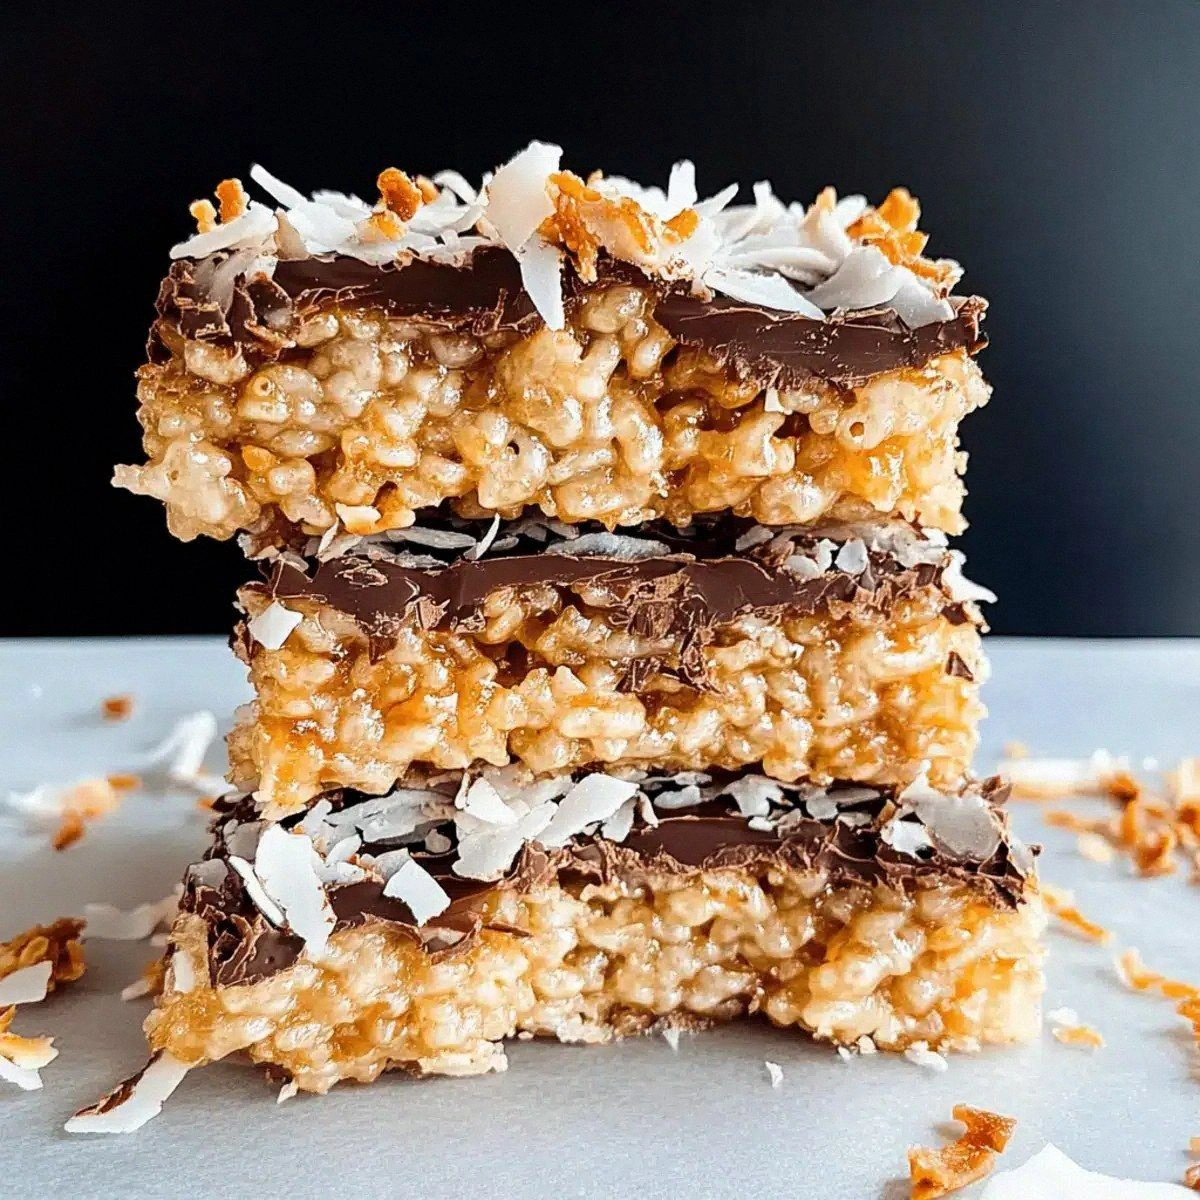
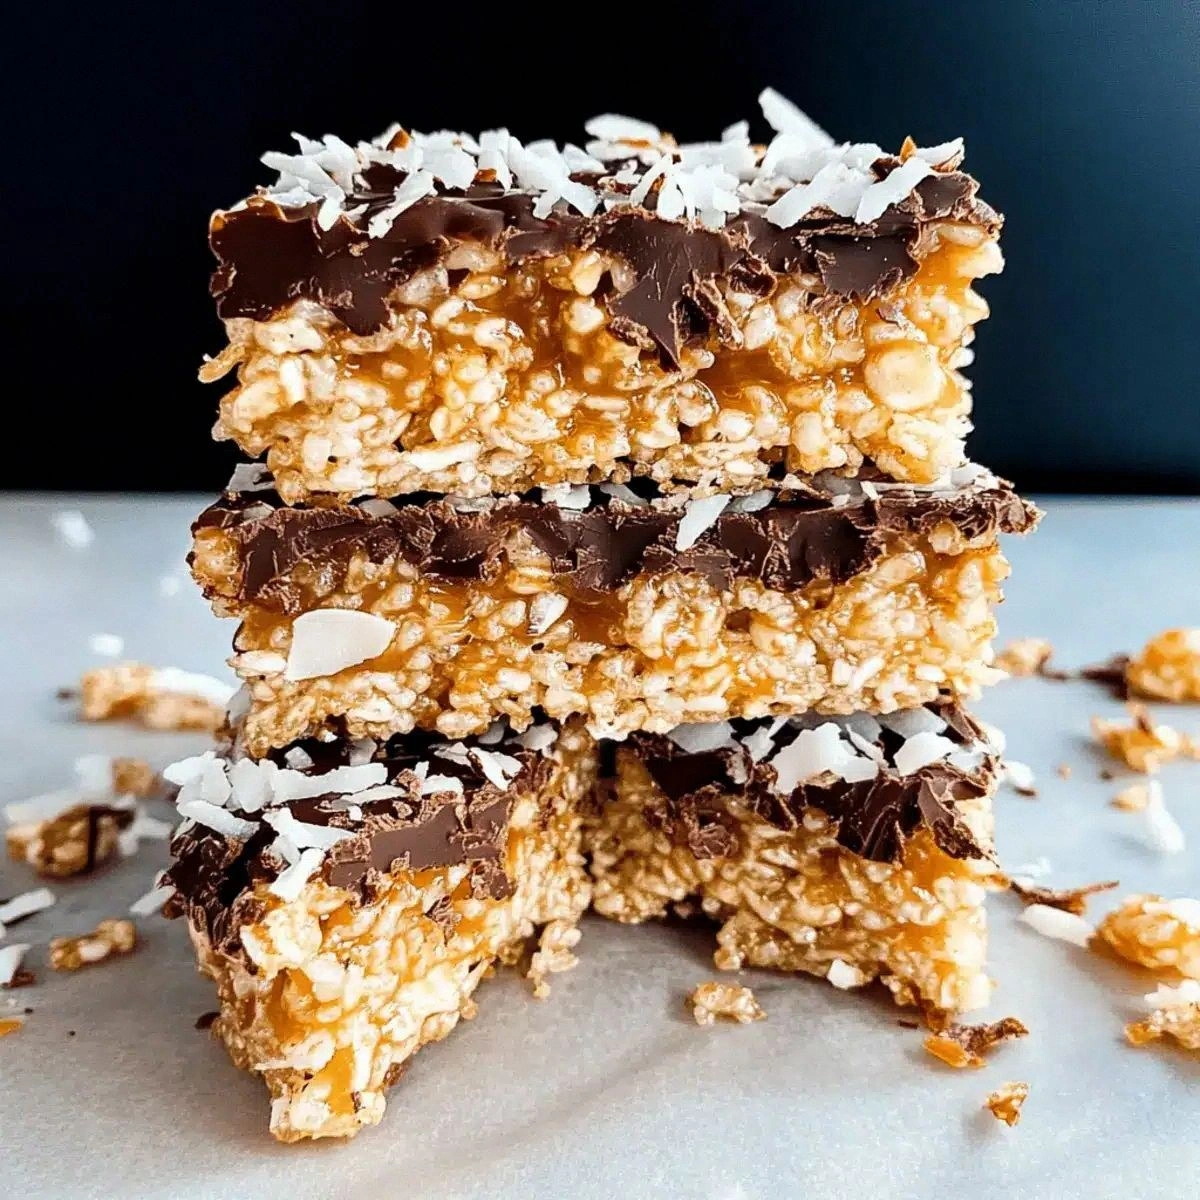
Now, imagine pulling a golden‑brown slab of these Samoan‑inspired Rice Krispies out of the pan, the whole kitchen smelling like a caramel‑coconut dream, and watching the glossy chocolate glaze set with a gentle sheen. Picture yourself cutting a perfect square, the edges giving a soft snap, the interior pulling apart in fluffy clouds of marshmallow, and the chocolate coating catching the light like a polished gem. I dare you to taste this and not go back for seconds — that’s a promise I’m willing to back with a spoonful of pure, unapologetic joy. Let me walk you through every single step — by the end, you’ll wonder how you ever made it any other way.
What Makes This Version Stand Out
- Taste: The caramel‑sweetness of dulce de leche intertwines with coconut, creating a flavor profile that feels both familiar and exotic.
- Texture: A perfect marriage of crunchy rice cereal, chewy marshmallows, and a smooth chocolate glaze that cracks delicately on the surface.
- Simplicity: Only seven ingredients, all pantry staples, yet the result feels like a gourmet confection from a high‑end patisserie.
- Uniqueness: The addition of sweetened shredded coconut and dulce de leche is a game‑changer that most standard recipes overlook.
- Crowd Reaction: Even the most skeptical dessert skeptics end up pleading for the recipe, often before the first bite is finished.
- Ingredient Quality: Using real butter and high‑quality semi‑sweet chocolate elevates the entire experience from “snack” to “celebration.”
- Method: A single‑pan technique keeps cleanup minimal while ensuring every component melds together flawlessly.
- Make‑Ahead Potential: This treat stores beautifully, retaining its texture and flavor for up to a week, making it perfect for parties.
Inside the Ingredient List
The Flavor Base
The star of this recipe is the dulce de leche. This caramel‑like sauce brings a deep, buttery sweetness that coats every morsel, turning ordinary marshmallows into a luxurious treat. If you skip it, you’ll lose the signature buttery caramel note that makes this dish feel like a tropical indulgence. A great alternative is a thick vanilla custard or a spoonful of golden syrup, but nothing matches the authentic flavor of traditional dulce de leche.
The Texture Crew
Mini marshmallows provide the airy lift. Their tiny size ensures they melt evenly, creating a smooth, cohesive matrix that holds the cereal together. Using regular marshmallows can result in uneven pockets and a gummy texture. If you’re allergic to gelatin, try agar‑based vegan marshmallows; they’ll give you a similar fluff without compromising the structure.
Rice Krispie cereal is the crunchy backbone. Each puff adds a light, crisp bite that contrasts beautifully with the soft interior. Opt for the original brand for consistency, but you can experiment with puffed quinoa for a gluten‑free twist. The key is to keep the cereal dry; any moisture will make the final product soggy.
The Unexpected Star
Sweetened shredded coconut is the secret weapon that transports you straight to a Samoan beach. It adds a nutty, toasted aroma and a subtle chew that elevates the overall mouthfeel. Skipping it will make the treat feel flat, like a plain rice crisp bar. For a richer coconut flavor, toast the shredded coconut lightly before adding it to the mix — just watch it, as it can burn in seconds.
The Final Flourish
Semi‑sweet chocolate provides the glossy finish that makes these treats look as good as they taste. Its balanced cocoa content ensures the chocolate isn’t overly bitter, while still delivering that satisfying snap when you bite into it. If you prefer a darker profile, swap for 70% dark chocolate, but reduce the sugar elsewhere to avoid bitterness.
Butter is the binding agent that melts the marshmallows and coats the cereal, giving it a rich, buttery mouthfeel. Using margarine will result in a waxy texture and a faint aftertaste. For a dairy‑free version, use coconut oil, but be aware the coconut flavor will become more pronounced.
Milk (just a tablespoon) is the secret moisture adjuster that helps the chocolate glaze achieve a silky sheen without becoming too runny. Too much liquid will make the coating thin, while too little will cause it to seize. A splash of coconut milk can be used for extra tropical flair.
Everything's prepped? Good. Let's get into the real action…
The Method — Step by Step
-
Melt the butter in a large, heavy‑bottomed saucepan over medium heat. As it begins to foam, add the mini marshmallows and stir continuously. You’ll hear a gentle crackle as the marshmallows soften, and the mixture will start to turn a golden amber. This is the moment of truth — if the butter burns, the entire batch will taste bitter, so keep the heat steady.
Kitchen Hack: Use a silicone spatula to scrape the sides of the pan; it prevents scorching and ensures every marshmallow gets fully incorporated. -
Once the marshmallows are fully melted and glossy, reduce the heat to low and stir in the dulce de leche. The sauce should swirl into the marshmallow mixture like a caramel river, creating a glossy, velvety base. Let it simmer for about 30 seconds, just enough for the flavors to meld without boiling.
-
Quickly fold in the rice Krispie cereal, shredded coconut, and semi‑sweet chocolate chunks. The heat from the marshmallow base will melt the chocolate just enough to coat each piece. You’ll notice the chocolate turning from solid to a glossy sheen that clings to every puff.
Watch Out: If you let the mixture sit too long before transferring to the pan, the chocolate will harden and form clumps, ruining the smooth texture. -
Line a 9×13 inch baking pan with parchment paper, allowing some overhang for easy lift‑out. Spoon the mixture into the pan, spreading it evenly with a greased spatula. Press down gently — you want the mixture to compact without crushing the cereal, which would eliminate that satisfying crunch.
-
While the base is still warm, melt the remaining semi‑sweet chocolate in a microwave‑safe bowl in 20‑second bursts, stirring between each burst. When it’s smooth, stir in the tablespoon of milk to achieve a glossy, pour‑able glaze. This next part? Pure magic.
-
Drizzle the chocolate glaze over the top of the set rice krispie slab, using a spatula to spread it into a thin, even layer. The glaze should spread like liquid amber, creating a thin film that will set into a firm, glossy shell. Let the glaze sit for about two minutes before moving to the next step.
Kitchen Hack: For an ultra‑smooth finish, use a small offset spatula to spread the glaze while it’s still warm; this prevents streaks and creates a professional‑looking sheen. -
Allow the entire slab to cool at room temperature for 15 minutes, then transfer the pan to the refrigerator for another 20 minutes. The cooling process lets the chocolate set and the interior firm up, making it easier to cut clean squares.
-
Once fully set, lift the slab out using the parchment overhang and place it on a cutting board. Using a sharp, warmed knife, cut the slab into bite‑size squares or bars. The edges should pull away cleanly, revealing a soft, marshmallow‑laden interior and a crisp, chocolate‑kissed crust.
-
Serve immediately or store in an airtight container. If you’re serving to a crowd, I dare you to watch them line up for seconds — it’s a guaranteed crowd‑pleaser. That sizzle when the chocolate hits the warm base? Absolute perfection.
That's it — you did it. But hold on, I've got a few more tricks that'll take this to another level…
Insider Tricks for Flawless Results
The Temperature Rule Nobody Follows
Never let the butter or marshmallows exceed a gentle simmer. If the mixture bubbles vigorously, the sugars will caramelize too quickly, turning bitter. Keep the heat low and watch for a steady, glossy sheen. A friend once tried to speed things up by cranking the heat, and the final product tasted like burnt toast — lesson learned.
Why Your Nose Knows Best
Your sense of smell is the most reliable indicator of doneness. When the butter‑marshmallow blend starts to emit a nutty, caramel aroma, you’re at the perfect stage to add the dulce de leche. If the scent is still raw or overly buttery, give it another 30 seconds. Trust your nose; it’s smarter than any timer.
The 5‑Minute Rest That Changes Everything
After spreading the mixture into the pan, let it rest untouched for five minutes before adding the chocolate glaze. This brief pause allows the interior to firm up slightly, preventing the glaze from sinking into the base. Skipping this step often results in a soggy bottom and a messy slice.
The Chocolate Tempering Shortcut
For a glossy, snap‑ready glaze, melt the chocolate to 115°F, then cool it to 88°F before adding the milk. This quick tempering technique ensures the chocolate sets with a professional shine and a satisfying snap, rather than a dull, soft coating.
The “One‑Touch” Cut
Warm your knife under hot water, dry it, and slice through the set slab in one smooth motion. The heat prevents the chocolate from cracking, giving you clean edges and a uniform appearance. A dull or cold knife will cause the chocolate to shatter, ruining the visual appeal.
Creative Twists and Variations
This recipe is a playground. Here are some of my favorite ways to switch things up:
Tropical Lime Burst
Add the zest of one lime to the marshmallow mixture and drizzle a lime‑infused white chocolate glaze instead of semi‑sweet chocolate. The citrus lifts the caramel notes, creating a bright, island‑inspired flavor that’s perfect for summer gatherings.
Espresso Crunch
Stir in two teaspoons of finely ground espresso into the dry cereal before folding. The coffee bitterness balances the sweetness, and the aroma adds a sophisticated twist that’s ideal for after‑dinner coffee pairings.
Nutty Delight
Replace half of the shredded coconut with toasted chopped macadamia nuts. The buttery crunch of macadamias pairs beautifully with the caramel and chocolate, giving the treat an extra layer of texture.
Berry Bliss
Fold in a half‑cup of freeze‑dried raspberry pieces after adding the cereal. The tart berries punctuate the sweet base, offering a burst of flavor that brightens each bite.
Vegan Dream
Swap butter for coconut oil, use a vegan dulce de leche (made from coconut milk), and choose dairy‑free dark chocolate. The result is a completely plant‑based version that still delivers on texture and flavor.
Storing and Bringing It Back to Life
Fridge Storage
Place the cut squares in an airtight container lined with parchment paper. They’ll stay fresh for up to five days, retaining their crisp exterior and soft interior. If you notice the chocolate coating becoming a bit dull, a quick re‑microwave for 10 seconds will revive the shine.
Freezer Friendly
Wrap individual squares in a small piece of wax paper, then place them in a zip‑top freezer bag. They freeze well for up to three months. When you’re ready to enjoy, let them thaw at room temperature for 15 minutes, then add a splash of milk and give a quick microwave zap to restore the glossy finish.
Best Reheating Method
To bring a refrigerated piece back to its peak, microwave it on low for 10‑12 seconds. Add a tiny splash (about a teaspoon) of milk before heating; the steam created revives the marshmallow interior and re‑glosses the chocolate. This trick works wonders for reviving that just‑baked texture.