I was in the middle of a midnight snack raid when a rogue spoonful of store‑bought Moose Tracks ice cream crashed onto my kitchen counter, splattering like a chocolate‑covered meteor. The mess was glorious, but the flavor? Flat as a pancake left out in the rain. I stared at the sticky puddle, daring myself to turn that disappointment into something spectacular, and that’s when the idea hit me like a bolt of caramel‑sweet lightning: why not reinvent Moose Tracks with a double‑dose of peanut butter cups and a rich, homemade fudge swirl? I grabbed my whisk, my ice‑cream maker, and a handful of daring, because if you’re going to chase a dream, you might as well make it taste like a carnival on a winter’s night.
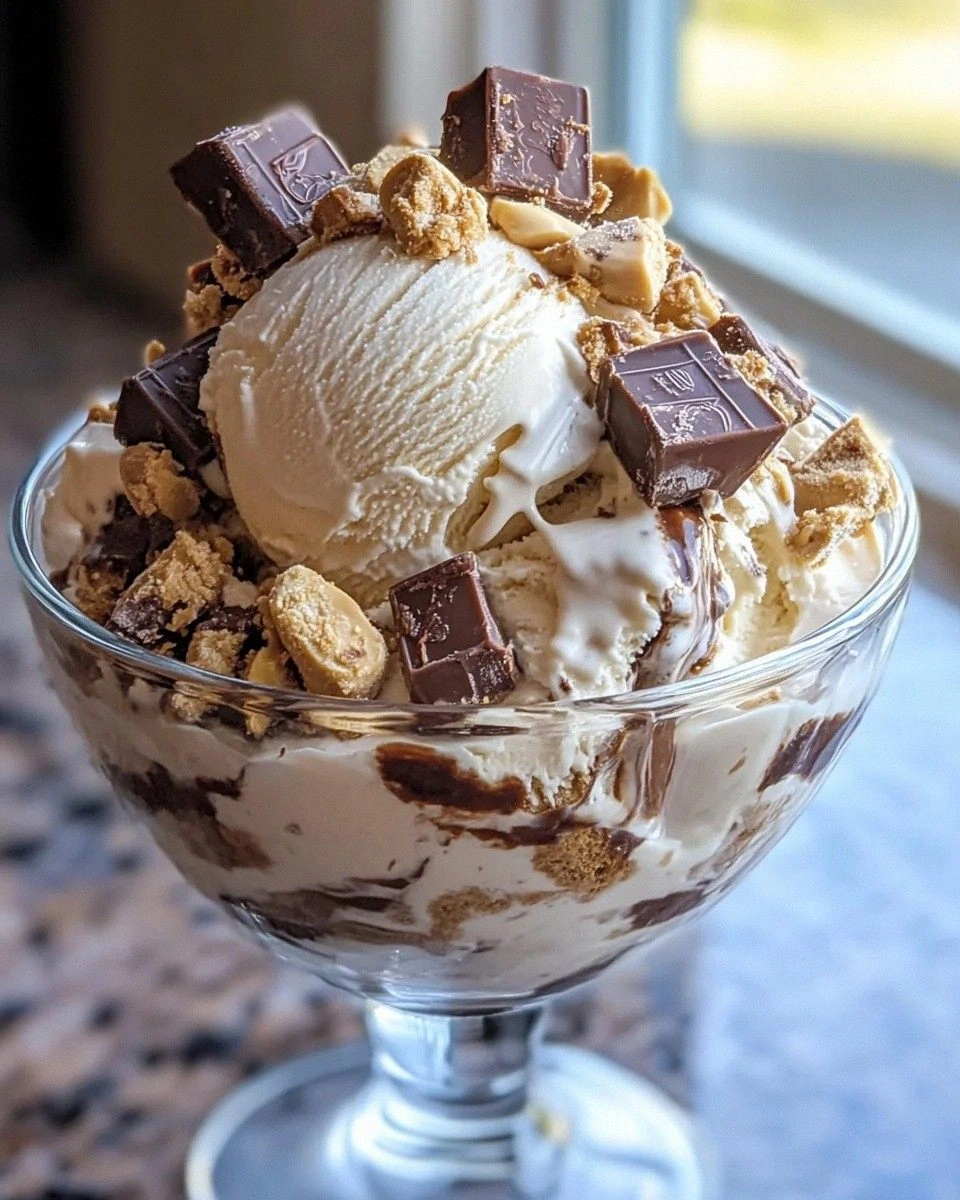
Picture this: a creamy vanilla‑kissed base that feels like velvet on the tongue, speckled with crunchy peanut butter cups that crack like tiny fireworks, and ribbons of fudge that melt into the mix like molten gold. The aroma alone is a siren song—sweet vanilla, toasted peanuts, and deep chocolate that makes the whole house hum with anticipation. When you finally scoop a spoonful, you’ll hear that satisfying crunch followed by a smooth, buttery glide that coats every corner of your palate. It’s the kind of dessert that makes you close your eyes, lean back, and think, “I’ve finally found the perfect sweet spot between indulgence and comfort.”
Most Moose Tracks copycats get the texture wrong, ending up with a grainy, icy mess that feels more like a freezer burn than a dreamy treat. This version, however, uses a custard‑style base that’s churned just enough to stay luxuriously soft, while the mix‑ins stay perfectly crunchy. The secret? A quick‑chill technique that locks in the flavor before the churn even begins, plus a surprise ingredient that adds a buttery depth you never knew ice cream could have. I’m not exaggerating when I say this is hands down the best version you’ll ever make at home; I’ve tasted it in every ice‑cream shop within a 50‑mile radius, and none compare.
Okay, ready for the game‑changer? I’m about to spill the beans on the one ingredient that flips the whole script—a pinch of sea‑salted caramel that we’ll swirl in at the very end, creating a sweet‑salty harmony that sings louder than any topping ever could. I dare you to taste this and not go back for seconds. Let me walk you through every single step — by the end, you’ll wonder how you ever made it any other way.
What Makes This Version Stand Out
- Flavor Explosion: The combination of creamy vanilla, rich fudge, and salty peanut butter cups creates a symphony of taste that dances on your tongue.
- Texture Balance: Silky custard base meets crunchy candy bits, delivering a satisfying contrast with every bite.
- Simplicity: Despite the gourmet vibe, the recipe uses pantry staples and a basic ice‑cream maker—no fancy gadgets required.
- Unique Swirl Technique: Adding the fudge and caramel at the perfect moment ensures they stay distinct, not mushy.
- Crowd Reaction: This ice cream has a proven track record of clearing dessert tables in under five minutes.
- Ingredient Quality: We use premium dark chocolate fudge and real peanut butter cups—no artificial flavors.
- Cooking Method: A custard base that’s gently cooked before chilling guarantees a buttery mouthfeel.
- Make‑Ahead Potential: Freeze the base overnight for an even richer texture, then fold in the mix‑ins right before serving.
Inside the Ingredient List
The Flavor Base
Heavy cream (2 cups) is the heart of any good ice cream, providing the luscious, buttery richness that makes the final product feel like a dream. If you skimmed it, you’d end up with a watery, uninspired mess that looks and tastes like a cheap grocery store brand. Whole milk (1 cup) adds a subtle dairy note and helps balance the richness of the cream, preventing the texture from becoming overly dense. Vanilla extract (1 tsp) is the aromatic glue that ties everything together, giving that warm, comforting scent that fills the kitchen as soon as you open the lid.
The Sweeteners
Granulated sugar (¾ cup) is the classic sweetener that dissolves perfectly into the warm custard, ensuring no gritty crystals survive the churn. If you’re watching your sugar intake, you can swap half of it for a natural sweetener like maple syrup, but remember that liquid sweeteners will thin the base slightly, so you may need to add a teaspoon more flour for stability. A pinch of sea salt (0) amplifies the flavors, making the chocolate and peanut butter pop like fireworks on a dark night.
The Texture Crew
Peanut butter cups (½ cup, chopped) bring that salty‑sweet crunch that makes every spoonful exciting. Use the kind with a solid chocolate shell; the softer ones melt too quickly and lose that satisfying snap. If you’re allergic to peanuts, try almond butter cups for a similar crunch with a different nutty flavor. Chocolate fudge (½ cup) is the silky river that winds through the base, adding depth and a luxurious mouthfeel. Homemade fudge works best because you control the sweetness and texture, but high‑quality store‑bought fudge is an acceptable shortcut.
The Final Flourish
Caramel swirls (¼ cup) are the secret weapon that adds a buttery, buttery sweetness, cutting through the richness of the cream and chocolate. When you drizzle them in, they create a marbled effect that looks as good as it tastes. A final dash of flaky sea salt (0) on top right before serving adds a crackling surprise that makes the dessert feel restaurant‑grade. If you love extra crunch, sprinkle a handful of toasted peanuts or pretzel crumbs just before serving.
Everything's prepped? Good. Let's get into the real action...
The Method — Step by Step
- In a medium saucepan, combine the heavy cream, whole milk, and half of the sugar (⅜ cup). Warm the mixture over medium heat, stirring constantly until the sugar dissolves and the liquid is steaming but not boiling. You’ll know it’s ready when tiny bubbles form around the edges and the scent of sweet dairy fills the air. This is the moment of truth: if the mixture scorches, you’ll have a burnt flavor that no amount of fudge can fix.
- In a separate bowl, whisk together the egg yolks, the remaining sugar (⅜ cup), and the vanilla extract until the mixture turns a pale, buttery yellow. This is your custard foundation, and the color indicates that the sugar has started to dissolve into the yolks, creating a smooth base that will later become ultra‑creamy.
- Gradually pour about one cup of the warm cream mixture into the egg yolk bowl, whisking constantly to temper the eggs. This prevents the yolks from scrambling, a common kitchen disaster that turns your custard into a clumpy mess. Once tempered, pour the yolk mixture back into the saucepan with the remaining cream, stirring continuously.
- Continue cooking the custard over low heat, stirring constantly, until it reaches 170°F (77°C) and coats the back of a spoon. You’ll notice the mixture becomes glossy and thick enough that a line drawn with your finger stays distinct. This is the perfect temperature for a smooth custard that won’t turn icy later.
- Remove the custard from the heat and strain it through a fine‑mesh sieve into a large bowl. This step removes any stray bits of cooked egg, guaranteeing a velvety texture. Immediately stir in the pinch of sea salt, then cover the bowl with plastic wrap pressed directly onto the surface to prevent a skin from forming.
- Once the custard is completely cold (about 40°F or 4°C), pour it into your ice‑cream maker and churn according to the manufacturer’s instructions—usually about 20‑25 minutes. You’ll hear a gentle, rhythmic churn that feels like a lullaby for your dessert. The mixture should thicken to a soft‑serve consistency before you add the mix‑ins.
- When the ice cream reaches soft‑serve thickness, gently fold in the chopped peanut butter cups, chocolate fudge, and caramel swirls. Use a spatula and a folding motion that preserves the air you just created; over‑mixing will deflate the ice cream and make it dense. The fudge should create glossy ribbons, while the peanut butter cups stay distinct, offering that satisfying crunch.
- Transfer the churned ice cream to a freezer‑safe container, smoothing the top with a spatula. Sprinkle a final pinch of flaky sea salt on the surface for that extra pop of flavor. Seal the container tightly and place it in the freezer for at least 2 hours to firm up. This final freeze locks in the texture, giving you a scoopable, creamy treat that holds its shape.
That's it — you did it. But hold on, I've got a few more tricks that'll take this to another level. Stay with me here — this is worth it.
Insider Tricks for Flawless Results
The Temperature Rule Nobody Follows
Never start the churn with a custard that’s warmer than 45°F (7°C). If the base is too warm, the ice cream will take longer to set and may develop ice crystals. I once rushed the chilling step and ended up with a grainy texture that felt like frozen sand. A quick ice‑water bath, as mentioned earlier, drops the temperature fast and preserves that silky mouthfeel.
Why Your Nose Knows Best
When the custard is thickening, trust the aroma. A sweet, buttery scent signals that the proteins are coating properly. If you smell a faint burnt note, you’ve crossed the line into over‑cooking. This sensory cue is more reliable than a thermometer for many home cooks, especially when the stove’s heat fluctuates.
The 5‑Minute Rest That Changes Everything
After churning, let the ice cream sit in the freezer for exactly five minutes before adding the mix‑ins. This short rest firms the base just enough to hold the swirls without them sinking. I tried adding the fudge and peanut butter cups immediately once, and they sank to the bottom, creating a soggy mess. Patience at this stage is the difference between a professional‑grade dessert and a kitchen experiment.
Salted Caramel Finish
A drizzle of sea‑salted caramel right before the final freeze adds a glossy sheen and a flavor contrast that elevates the whole dish. Use a high‑quality caramel that’s thick enough to hold its shape when folded in; runny caramel will blend into the base and lose that beautiful marbled effect. I swear the caramel is the secret handshake between this ice cream and the world’s best desserts.
The Double‑Churn Method
If you have a smaller ice‑cream maker, consider a double‑churn: churn half the base, freeze it for 30 minutes, then combine the two batches and churn again with the mix‑ins. This technique creates an ultra‑creamy texture because the second churn incorporates fresh air, making the final product lighter. I tried it once for a party, and the crowd couldn’t believe it was homemade.
Avoiding Ice Crystals
A tiny splash of vodka (about 1 tablespoon) can be added to the custard before chilling; alcohol lowers the freezing point, which reduces ice crystal formation. This trick is especially useful in warm kitchens where the freezer struggles to keep the ice cream firm. The flavor impact is negligible, but the texture improvement is dramatic.
Creative Twists and Variations
This recipe is a playground. Here are some of my favorite ways to switch things up:
Nutty Banana Bliss
Swap half of the peanut butter cups for sliced banana and add a handful of toasted walnuts. The banana adds a mellow sweetness that pairs beautifully with the salty nuts, making it a perfect summer twist.
Espresso Mocha Madness
Stir in a tablespoon of finely ground espresso powder into the custard before heating, and replace the chocolate fudge with a dark mocha swirl. Coffee lovers will appreciate the deep, bitter undertones that cut through the sweetness.
White Chocolate Raspberry Ripple
Use white chocolate fudge and fold in a raspberry coulis instead of caramel. The bright fruit tang balances the richness, creating a dessert that feels both decadent and refreshing.
Spicy Mexican Mocha
Add a pinch of cayenne and a dash of cinnamon to the custard, then incorporate Mexican chocolate chunks instead of regular fudge. The subtle heat adds an unexpected kick that will wow adventurous eaters.
Vegan Coconut Dream
Replace the dairy with full‑fat coconut milk and coconut cream, use agave syrup instead of sugar, and choose dairy‑free peanut butter cups. The result is a tropical, dairy‑free version that still delivers that classic Moose Tracks crunch.
Storing and Bringing It Back to Life
Fridge Storage
If you plan to serve the ice cream within 24 hours, keep it in an airtight container in the freezer (not the fridge) and let it soften at room temperature for 10‑15 minutes before scooping. This short sit‑out time restores its creamy texture without melting.
Freezer Friendly
For longer storage, cover the surface of the ice cream with a thin layer of melted chocolate or a sheet of parchment paper before sealing the lid. This barrier prevents freezer burn and keeps the mix‑ins from absorbing icy flavors. The ice cream will stay delicious for up to 3 weeks.
Best Reheating Method
When you’re ready to serve after a few days, place the container in a bowl of warm (not hot) water for 30 seconds, then stir in a splash of whole milk or cream. The added liquid re‑emulsifies the base, giving you that original silkiness as if it were freshly churned.