Picture this: I was in the middle of a brunch gathering, the air thick with the scent of toasted coffee and buttery pastries, when I decided to pull a quick dessert from the pantry. I grabbed a tub of marshmallow fluff, a block of cream cheese, and a handful of graham crackers, thinking I could whip up something sweet in minutes. The result? A soggy, lumpy mess that looked more like a dessert disaster than a treat. That night, I stared at the ruined plate, swearing to myself that I would never again let a marshmallow cheesecake slip through my fingers. Fast forward to today, and I’ve cracked the code to a silky, cloud‑like cheesecake that stays firm, melts in your mouth, and leaves everyone begging for the recipe.
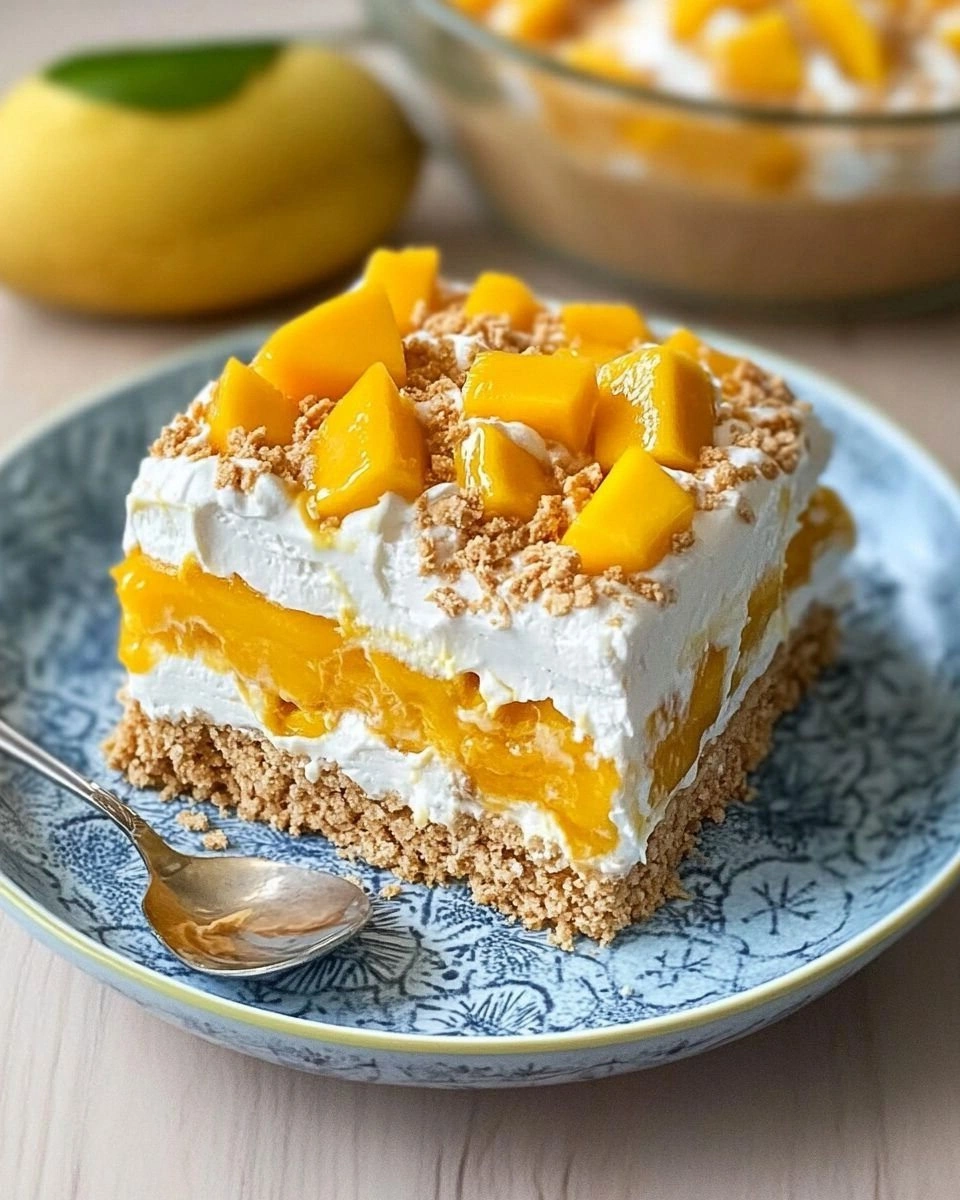
Now, imagine the first bite: the crust gives a satisfying crunch, the creamy layer glides across your palate like velvet, and the sweet marshmallow undertone lingers long after the last crumb. The aroma is a comforting blend of vanilla, toasted graham, and a faint hint of caramelized sugar that makes the whole kitchen feel like a cozy bakery. When you press the cheesecake with your finger, it’s firm yet yields to the gentle pressure, a tactile confirmation that the filling has set perfectly. The sound of a spoon slicing through the smooth center is almost musical, a soft whoosh that signals the dessert’s readiness. Finally, the aftertaste is a subtle, lingering sweetness that invites you to taste again, proving that this dessert is not just a treat but a promise of more indulgence.
This version stands apart because it eliminates the need for a heat source while still achieving a firm, slice‑ready texture. The combination of heavy whipping cream and marshmallow fluff creates a natural stabilizer that locks in the airy fluff without any gelatin or custard base. Unlike other recipes that rely on a double‑boiled custard or a pre‑baked crust, this cheesecake sets in the fridge within thirty minutes, letting you enjoy a fresh dessert at any time. The flavor profile is a harmonious balance between sweet, creamy, and slightly nutty, thanks to the toasted graham cracker base that adds a subtle crunch. And the best part? It’s a crowd‑pleaser that can be assembled in a single bowl, making it a lifesaver for last‑minute parties or a sweet surprise for a loved one.
The secret to its lightness lies in the precise whipping of the cream and the gentle folding of the marshmallow fluff, which trap tiny air pockets that keep the cheesecake airy. I dare you to taste this and not go back for seconds; the texture alone will have you questioning why you ever settled for a dense, over‑baked cheesecake. Picture yourself pulling this out of the fridge, the whole kitchen smelling incredible, and watching friends reach for their forks with a look of pure delight. And now, ready for the game‑changer? Let me walk you through every single step — by the end, you'll wonder how you ever made it any other way.
What Makes This Version Stand Out
- Taste: The cheesecake balances sweet marshmallow, rich cream cheese, and a subtle graham cracker bite, creating a flavor profile that feels indulgent yet sophisticated. The vanilla extract ties everything together, leaving a lingering aroma that beckons for another spoonful.
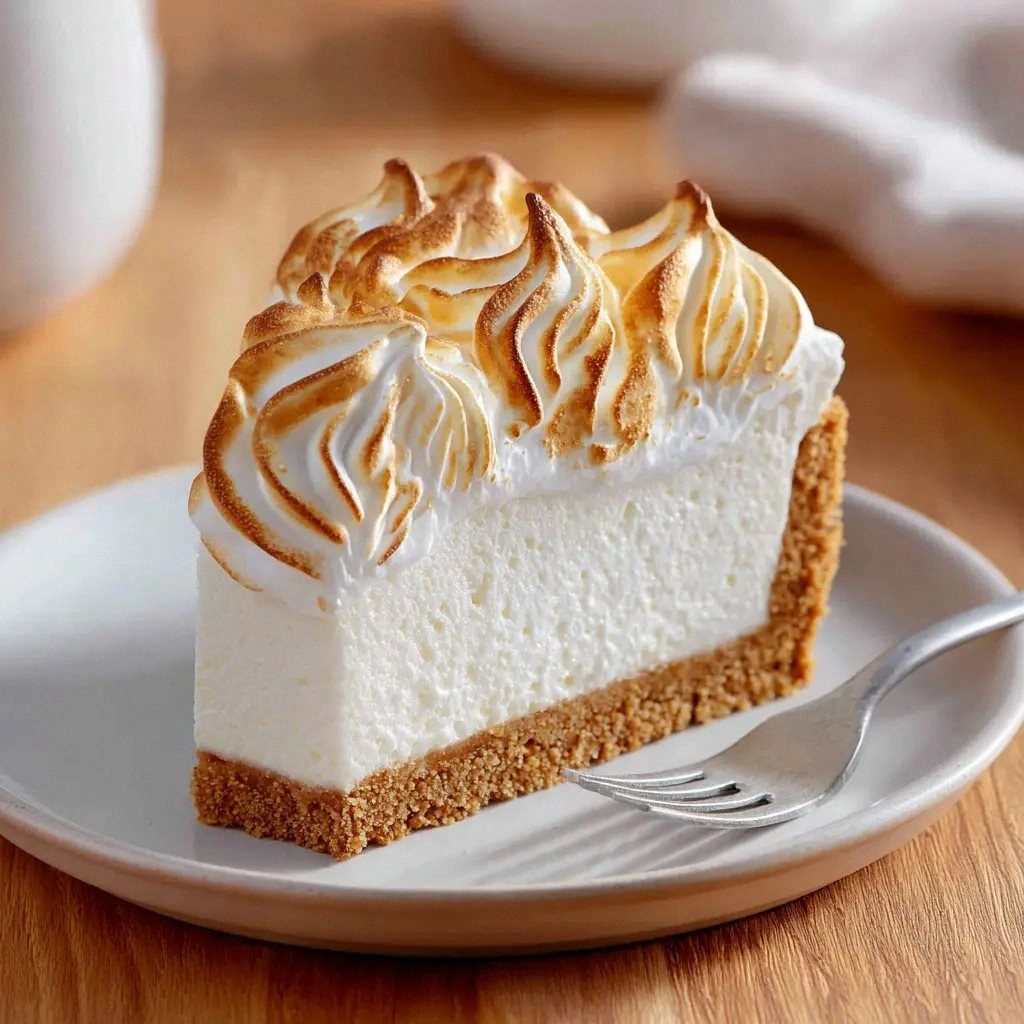
- Texture: The airy filling melts in your mouth like a cloud, while the crust offers a satisfying crunch that contrasts beautifully with the silky interior. The result is a dessert that feels both light and substantial.
- Simplicity: No ovens, no timers, just a handful of ingredients and a few minutes of mixing. This makes the cheesecake an instant go-to for busy evenings or spontaneous gatherings.
- Crowd Reaction: Friends who try this will swear they’ve never tasted a cheesecake that’s both fluffy and firm. The dessert is guaranteed to become a party favorite, sparking conversations and dessert debates.
- Ingredient Quality: Using premium cream cheese and real marshmallow fluff elevates the flavor and ensures a smooth, luxurious mouthfeel. The choice of graham crackers also adds a subtle toasted note.
- Make‑Ahead Potential: The cheesecake can be prepared up to two days in advance, making it a stress‑free option for events or last‑minute plans.
- Unique Twist: The natural stabilizing power of marshmallow fluff eliminates the need for gelatin, giving the dessert a pure, unadulterated sweetness that’s hard to replicate.
Inside the Ingredient List
The Flavor Base
Graham cracker crumbs are the foundation that anchors the cheesecake, providing both structure and a subtle sweet crunch. The crumbs are mixed with a pinch of granulated sugar and melted butter to form a cohesive crust that holds the luscious filling in place. If you skip the butter, the crust will crumble, losing the buttery depth that balances the dessert’s overall sweetness.
The granulated sugar adds a touch of brightness to the crust, preventing it from feeling flat or overly doughy. It also caramelizes slightly when pressed, giving the base a hint of toasty flavor that complements the creamy layers. A small reduction in sugar will still work, but you’ll lose that subtle caramel kick that makes the crust memorable.
The Texture Crew
Cream cheese is the star that provides a rich, tangy backbone to the cheesecake. When it’s at room temperature, it blends smoothly with the other ingredients, preventing lumps and ensuring a silky finish. If you use cold cream cheese, the mixture will become gritty and the final texture will suffer.
Heavy whipping cream is the secret to achieving that airy, cloud‑like quality. When whipped to soft peaks, it incorporates tiny air bubbles that keep the cheesecake light and fluffy. Over‑whipped cream can become too stiff, causing the filling to become rubbery.
Powdered sugar fine‑tunes the sweetness and contributes to the overall smoothness of the filling. Its fine granules dissolve effortlessly, avoiding any gritty texture that might distract from the silky mouthfeel. Replacing it with granulated sugar would require extra stirring and might leave small crystals on the surface.
Vanilla extract adds depth and warmth, binding the flavors together into a cohesive whole. Even a small splash can elevate the entire dessert, giving it a sophisticated finish that feels more like a professionally crafted cheesecake.
The Unexpected Star
Marshmallow fluff is the game‑changer that gives this cheesecake its signature fluffiness. Its airy structure traps air, creating a lightness that is rare in no‑bake desserts. Skipping marshmallow fluff will result in a denser, less buoyant cheesecake that feels like a traditional cream cheese dessert.
The fluff’s mild sweetness also balances the tang of cream cheese, preventing the filling from becoming overly acidic. When folded into the cream, it creates a silky texture that feels almost like a mousse. If you prefer a less sweet option, consider using a low‑sugar marshmallow alternative or reducing the amount slightly.
The Final Flourish
Vanilla extract is more than a flavor enhancer; it acts as a subtle emulsifier that helps bind the cream, sugar, and fluff together. The aromatic profile of vanilla also triggers the brain’s pleasure centers, making each bite feel indulgent without being overpowering. A few drops are enough; overuse can mask the delicate balance of flavors.
Together, these ingredients create a cheesecake that feels luxurious yet approachable. The combination of textures—crisp crust, airy filling, and smooth finish—ensures a satisfying experience with every forkful. The result is a dessert that feels like a sweet cloud in every bite.
Everything's prepped? Good. Let's get into the real action.
The Method — Step by Step
- Start by mixing the graham cracker crumbs, granulated sugar, and melted butter in a bowl until the mixture resembles wet sand. Press the crumb mixture into the bottom of a 9‑inch springform pan, using the back of a spoon or a flat-bottomed glass to compact it evenly. This creates a firm base that will support the creamy filling without sinking. As you press, you’ll hear a satisfying crunch—proof that the crust is ready.
- Let the crust chill in the refrigerator while you prepare the filling. A cold environment helps the cream cheese and heavy cream blend smoothly. The cooler the filling, the better it will set later. While the crust chills, gather all your other ingredients for a seamless workflow.
- In a large bowl, beat the cream cheese until it’s completely smooth and creamy, with no lumps remaining. This ensures a silky filling that won’t have gritty patches. Once the cream cheese is fluffy, gradually add the powdered sugar, mixing until the sugar is fully incorporated. The mixture should feel light and airy.
- Whip the heavy cream to soft peaks in a separate bowl. The peaks should hold a gentle shape but still collapse slightly when you lift the whisk. This level of whipping is key to maintaining the cheesecake’s airy structure without making it too stiff.
- Fold in the marshmallow fluff, using a spatula to gently combine it with the cream cheese and whipped cream. The fluff should be evenly distributed, creating a uniform, velvety texture. This step is where the cheesecake’s signature fluffiness is achieved.
- Pour the filling over the chilled crust, smoothing the top with a spatula. The filling should spread evenly, covering the entire crust surface. Gently tap the pan on the counter to release any air bubbles that might have formed during the transfer.
- Cover the pan with plastic wrap and refrigerate for at least 30 minutes, or until the cheesecake has set firmly. The refrigeration time allows the flavors to meld and the texture to firm up. During this time, the cheesecake will develop a creamy, yet slightly firm consistency.
- After the cheesecake has set, remove the springform ring carefully. Slice with a hot, damp knife to achieve clean cuts. The warm knife helps prevent the cheesecake from tearing or sticking to the blade.
- Optional: Garnish with fresh berries, a drizzle of chocolate ganache, or a dusting of cocoa powder for an extra touch of elegance. The garnish adds visual appeal and a complementary flavor that elevates the dessert. Feel free to experiment with toppings that suit your taste.
The crust’s firmness is crucial; a loose base can cause the cheesecake to wobble and spill when you cut into it. If you prefer a slightly sweeter crust, add a teaspoon of honey to the crumb mixture. The extra moisture will also help the crust set more firmly. Remember to chill the pan for a few minutes after pressing to keep the crust cool.
Chilling the crust also prevents the filling from melting too quickly when poured on top. It creates a temperature gradient that encourages the filling to set more evenly. If you’re short on time, you can skip the chilling step, but the final texture may be slightly less firm. For best results, give the crust a 10‑minute chill.
Use a hand mixer on medium speed to achieve the perfect texture; too high a speed can cause the mixture to over‑whip and become too stiff. If you notice any lumps, pulse the mixer a few times until they dissolve. The goal is a uniform consistency that feels like a thick mousse.
Whipped cream adds volume and a delicate lightness to the filling. If you over‑whip, the cream can separate and create a grainy texture. Keep an eye on the peaks; they should look like a soft cloud, not a firm mound. Once ready, fold the whipped cream into the cream cheese mixture gently.
Be careful not to over‑mix; too much agitation can cause the fluff to lose its airy quality. The mixture should feel like a thick, silky mousse. If you notice pockets of fluff, gently stir them back in with a spatula. The goal is a smooth, cohesive filling.
A level surface ensures an even set and a beautiful finish. If you notice any uneven spots, use a small offset spatula to level the filling. This step also allows you to check for any lumps that might need smoothing out. A smooth top will look more appealing when sliced.
If you’re short on time, you can chill the cheesecake for 20 minutes, but it might not set fully. For the best results, give it a full 30‑minute chill. The longer it sits, the more the flavors deepen and the texture becomes more satisfying.
Serve chilled for the best experience. If you prefer a slightly softer texture, let the cheesecake sit at room temperature for 10 minutes before cutting. The contrast between the chilled filling and the slightly warmer crust creates a delightful mouthfeel.
The cheesecake’s versatility allows you to tailor it to any occasion. For a festive look, top it with a swirl of raspberry coulis. For a summer vibe, sprinkle toasted coconut flakes. The possibilities are endless, and each addition brings a new dimension to the classic.
That’s it — you did it. But hold on, I've got a few more tricks that'll take this to another level. These insider tips will help you avoid common pitfalls and ensure every bite is a flawless experience.
Insider Tricks for Flawless Results
The Temperature Rule Nobody Follows
Temperature is the silent hero in any no‑bake dessert. Keep all your dairy ingredients at room temperature before mixing; this prevents the mixture from separating and ensures a smooth finish. A chilled bowl can cause the cream cheese to firm up too quickly, leading to lumps. By letting the ingredients warm to room temperature, you create a uniform base that blends effortlessly.
Why Your Nose Knows Best
The aroma of the cheesecake is a subtle indicator of its readiness. When the filling has set, the scent will be sweet but not overpowering, with a faint vanilla undertone. If the smell feels too buttery or too sweet, it’s a sign that the mixture might still be too wet. Trust your nose; it’s a reliable guide to the dessert’s perfect texture.
The 5-Minute Rest That Changes Everything
After you remove the cheesecake from the fridge, let it rest at room temperature for five minutes before slicing. This short pause allows the filling to relax, making it easier to cut clean slices without tearing. A friend once skipped this step and ended up with jagged edges that looked like a disaster.
How to Keep It From Becoming Sticky
If you find the cheesecake sticking to the springform ring, lightly coat the ring with a thin layer of powdered sugar or a dusting of cocoa powder before adding the crust. This creates a barrier that keeps the cheesecake from adhering. Alternatively, you can use a silicone ring that is naturally non‑stick.
The Perfect Finish with a Quick Chill
For a glossy finish, chill the cheesecake for an additional 10 minutes before serving. This final chill causes the surface to set slightly, giving it a subtle sheen that looks professional. The extra chill also ensures that the cheesecake holds its shape when plated.
Creative Twists and Variations
This recipe is a playground. Here are some of my favorite ways to switch things up:
Chocolate‑Marshmallow Swirl
Fold in a handful of dark chocolate chips into the filling before pouring it over the crust. The chocolate melts slightly, creating a marbled effect that adds a rich, bittersweet note. This variation is perfect for chocolate lovers who want a creamy yet indulgent treat.
Berry‑Infused Delight
Stir a cup of fresh raspberries or blueberries into the filling for a burst of tartness. The berries add color and a subtle fruitiness that contrasts beautifully with the creamy base. Top with a drizzle of lemon curd for an extra zing.
Salted Caramel Crunch
Swirl in a splash of caramel sauce and sprinkle sea salt flakes on top before chilling. The caramel adds a buttery sweetness while the sea salt provides a salty counterpoint that enhances every bite. This version is a crowd‑pleaser for those who love sweet‑salty combinations.
Peanut Butter Banana Bliss
Blend in a couple of ripe bananas and a tablespoon of peanut butter to the filling. The banana adds natural sweetness and a hint of tropical flavor, while the peanut butter brings a nutty depth. This variation is a delicious, protein‑rich twist.
Coconut Lime Surprise
Add shredded coconut and a splash of lime zest to the filling for a tropical escape. The coconut gives a chewy texture, while the lime zest adds a bright citrus note that lifts the dessert. Finish with a sprinkle of toasted coconut for a crunchy finish.
Storing and Bringing It Back to Life
Fridge Storage
Store the cheesecake in the refrigerator for up to four days in an airtight container. The cold environment keeps the filling firm and prevents bacterial growth. When you’re ready to serve, let it sit at room temperature for ten minutes to soften slightly.
Freezer Friendly
Wrap the cheesecake tightly in plastic wrap and then in a layer of aluminum foil before freezing. It can be kept in the freezer for up to two weeks. Thaw overnight in the refrigerator to maintain its texture and flavor.
Best Reheating Method
Reheat the cheesecake in the microwave on low power for 15‑20 seconds, then let it sit for a minute. If you prefer a warmer dessert, place it in a preheated oven at 300°F for 5 minutes. Add a tiny splash of water before reheating to keep it moist and prevent it from drying out.