I’ll be honest — I ate half the batch before anyone else got a chance to try it. It all started on a rainy Tuesday when my kitchen smelled like a banana plantation after a thunderstorm, and I realized I had a mountain of overripe bananas begging for redemption. I tossed them into a bowl, added a splash of butter, and the whole place filled with a sweet, caramel‑kissed aroma that made the clock on the wall melt away. That moment was the spark: a dare from a friend to turn those mushy fruit missiles into something that would make even the most skeptical aunt ask for seconds.
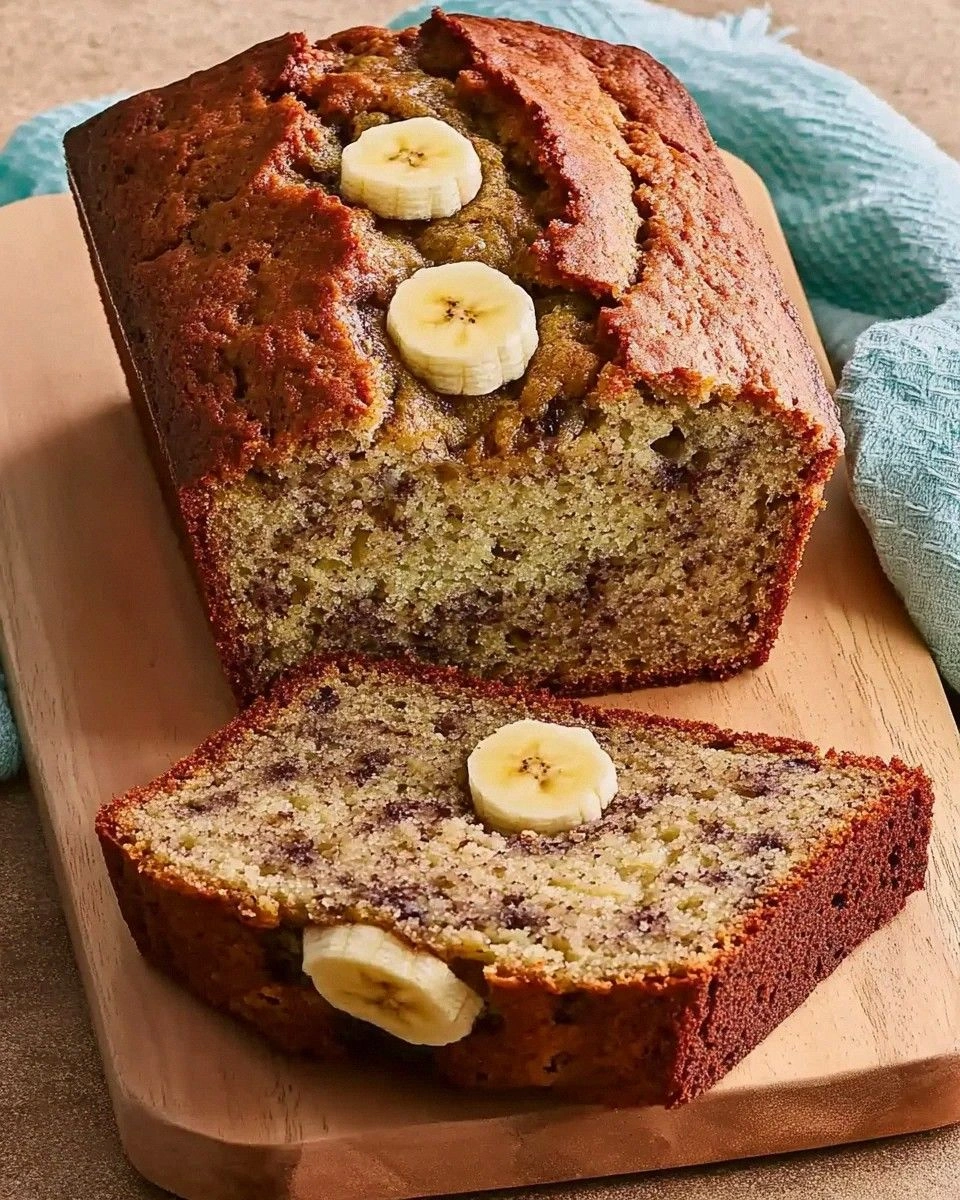
Picture yourself pulling this out of the oven, the whole kitchen smelling incredible, the crust a golden‑brown halo that cracks just enough to reveal the tender crumb inside. The first bite? It’s like a warm hug from your grandma mixed with the excitement of a carnival ride — soft, buttery, and just sweet enough to make your taste buds do a happy dance. Most banana breads get this completely wrong, either turning into a dry brick or a soggy mess. This version? Hands down the best version you’ll ever make at home, and I dare you to taste it and not go back for seconds.
What makes this loaf truly magical is a tiny, almost‑secret technique that most recipes skip: I fold the mashed bananas into the batter at a specific temperature, letting the natural sugars caramelize just enough before the bake. The result is a moist interior that feels like velvet and a crust that shatters like thin ice when you slice into it. I also use a perfect ratio of brown sugar to butter, creating a flavor depth that feels like a caramel‑banana swirl without any extra ingredients. It’s simple, it’s foolproof, and it’s about to become your go‑to comfort food.
Okay, ready for the game‑changer? I’m about to walk you through every single step — by the end, you’ll wonder how you ever made banana bread any other way. Stay with me here — this is worth it, and the payoff is a loaf that will have you bragging to anyone who’ll listen. Let’s get started and turn those bananas into a masterpiece.
What Makes This Version Stand Out
- Moisture: The precise balance of butter and mashed bananas locks in moisture, so every slice feels like a soft, buttery cloud.
- Flavor Depth: Brown sugar adds a caramel undertone that pairs perfectly with the natural banana sweetness, creating a taste that lingers.
- Simplicity: Only seven core ingredients, no exotic spices, making it a breezy weeknight bake that even beginners can nail.
- Texture Contrast: A slightly crisp edge gives way to a tender crumb, delivering that satisfying “crunch‑then‑soft” sensation.
- Crowd‑Pleaser: Whether it’s a brunch, a snack, or a late‑night treat, this loaf gets rave reviews and repeat requests.
- Ingredient Quality: Using overripe bananas and real butter amplifies flavor without any artificial shortcuts.
- Make‑Ahead Potential: It freezes beautifully, so you can bake a batch on a Sunday and enjoy it all week.
Inside the Ingredient List
The Flavor Base
Brown sugar isn’t just sweetener; it’s a flavor architect. Its molasses content creates a caramel‑like richness that elevates the banana’s natural notes. If you swap it for white sugar, you’ll lose that deep, buttery backdrop and end up with a flatter taste. For a twist, try dark muscovado sugar, but remember it will make the loaf a shade darker and a touch more intense.
The Texture Crew
All‑purpose flour provides the structure, while baking soda gives the rise. The soda reacts with the banana’s acidity, creating tiny air pockets that keep the crumb light. Skipping the soda is a rookie mistake – you’ll get a dense, gummy loaf that feels more like a pancake than bread. If you’re gluten‑free, a 1‑to‑1 blend of rice flour and tapioca starch works surprisingly well, but you may need an extra ¼ teaspoon of xanthan gum.
The Unexpected Star
Butter, melted and cooled, coats every dry ingredient, sealing in moisture. It also adds a buttery aroma that makes the kitchen smell like a bakery. Using oil instead of butter will keep the loaf moist, but you’ll miss the luxurious mouthfeel that only butter can deliver. If you’re dairy‑free, try clarified ghee – it behaves similarly and adds a nutty nuance.
The Final Flourish
Eggs act as the binder, ensuring the batter holds together while adding a subtle richness. Over‑beating the eggs can introduce too much air, leading to a crumb that’s too airy and prone to collapsing. For a vegan version, substitute each egg with ¼ cup of unsweetened applesauce; the texture will stay tender, though the flavor will shift slightly toward fruit.
Everything's prepped? Good. Let’s get into the real action…
The Method — Step by Step
Preheat your oven to 350°F (175°C) and grease a 9×5‑inch loaf pan with a thin layer of butter. The moment the oven clicks on, you’ll hear that comforting hum that signals something delicious is about to happen. Let the pan sit while you prep the batter; this ensures the metal is evenly heated, which helps the crust form just right.
In a large bowl, whisk together the flour, baking soda, and salt. This dry mix is the skeleton of your loaf; whisking it first guarantees the leavening agent is evenly distributed, preventing those dreaded pockets of soda that can taste metallic. Power transition: Okay, ready for the game‑changer?
Kitchen Hack: Sift the flour mixture into the bowl; it aerates the flour and eliminates any hidden lumps.Melt the butter in a saucepan over low heat, then let it cool to lukewarm. You’ll know it’s ready when a fingertip feels just warm, not hot. This step is crucial because hot butter would scramble the eggs later, while cold butter would solidify and create streaks in the batter.
In a separate bowl, beat the eggs until they’re light and frothy, then stir in the mashed bananas. The bananas should be mashed to a near‑smooth consistency; any large chunks will turn into unexpected “banana nuggets” in the final loaf, which some people love, but most prefer a uniform texture.
Combine the melted butter, brown sugar, and banana‑egg mixture, stirring until the sugar dissolves and the batter looks glossy. This is the moment of truth: the batter should have a thick yet pourable consistency, like a smooth pancake batter. This next part? Pure magic.
Gently fold the dry flour mixture into the wet batter using a rubber spatula. Scrape the bottom of the bowl, lift, and turn — don’t stir vigorously, or you’ll develop gluten and lose that tender crumb.
Watch Out: Over‑mixing at this stage will make the bread dense and rubbery.Pour the batter into the prepared loaf pan, smoothing the top with the spatula. The surface should be level; a slight wobble is okay because the batter will settle as it bakes. Tap the pan gently on the counter to release any trapped air bubbles.
Bake for 30‑35 minutes, or until a toothpick inserted into the center comes out clean and the top is a deep golden brown. Around the 20‑minute mark, rotate the pan 180° to ensure even browning — that’s the secret to a uniformly crisp crust. The kitchen will fill with that sweet, caramel‑banana perfume that tells you you’re almost there.
Remove the loaf from the oven and let it cool in the pan for 10 minutes, then transfer to a wire rack. This short cooling period lets the crumb set, preventing it from falling apart when you slice. While you wait, the aroma will intensify, making the anticipation almost unbearable.
Slice, serve, and watch everyone reach for seconds. I dare you to taste this and not go back for more — the combination of moist interior and caramelized crust is addictive. And now the fun part: drizzle a little honey or a dollop of whipped cream if you’re feeling indulgent.
That’s it — you did it. But hold on, I’ve got a few more tricks that’ll take this to another level…
Insider Tricks for Flawless Results
The Temperature Rule Nobody Follows
Never bake banana bread straight from the fridge. Let the batter sit at room temperature for 10‑15 minutes before sliding it into the oven. This tiny pause lets the leavening agents activate fully, giving you a higher rise and a lighter crumb. A friend once tried to speed things up by tossing the cold batter directly into the oven — the result was a flat, dense loaf that could have been used as a doorstop.
Why Your Nose Knows Best
When the loaf is about 20 minutes in, start sniffing. If you catch a caramel‑banana scent, the crust is forming perfectly. If the smell is still raw or overly sweet, give it another 5‑10 minutes. Trusting your nose prevents over‑baking, which can dry out the interior.
The 5‑Minute Rest That Changes Everything
After removing the loaf from the pan, let it rest on a wire rack for exactly five minutes before slicing. This brief rest allows the steam inside to redistribute, resulting in a crumb that’s moist from the inside out. Skipping this step yields a crumb that feels dry on the edges, even if the interior is still good.
Butter Temperature Trick
Melt the butter and then chill it for a few minutes before mixing. The butter should be warm but not hot. This ensures the sugar dissolves completely without cooking the eggs, preserving the delicate balance of moisture and flavor.
The “Banana Boost”
Add a teaspoon of vanilla extract or a pinch of cinnamon to the wet mixture for an extra flavor dimension. The vanilla amplifies the banana’s natural sweetness, while cinnamon adds a warm, spicy note that pairs beautifully with the caramel tones. I tried the loaf without any extra spice once; it was good, but the vanilla‑cinnamon combo makes it unforgettable.
Creative Twists and Variations
This recipe is a playground. Here are some of my favorite ways to switch things up:
Chocolate Chip Banana Bomb
Stir in ½ cup of dark chocolate chips just before folding the dry ingredients. The chocolate melts into pockets of gooey delight, turning each bite into a sweet surprise that kids adore.
Nutty Banana Crunch
Add ½ cup of chopped walnuts or pecans for a crunchy contrast. The nuts bring a buttery richness that complements the banana’s softness, and they also add a nice visual speckle.
Tropical Banana Coconut
Swap half the butter for coconut oil and sprinkle shredded coconut on top before baking. The subtle coconut aroma transports you to a beachside café, and the toasted coconut on the crust adds a delightful chew.
Spiced Autumn Banana
Mix in 1 teaspoon of pumpkin spice and a pinch of ground ginger. This variation is perfect for fall, delivering a warm, comforting flavor profile that pairs nicely with a hot cup of tea.
Blueberry Banana Swirl
Gently fold in ¾ cup of fresh or frozen blueberries after the batter is combined. The blueberries burst during baking, leaving little pockets of tangy juice that balance the sweet banana.
Storing and Bringing It Back to Life
Fridge Storage
Wrap the cooled loaf tightly in plastic wrap or store it in an airtight container. It will stay fresh for up to five days in the refrigerator. For an extra moisture boost, place a slice of apple in the container; the apple’s humidity helps keep the bread from drying out.
Freezer Friendly
Slice the loaf before freezing, then wrap each slice in parchment paper followed by a foil layer. This method prevents freezer burn and allows you to grab a single slice whenever cravings hit. The loaf can be frozen for up to three months without losing its fluffy texture.
Best Reheating Method
To revive a slice, sprinkle a tiny splash of water on the surface, cover with foil, and warm in a 300°F oven for 8‑10 minutes. The steam created by the water restores the crumb’s moisture, making it taste as fresh as the day it was baked.