I still remember the year I swore off Christmas baking after my gingerbread cookies came out looking like sad, misshapen reindeer. The kitchen looked like a snowstorm had exploded, my mixer was smoking, and the neighbor's kid took one bite and politely asked if he could feed them to their dog. Fast forward to December last year: I'm standing in my kitchen at midnight, snow falling outside, and these Festive Frosted Christmas Brownies are cooling on the counter. The smell of deep chocolate and peppermint is so intoxicating that my roommate wandered out in her pajamas, eyes half-closed, following her nose like a cartoon character. She took one bite, muttered something that sounded like "holy mistletoe," and promptly sat on the floor to eat three more squares right there. That, my friends, is the moment I knew I had cracked the code to holiday dessert perfection.
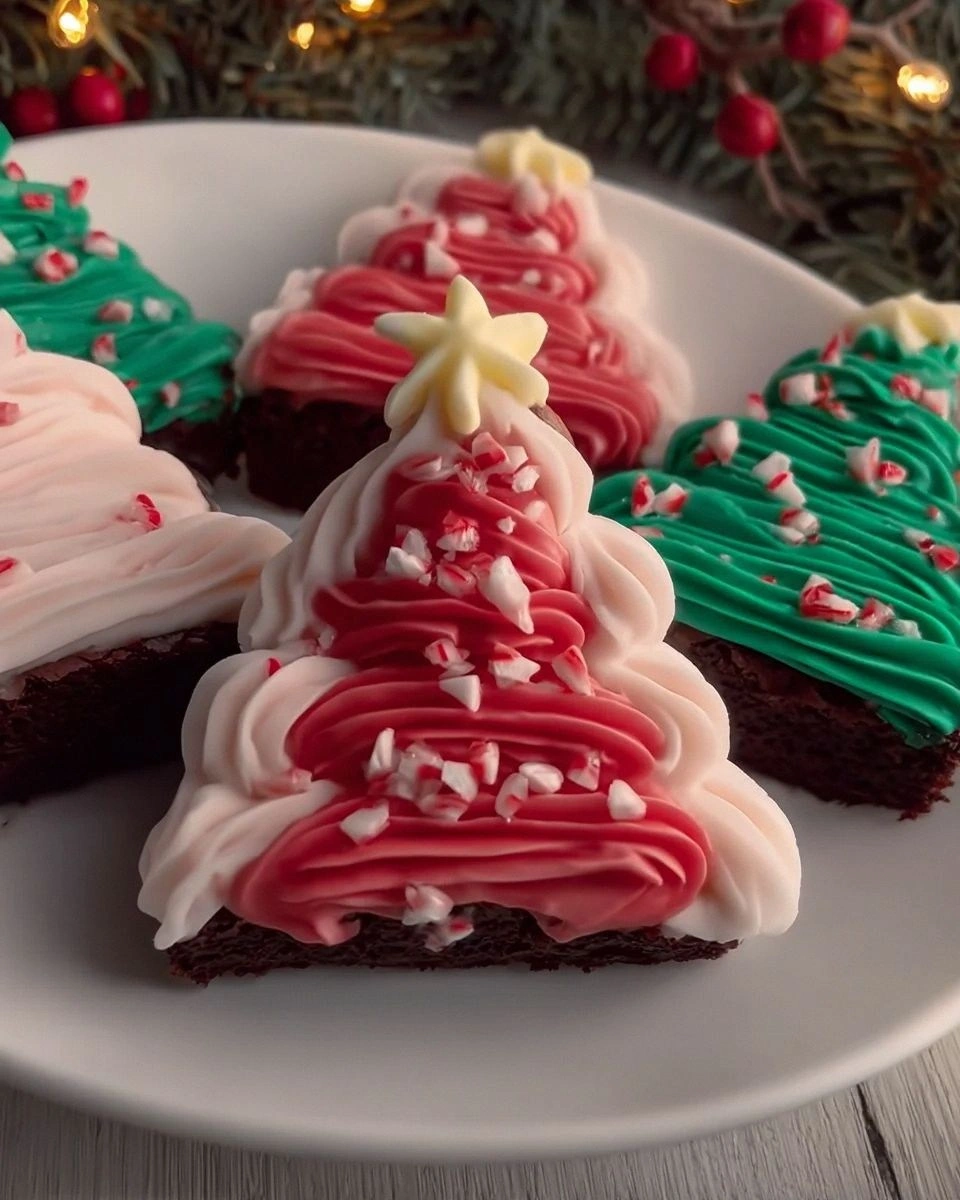
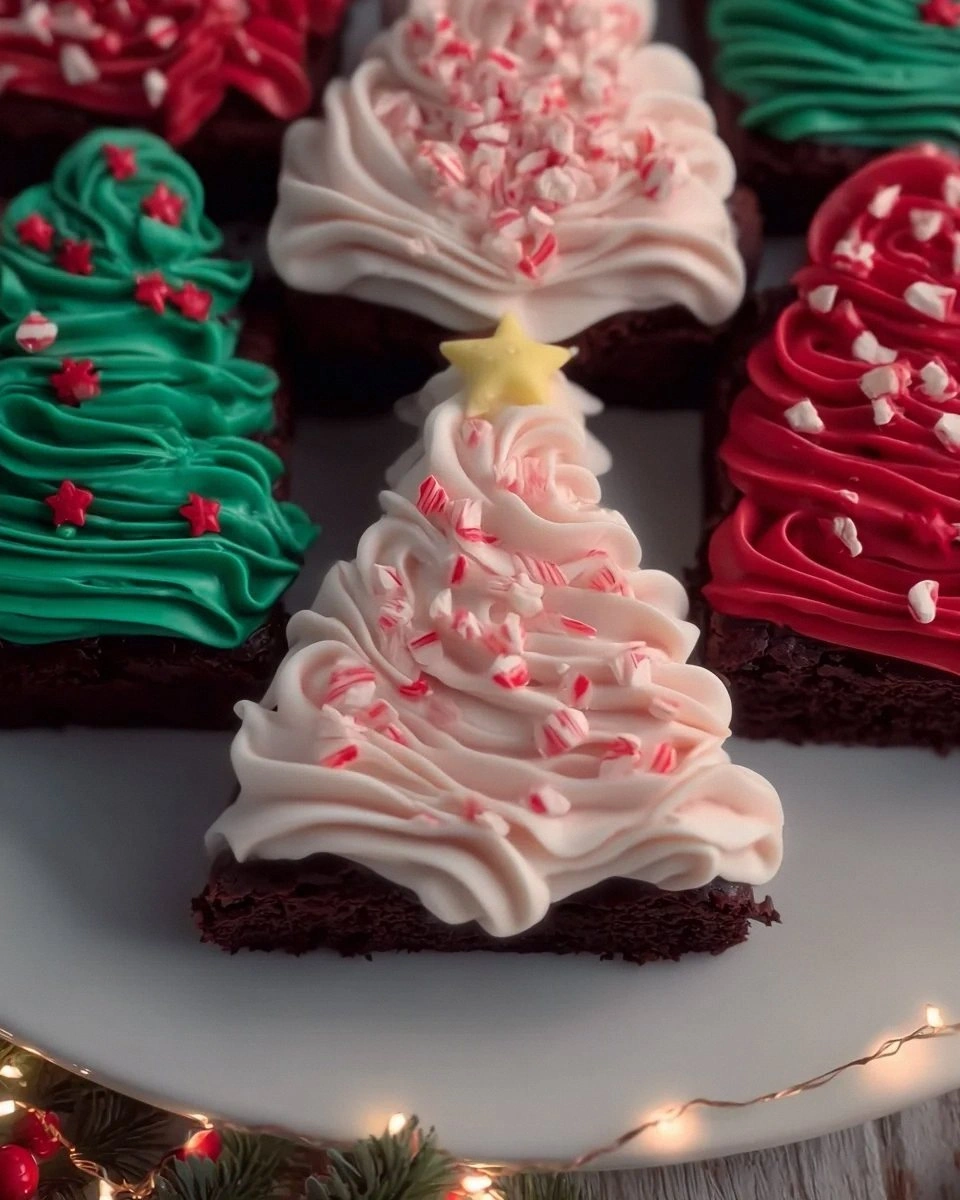
Most Christmas brownies are dry, cakey afterthoughts that taste like someone just added red and green sprinkles to a box mix and called it festive. This version? It's the love child of a fudgy French chocolate torte and a winter wonderland, with crackly tops that shatter like thin ice and centers so moist they practically sigh when you cut them. The secret isn't just in the chocolate (though we're using the good stuff), but in how we treat every ingredient like it matters — because it does. Picture this: a brownie so rich and decadent that it makes your holiday cookies jealous, topped with a peppermint cream cheese frosting so fluffy it could double as a winter cloud, finished with crushed candy canes that sparkle like fresh snow under twinkling lights.
Here's the thing — I dare you to taste these and not go back for seconds. I double-dog dare you, because I've watched grown adults hide these from their own children. The magic isn't just in the eating, though that's spectacular enough. It's in the making: the way your kitchen transforms into a Christmas bakery, the anticipation as they cool, the pride when you lift that first perfect square and see those clean, beautiful edges. If you've ever struggled with dry, crumbly brownies or frosting that melts into a sad puddle, you're not alone — and I've got the fix that's about to become your holiday legacy.
Okay, ready for the game-changer? We're going to brown the butter first, which sounds fancy but is actually just you watching butter dance in a pan until it smells like toasted nuts and caramel had a baby. Then we're using both cocoa powder AND melted chocolate, because why choose when you can have depth and intensity? The frosting gets its structure from a secret ingredient that keeps it stable even if your kitchen hits tropical temperatures. And that shiny, crackly top? It's not just for looks — it's your signal that you've achieved brownie nirvana. Let me walk you through every single step — by the end, you'll wonder how you ever made it any other way.
What Makes This Version Stand Out
Unapologetically Fudgy: These aren't those sad, cakey brownies that crumble like desert sand. We're talking dense, moist, stick-to-your-teeth fudgy that melts on your tongue like chocolate ice cream on a hot sidewalk. The secret ratio of butter to chocolate creates a texture so luxurious, you'll want to wrap yourself in it like a chocolate blanket.
Double-Down Chocolate: Most recipes cheap out with just cocoa powder and taste like disappointment. We're using both premium cocoa AND real melted chocolate, creating layers of flavor that hit you like a chocolate tsunami. It's the difference between hearing music through phone speakers versus a concert hall — same song, completely different experience.
Peppermint That Punches: Not that wimpy, fake mint extract that tastes like toothpaste. We're using real peppermint oil and crushed candy canes that give you bright, clean mint flavor with actual depth. It's like the difference between a snowflake and a snowball — both cold, but one has way more impact.
Foolproof Frosting: This isn't the grainy, too-sweet stuff that slides off in warm weather. Our cream cheese base stays fluffy for days, pipes like a dream, and holds its shape even when your kitchen hits sauna temperatures. Plus, it balances the rich chocolate like a perfect dance partner.
Make-Ahead Magic: These actually get better after a day in the fridge — if they last that long. The flavors meld, the frosting sets, and you can slice them into perfect squares without any crumbling disasters. Perfect for holiday entertaining when you need dessert done ahead of time.
Crowd-Wowing Presentation: Those clean edges, that glossy top, the snow-like dusting of crushed candy canes — these look like they came from a fancy bakery. Your guests will think you secretly attended culinary school, but really, you just followed a recipe that understands that we eat with our eyes first.
Alright, let's break down exactly what goes into this masterpiece...
Inside the Ingredient List
The Flavor Base
Butter is the foundation of everything good in this world, and here it gets the VIP treatment. We're browning eight ounces of unsalted butter until it transforms from ordinary dairy into liquid gold that smells like toasted hazelnuts and caramel. This isn't just about being fancy — browned butter adds nutty, complex depth that makes regular melted butter taste flat and sad by comparison. The milk solids toast and caramelize, creating hundreds of new flavor compounds that regular butter can only dream about. Skip this step and you'll still get good brownies, but you'll miss that haunting background note that makes people close their eyes when they taste these.
Dutch-processed cocoa powder is our chocolate backbone, providing that deep, sophisticated chocolate flavor without any bitterness. The Dutch processing removes acidity and creates a smoother, more mellow chocolate taste that plays beautifully with the peppermint. Don't substitute natural cocoa here — it has a sharper, more acidic bite that can clash with the mint and make your brownies taste harsh. Look for brands like Valrhona or Droste for the best results; they dissolve smoothly and give you that restaurant-quality chocolate depth.
The Texture Crew
Eggs do the heavy lifting in the texture department, providing structure and that fudgy richness we crave. We're using three large eggs plus one extra yolk — the yolk adds fat and emulsifiers that make the brownies extra tender and rich. Room temperature eggs incorporate more smoothly, so pull them out an hour before baking or give them a quick warm bath in a bowl of hot water for five minutes. Cold eggs can seize up your melted chocolate faster than you can say "lumpy brownies."
Sugar isn't just sweetener — it's texture insurance. We're using a combination of granulated sugar for structure and brown sugar for moisture and chewiness. The brown sugar adds molasses notes that complement the chocolate beautifully, while its natural humectants keep your brownies moist for days. Don't reduce the sugar thinking you're being healthy — sugar affects texture, moisture, and shelf life, not just sweetness.
The Unexpected Star
Espresso powder is our secret weapon — just one teaspoon amplifies the chocolate flavor without making anything taste like coffee. It's like turning up the volume on your chocolate; the bitterness enhances cocoa's natural complexity while adding roasted depth that makes the peppermint pop. If you don't have espresso powder, instant coffee works in a pinch, but go easy — you want background notes, not a mocha situation.
The Final Flourish
Peppermint extract is where most recipes go wrong — they dump in too much and suddenly you're eating a York Patty. We're using just enough to brighten the chocolate without overwhelming it, plus real crushed candy canes for texture and visual appeal. Look for pure peppermint extract, not artificial mint flavoring. The real stuff costs a bit more but tastes clean and bright, not like toothpaste or mouthwash.
Everything's prepped? Good. Let's get into the real action...
The Method — Step by Step
- Start by browning your butter in a medium saucepan over medium heat. This is the moment of truth, so don't walk away from the stove. The butter will melt, then foam, then start making little popping sounds as the water evaporates. Keep swirling the pan — within 5-7 minutes, you'll see golden brown specks forming and smell something incredible, like toasted nuts and caramel. Pull it off the heat immediately when it turns amber and smells nutty — it goes from perfect to burnt faster than you can say "holiday disaster."
- While the butter cools slightly, prep your 8x8 pan with parchment paper, leaving overhang on two sides like handles. This little trick will save you from brownie breakage later — you'll lift out perfect squares like a professional baker. Spray the parchment with non-stick spray too, because we're not taking any chances with our precious cargo sticking.
- In a heatproof bowl, combine your chopped chocolate with the still-warm browned butter. The residual heat will melt the chocolate perfectly — no need for a double boiler. Stir until smooth and glossy, then let it cool for about five minutes. You want it warm but not hot enough to scramble your eggs when they hit the bowl.
- Whisk in both sugars until the mixture looks like thick, glossy chocolate pudding. This step dissolves the sugars and starts building that shiny, crackly top we all love. Take your time here — a full minute of whisking makes all the difference between good brownies and legendary ones. The mixture should feel slightly warm but not hot when you touch it.
- Beat in your eggs one at a time, whisking until each is fully incorporated before adding the next. Then add the yolk and vanilla, whisking until the mixture is thick and glossy like liquid fudge. This is where the magic happens — properly incorporated eggs create that perfect fudgy texture that makes people close their eyes when they bite in.
- Sift in your cocoa powder, flour, and salt, then gently fold with a spatula just until no dry streaks remain. This is where most people go wrong — overmixing develops gluten and gives you cakey brownies. Mix just until combined, even if it looks a bit rustic. Those tiny flour pockets will disappear during baking, I promise.
- Bake at 350°F for 25-30 minutes, rotating the pan halfway through. The edges should look set and slightly puffed, while the center still has a gentle wobble. A toothpick inserted two inches from the edge should come out with a few moist crumbs — not wet batter, but not completely clean either. This is your signal that you've achieved brownie perfection.
- Cool completely in the pan on a wire rack — I know it's torture, but cutting warm brownies is a recipe for a crumbly mess. The waiting is actually the hardest part of this whole recipe. I've been known to set a timer and walk away because otherwise I'll keep poking them like a toddler checking if cookies are done.
That's it — you did it. But hold on, I've got a few more tricks that'll take this to another level...
Insider Tricks for Flawless Results
The Temperature Rule Nobody Follows
Room temperature ingredients aren't just baking snobbery — they're the difference between smooth, glossy batter and a curdled mess that bakes up greasy. Pull your eggs out an hour before baking, or give them a five-minute warm water bath if you're impatient like me. Cold eggs hitting warm chocolate can seize it up faster than you can say "lumpy disaster," creating hard chocolate chunks that never quite incorporate. Same goes for cream cheese in the frosting — cold cream cheese creates a lumpy, curdled-looking mess that no amount of beating will smooth out.
Why Your Nose Knows Best
Don't rely on the timer alone — your nose is the most reliable kitchen tool you own. When these brownies are perfectly baked, your kitchen will smell like a chocolate factory had a baby with a candy cane. That moment when the aroma hits its peak intensity? That's usually when they're done. If you smell chocolate but also a hint of toasty, nutty goodness, you've nailed it. If you smell anything approaching burnt, you've gone too far and need to rescue them immediately.
The 5-Minute Rest That Changes Everything
After mixing your batter, let it rest for five minutes before pouring into the pan. This brief pause allows the flour to hydrate fully and the chocolate to cool slightly, creating that glossy, crackly top that makes bakery brownies so Instagram-worthy. It's like letting a good wine breathe — the flavors meld and develop, plus you get that professional-looking finish that makes people think you went to culinary school when really you just learned to wait five minutes.
The Storage Secret That Keeps Them Perfect
Here's what nobody tells you — these brownies actually improve after a day in the fridge. The flavors meld and deepen, the frosting sets perfectly, and they slice like a dream. Store them in an airtight container with parchment between layers, and they'll stay moist for up to five days. Just pull them out 30 minutes before serving so they lose that refrigerator chill and the chocolate flavor can bloom. A friend tried skipping this step once — let's just say it didn't end well, and she ended up eating half the pan herself because "they weren't good enough to share."
Creative Twists and Variations
This recipe is a playground. Here are some of my favorite ways to switch things up:
White Chocolate Wonderland
Swap the semisweet chocolate for white chocolate and add dried cranberries instead of candy canes. The result is like Christmas morning in brownie form — sweet, tart, and totally addictive. The white chocolate creates a vanilla-caramel base that makes the peppermint taste like fresh snow, while the cranberries add jewel-like color and tartness that cuts through the richness.
Mocha Mint Madness
Add two tablespoons of instant espresso powder and substitute coffee for the vanilla. The coffee amplifies the chocolate to eleven while adding roasted depth that makes the peppermint taste like a sophisticated after-dinner mint. Top with chocolate-covered espresso beans for a brownie that'll keep you jolly through the whole holiday season.
Salted Caramel Swirl
Skip the peppermint entirely and swirl in homemade salted caramel before baking. The sweet-salty combination is like a hug from your favorite aunt — comforting, indulgent, and impossible to resist. Finish with a sprinkle of flaky sea salt on top for that bakery-style sophistication that makes people think you spent hours on these.
Orange Chocolate Dreams
Add the zest of one orange and substitute orange extract for the peppermint. The combination of chocolate and orange is like liquid Christmas in Europe — sophisticated, bright, and totally unexpected. Candied orange peel on top adds professional flair and that artisanal touch that makes these gift-worthy.
Nutty Holiday
Fold in toasted pecans or walnuts before baking for a textural twist that adds crunch to all that fudgy richness. The nuts toast while baking, creating pockets of nutty flavor that complement the chocolate like they were made for each other. Perfect for those who like their desserts with a bit of crunch.
Gluten-Free Glory
Substitute the all-purpose flour with a good gluten-free blend — I've had great results with King Arthur's measure-for-measure flour. Nobody will know the difference, and you'll be the hero of every gluten-free guest at your holiday table. Just be sure to check that your candy canes are gluten-free too.
Storing and Bringing It Back to Life
Fridge Storage
These brownies keep beautifully in the fridge for up to five days — if they last that long. Store them in an airtight container with parchment paper between layers to prevent the frosting from sticking. The cold actually helps set the frosting and makes them slice like a dream. Just remember to pull them out 30 minutes before serving so they can come to room temperature and the chocolate flavor can fully bloom. Cold chocolate tastes flat and dull, but at room temperature, it's like someone turned up the volume on all the flavors.
Freezer Friendly
These freeze like champions — perfect for making ahead during your holiday prep marathon. Cut them into squares, layer between parchment in an airtight container, and they'll keep for up to three months. Pro tip: freeze them unfrosted, then add the frosting after thawing for maximum freshness. Thaw overnight in the fridge, then frost fresh when you're ready to serve. They'll taste like you just baked them, and nobody needs to know you made them weeks ago while watching holiday movies in your pajamas.
Best Reheating Method
Room temperature is best for these beauties, but if you must reheat, do it gently. A 10-second zap in the microwave brings them back to that fresh-baked texture without melting the frosting into a sad puddle. Better yet, pop them in a 300°F oven for 5 minutes — this warms them through while keeping the frosting intact. Add a tiny splash of water before reheating — it steams back to perfection and prevents the edges from drying out like old cake.