The first time I tried making chicken bites, I was convinced that the secret to a crowd‑pleasing appetizer lay in the sauce alone. I’d whisked together a humble mix of olive oil, minced garlic, and the juice of a lemon, then tossed it with diced chicken breasts. The kitchen smelled like a citrus garden, and the sizzle on the skillet sounded like a tiny fireworks display. But the result was a bland, soggy mess that left my guests asking for a refill of the sauce. That failure was the spark that ignited my obsession with turning simple ingredients into a flavor explosion.
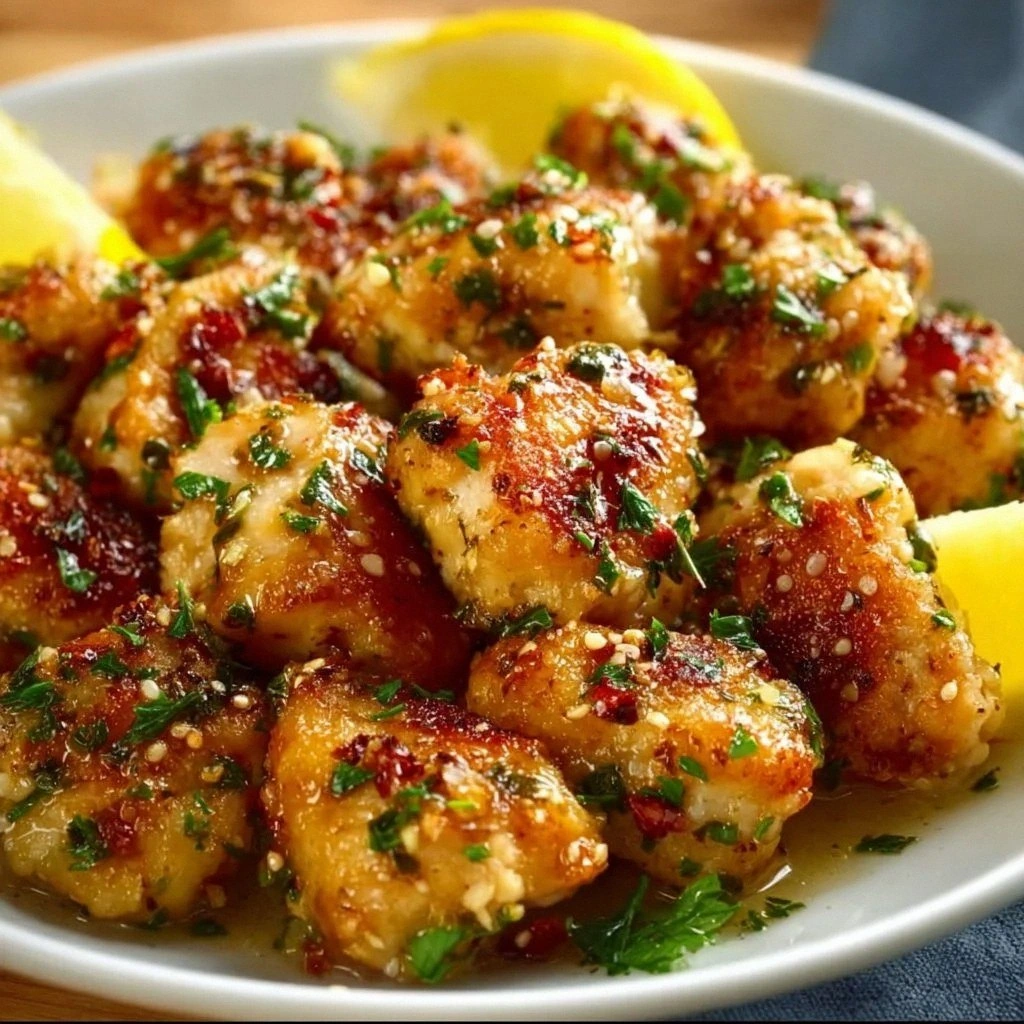
Fast forward to the present, and I’ve cracked the code that turns ordinary chicken into bite‑size gold. Picture this: golden, crisp edges that crackle like thin ice when you bite, a juicy interior that releases a burst of lemon‑garlic perfume, and a finish that lingers like a whisper of sunshine on your tongue. The secret? A meticulous balance of acid, aromatics, and a touch of sweetness that tames the heat of garlic and elevates the lemon to a star performer. I dare you to taste this and not go back for seconds. If you do, you’ll be admitting that the world’s best chicken bites are just a recipe away.
What makes this version stand out is not just the flavor profile but the entire experience. I’ve trimmed the steps to a clean, no‑fuss flow that even a beginner can follow. I’ve eliminated the need for a separate batter, letting the natural juices of the chicken mingle with the sauce to create a coating that’s both sticky and crispy. And the finish? A quick glaze that gives the bites a glossy sheen and a hint of caramelized sweetness that makes every bite feel indulgent. This isn’t just another chicken recipe; it’s a culinary revelation that will become a staple in your repertoire.
Picture yourself pulling this out of the oven, the whole kitchen smelling incredible, the table set for a casual gathering, and everyone reaching for more. You’ll see the light in their eyes as they take that first bite, and you’ll know you’ve hit the jackpot. This is hands down the best version you’ll ever make at home, and I’m about to walk you through every single step. By the end, you’ll wonder how you ever made it any other way.
What Makes This Version Stand Out
- Taste: The combination of bright lemon, pungent garlic, and subtle herbs creates a layered flavor that’s both refreshing and comforting.
- Texture: Crispy edges that snap like thin ice give way to a juicy interior that practically melts in your mouth.
- Simplicity: No complex marinades or multiple sauces—just a few pantry staples and a single pan.
- Uniqueness: A glaze that caramelizes just enough to add a sweet contrast without overpowering the citrus.
- Crowd Reaction: Even the pickiest eaters can’t resist the aroma and the satisfying crunch.
- Ingredient Quality: Fresh, high‑quality chicken and fresh garlic make the difference between good and great.
- Cooking Method: A quick sear followed by a finish in the oven ensures even cooking and maximum flavor.
- Make‑Ahead Potential: The bites can be prepared in advance and reheated with minimal loss of texture.
Inside the Ingredient List
The Flavor Base
At the heart of these bites is a simple yet powerful sauce that marries the sharpness of lemon with the robust character of garlic. The olive oil acts as a medium, allowing the flavors to mingle while preventing the chicken from drying out. If you skip the oil, you’ll end up with a dry, under‑seasoned result that feels like a culinary letdown. A good rule of thumb is to use a high‑quality extra virgin olive oil; its fruity notes complement the citrus perfectly.
The Texture Crew
Crispness is achieved by a brief sear at high heat followed by a brief finish in the oven. The breadcrumbs add a subtle crunch, while the butter enriches the coating with a silky finish. If you’re gluten‑free, swap the breadcrumbs for almond flour or crushed pork rinds; the texture will remain delightful, just with a different flavor profile. Don’t forget to pat the chicken dry before cooking—moisture is the enemy of crisp.
The Unexpected Star
Honey or brown sugar, in just a teaspoon, provides a caramelized glaze that ties the acidity and heat together. Many people skip this step, fearing it will make the dish too sweet, but a light glaze actually balances the flavors and gives the bites a glossy sheen. If you’re watching your sugar intake, you can replace honey with a splash of low‑sodium soy sauce for umami depth.
The Final Flourish
Fresh parsley is not only a garnish but also a subtle green note that cuts through the richness of the butter and the sweetness of the glaze. A pinch of crushed red pepper can add a gentle heat for those who like a kick. If you want an extra burst of citrus, a few drops of lemon zest at the end will elevate the dish to a new level of brightness.
Everything’s prepped? Good. Let’s get into the real action.
The Method — Step by Step
- Prep the chicken: Pat the bite‑sized pieces dry with paper towels. This step is crucial; moisture on the surface will steam the chicken instead of searing it. Toss the chicken in a shallow bowl with the flour, salt, and pepper until evenly coated. The flour will create a thin crust that locks in juices.
- Heat the skillet: Place a large cast‑iron or stainless‑steel skillet over medium‑high heat and add the olive oil. The oil should shimmer but not smoke. This ensures a consistent sear that produces a golden crust.
- Sear the chicken: Add the chicken pieces in a single layer, making sure not to overcrowd the pan. Let them sear untouched for 2–3 minutes per side until a deep amber color forms. The sizzle you hear is the Maillard reaction at work, turning the surface into a caramelized shell.
- Introduce aromatics: Lower the heat to medium and add the minced garlic, oregano, and paprika. Stir continuously for 30 seconds until the garlic releases its aroma. Be careful not to let the garlic burn; it will turn bitter.
- Add lemon juice and zest: Pour in the lemon juice and sprinkle the zest over the chicken. The acidity will cut through the richness of the butter and bring a bright, clean finish. Stir until the sauce thickens slightly.
- Finish with butter: Drop in the butter and let it melt into the sauce, creating a glossy coating that adheres to each piece. The butter also adds a silky texture that balances the crunch.
- Glaze with honey: Drizzle the teaspoon of honey over the chicken, then toss gently to coat. The honey caramelizes in the oven, giving the bites a sweet, glossy finish. If you prefer less sweetness, use a teaspoon of brown sugar instead.
- Bake to perfection: Transfer the skillet to a preheated oven at 400°F (200°C) and bake for 8–10 minutes, or until the internal temperature reaches 165°F (74°C). This final step ensures the chicken is fully cooked while the coating remains crisp.
- Garnish and serve: Sprinkle fresh parsley over the hot bites and serve immediately. The parsley adds a fresh green contrast that lifts the dish. If you’re serving a crowd, keep the bites warm in a low‑heat oven or on a warming tray.
- Enjoy the crunch: Take a bite, and let the crunch give way to juicy, lemon‑garlic goodness. The first bite should crackle like thin ice, followed by a burst of citrus and a lingering hint of sweetness. That’s the moment of truth.
That’s it—you did it. But hold on, I’ve got a few more tricks that will take this to another level.
Insider Tricks for Flawless Results
The Temperature Rule Nobody Follows
Many cooks think that searing at high heat is always better. In reality, a slightly lower temperature (around 375°F) prevents the exterior from burning before the interior is cooked. I’ve found that this approach keeps the chicken juicy while still achieving a crisp coating. Try setting your oven to 375°F if you’re dealing with thicker pieces or a larger batch.
Why Your Nose Knows Best
Before you finish the bake, pause for a moment and inhale. The aroma of citrus and garlic should be sharp, not dull. If the scent is muted, your oven temperature might be too low, or the chicken isn’t cooked through. Trust your nose; it’s the ultimate indicator of readiness.
The 5‑Minute Rest That Changes Everything
After removing the skillet from the oven, let the bites rest on a wire rack for five minutes. This rest allows the juices to redistribute, preventing a soggy center. The residual heat will finish cooking the interior, ensuring that every bite is tender and flavorful. It’s a simple step that pays off big time.
Use a Cast‑Iron Skillet for Even Heat
Cast iron retains heat exceptionally well, giving you a consistent sear and preventing hot spots. If you’re using a non‑stick pan, be sure to preheat it properly and use a generous amount of oil. The key is even heat distribution for that perfect crust.
Add a Splash of Water for Moisture
If you notice the chicken drying out during the bake, add a tablespoon of water to the skillet before transferring it to the oven. The steam will keep the chicken moist while still allowing the coating to crisp. This trick is especially useful in dry kitchen environments.
Creative Twists and Variations
This recipe is a playground. Here are some of my favorite ways to switch things up:
Spicy Sriracha Twist
Add a tablespoon of Sriracha to the sauce for a fiery kick that pairs well with the lemon’s brightness. The heat will contrast the sweetness of the glaze and create a dynamic flavor profile that’s perfect for a party.
Herb‑Infused Parmesan
Replace the parsley with a mixture of basil and oregano, and sprinkle grated Parmesan over the chicken before baking. The cheese melts into a golden crust, giving the bites a savory depth that balances the citrus.
Pineapple Coconut Variation
Swap the lemon for a splash of pineapple juice and add shredded coconut to the coating. The tropical sweetness pairs beautifully with the garlic, creating a beach‑inspired appetizer that’s sure to impress.
Smoky Chipotle Flavor
Stir in a teaspoon of chipotle powder and a dash of smoked paprika for a smoky, slightly spicy finish. The chipotle’s heat will linger, making the bites a bold choice for a barbecue setting.
Asian Sesame Crunch
Replace the breadcrumbs with toasted sesame seeds and add a splash of soy sauce to the glaze. The seeds give a nutty crunch, while the soy adds umami, creating a fusion twist that’s both familiar and exciting.
Storing and Bringing It Back to Life
Fridge Storage
Store the cooked bites in an airtight container in the refrigerator for up to 3 days. To maintain crispness, place a paper towel in the bottom of the container to absorb excess moisture. Reheat in a 350°F oven for 5 minutes before serving.
Freezer Friendly
Freeze the bites in a single layer on a parchment‑lined tray for 1–2 hours, then transfer to a freezer bag. They’ll keep for up to 2 months. Thaw overnight in the refrigerator, then reheat in a 350°F oven for 10 minutes.
Best Reheating Method
To bring them back to life, preheat your oven to 375°F. Place the bites on a baking sheet and bake for 7–8 minutes, or until the coating is crisp again. Add a tiny splash of water before reheating to create steam that keeps the interior moist while the exterior remains crunchy.