I’ll be honest — I ate half the batch before anyone else got to try it, and that’s because this sweet and crunchy salted caramel cracker bite is nothing short of a culinary mic drop. It all started on a rainy Tuesday when I was desperate for a snack that could simultaneously satisfy my sweet tooth, my craving for crunch, and my need for that sophisticated “I‑just‑brought‑dessert‑to‑the‑party” vibe. I tossed a handful of oyster crackers into a pan, added butter, brown sugar, and a splash of vanilla, and the kitchen instantly transformed into a caramel‑laden wonderland. The aroma was like a warm hug from a bakery, the sizzle of butter hitting the pan was pure music, and the first bite? Imagine a caramel coating that clings to the cracker like velvet, then shatters with a satisfying crack that makes your teeth sing.
Most recipes for caramel‑drizzled crackers get this completely wrong – they either end up soggy, overly sweet, or they miss that essential salty bite that makes you gasp for more. I’ve tried the store‑bought versions, the “quick microwave” hacks, and even the fancy chef‑in‑a‑restaurant renditions, and each one fell flat somewhere. The secret to my version is a precise balance of butter and brown sugar, a dash of sea salt that pops like fireworks, and a whisper of cinnamon that adds depth without overwhelming the sweet. The result is a bite that’s simultaneously buttery, caramel‑rich, and delightfully salty – a flavor trifecta that will make you swear you’ve discovered the holy grail of snack foods.
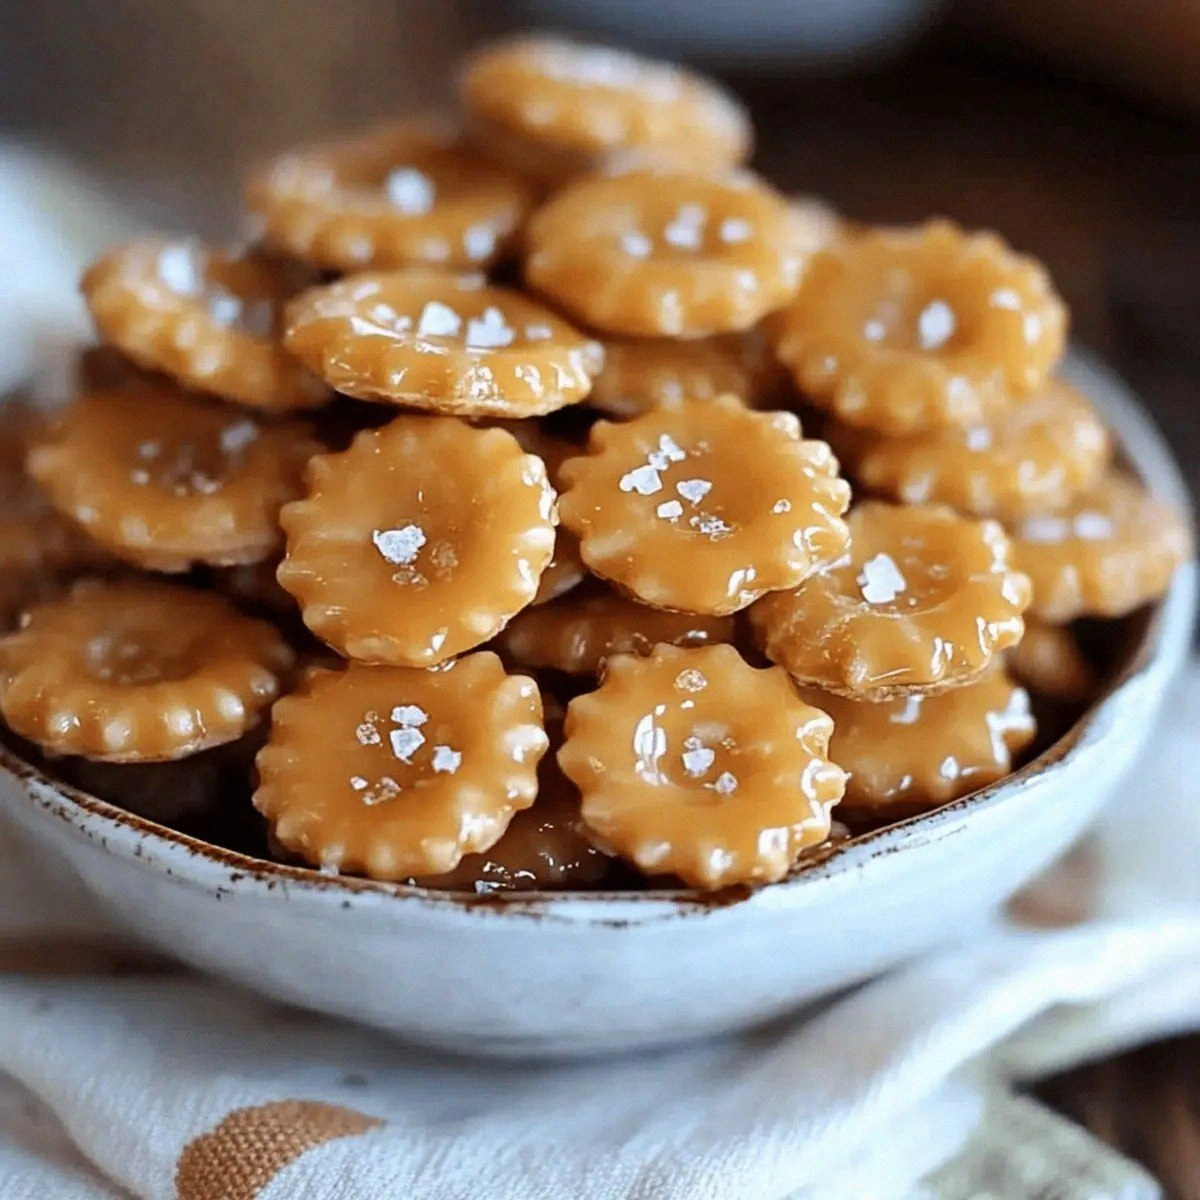
Picture yourself pulling this out of the oven, the whole kitchen smelling incredible, the caramel glistening like amber, and the crackers looking like golden treasure chests waiting to be cracked open. The moment you bite, you’ll hear that crisp snap, feel the melt‑in‑your‑mouth caramel, and taste the sea‑salted kiss that lingers just long enough to keep you reaching for the next one. I dare you to taste this and not go back for seconds – it’s that good. This isn’t just a snack; it’s a conversation starter, a party pleaser, and a comfort food rolled into one glorious bite.
Okay, ready for the game‑changer? I’m about to walk you through every single step — by the end, you’ll wonder how you ever made it any other way. We’ll cover the why behind each ingredient, the exact temperature tricks that make the caramel coat perfectly, and the little hacks that keep the crackers from turning into a sticky mess. Stay with me here — this is worth it, and the payoff is a batch of bites that will have everyone begging for the recipe.
What Makes This Version Stand Out
- Flavor Harmony: The sweet caramel, buttery crunch, and a hint of sea salt create a balanced profile that dances on the palate without any single note dominating.
- Texture Triple‑Threat: You get the initial crisp snap of the oyster cracker, a chewy caramel center, and a delicate, melt‑in‑your‑mouth finish that keeps you coming back.
- Simplicity: Only six pantry staples are needed, making this a no‑fuss recipe that even a kitchen rookie can nail on the first try.
- Unique Ingredient Pairing: Using oyster crackers instead of the usual graham or shortbread base adds a light, airy crunch that absorbs the caramel without getting soggy.
- Crowd Reaction: Guests often declare this the best thing they’ve ever tasted at a gathering, and the “wow” factor is instant.
- Ingredient Quality: High‑quality butter and coarse sea salt elevate the dish from ordinary to extraordinary, turning simple components into pure indulgence.
- Cooking Method: The stovetop caramelization followed by a quick bake locks in flavor while giving the bites a perfect golden hue.
- Make‑Ahead Potential: These bites keep beautifully for up to a week, and they even freeze well, so you can prep a batch ahead of any event.
Inside the Ingredient List
The Flavor Base
Butter is the heart of any good caramel, and here we use a full cup of unsalted, high‑fat butter for a rich, velvety foundation. The butter melts slowly, allowing the brown sugar to dissolve evenly, preventing grainy pockets that can ruin the texture. If you skimp on the butter, the caramel will be thin and won’t cling properly to the crackers, leaving you with a soggy mess. For an extra depth of flavor, try using a European‑style butter with a higher butterfat content – it adds a subtle nutty note that pairs beautifully with the sea salt.
The Sweet Symphony
One cup of brown sugar brings the sweet, caramelized flavor that we all crave. Its molasses content gives the caramel a deeper, almost toffee‑like richness that white sugar simply can’t achieve. If you prefer a less intense sweetness, you can substitute half the brown sugar with coconut sugar, which adds a gentle caramel‑like nuance and a hint of tropical flair. Be sure to use packed brown sugar; loosely measuring can lead to a thinner caramel that won’t coat the crackers properly.
The Texture Crew
Oyster crackers are the unsung heroes of this recipe. Their light, airy structure absorbs just enough caramel to stay crunchy, while still delivering that satisfying snap. If you accidentally grab a denser cracker, the result can be a gummy bite that loses its charm. Look for the classic square‑shaped oyster crackers, and give them a quick toss in a single layer on a baking sheet to ensure even caramel coverage.
The Unexpected Star
A teaspoon of vanilla extract might seem modest, but it acts like a secret agent, amplifying the caramel’s sweetness without adding any extra sugar. The vanilla’s aromatic compounds mingle with the butter and brown sugar, creating a complex bouquet that makes each bite feel luxurious. If you’re feeling adventurous, a splash of bourbon or dark rum can replace the vanilla for a grown‑up twist that adds a warm, caramel‑spiced undertone.
The Final Flourish
Half a teaspoon of cinnamon and a full teaspoon of coarse sea salt are the finishing touches that turn a good snack into an unforgettable one. Cinnamon adds a whisper of spice that cuts through the sweetness, while the flaky sea salt provides that bright pop you hear in your head when you bite. Skipping the salt is a cardinal sin – the caramel will taste flat, and the whole experience loses its signature contrast. Opt for Maldon sea salt flakes for an extra crunch and a sophisticated look.
Everything's prepped? Good. Let's get into the real action…

The Method — Step by Step
Preheat your oven to 350°F (175°C). While the oven warms up, line a large baking sheet with parchment paper; this prevents the caramel from sticking and makes cleanup a breeze. The heat of the oven will later give the bites a golden finish, so make sure it’s fully preheated before you slide the tray in.
In a heavy‑bottomed saucepan, melt the cup of butter over medium‑low heat. As it begins to foam, stir in the brown sugar, letting it dissolve completely. You’ll hear a gentle hiss – that’s the sugar caramelizing, and it should smell like toasted marshmallows within a minute.
Once the sugar is fully incorporated, increase the heat to medium and bring the mixture to a gentle boil. Watch closely: the caramel will start to thicken and turn a deep amber color. That sizzle when it hits the pan? Absolute perfection. Let it boil for exactly 3 minutes, stirring constantly to avoid scorching.
Remove the saucepan from the heat and immediately whisk in the vanilla extract, cinnamon, and sea salt. The mixture will bubble up; this is normal and indicates the flavors are melding. Okay, ready for the game‑changer? Now, add the oyster crackers, tossing them quickly so each piece gets a glossy coat.
Spread the coated crackers in an even layer on the prepared baking sheet. Make sure they’re not piled on top of each other; overlapping will cause uneven caramelization and soggy spots.
Place the sheet in the oven and bake for 12‑15 minutes, or until the edges start pulling away and the caramel turns a deeper, honey‑gold hue. Keep an eye on the color – you want a rich amber, not a burnt brown. The aroma will fill your kitchen, and you’ll know it’s ready when you hear a faint crackle from the crackers.
Watch Out: If you leave the bites in the oven too long, the caramel will harden into a brittle shell that shatters before you can enjoy the soft interior. Set a timer and resist the urge to keep checking; trust the timing.
When the timer dings, remove the tray and let the bites cool on the parchment for 5 minutes. As they cool, the caramel will set, creating that perfect snap you’ve been dreaming of. If you want extra crunch, let them cool completely before moving them to a wire rack.
Once cooled, transfer the bites to an airtight container. They’ll stay crunchy for up to a week, and the salted caramel flavor will only deepen with time. For an extra touch of elegance, sprinkle a pinch of flaky sea salt over the top before sealing.
That’s it — you did it. But hold on, I've got a few more tricks that'll take this to another level…
Insider Tricks for Flawless Results
The Temperature Rule Nobody Follows
Never let the caramel exceed 350°F (175°C). Going higher will cause the sugars to break down into bitter compounds, ruining the sweet‑salty balance. Use an instant‑read candy thermometer to stay precise; if you don’t have one, watch the color and the way the mixture thickens. A lower temperature ensures a smooth, glossy sauce that clings without becoming grainy.
Why Your Nose Knows Best
Your sense of smell is the ultimate doneness gauge. When the caramel starts releasing a toasty, buttery scent with a hint of caramelized sugar, you’re at the perfect stage. If you notice a burnt or acrid smell, pull it off the heat immediately. Trusting your nose saves you from a batch of bitter bites.
The 5‑Minute Rest That Changes Everything
After baking, let the bites rest uncovered for five minutes before sealing them away. This short air‑dry period allows excess moisture to evaporate, preserving the crunch. Skipping this step results in a slightly soggy texture because residual steam gets trapped in the container.
The Salt Sprinkle Secret
A final dusting of coarse sea salt right after baking creates a beautiful visual contrast and an extra pop of flavor. The salt crystals sit on the caramel’s surface, catching the light and adding a satisfying crunch with each bite. Use a fine-mesh sieve for an even distribution.
The Butter‑Upgrade Trick
If you want an ultra‑rich caramel, replace half of the butter with clarified butter (ghee). The higher smoke point and pure butterfat give a cleaner, more buttery flavor without the water content that can cause splattering.
Creative Twists and Variations
This recipe is a playground. Here are some of my favorite ways to switch things up:
Maple‑Brown Sugar Fusion
Swap half of the brown sugar for pure maple syrup. The result is a deeper, earthier sweetness with a subtle woodsy note that pairs beautifully with the sea salt.
Spicy Chili Kick
Add a pinch of cayenne pepper or a dash of chipotle powder to the caramel. The heat cuts through the sweetness and gives the bites a surprising, lingering warmth – perfect for those who love a sweet‑heat combo.
Nutty Crunch
Fold in toasted chopped pecans or almonds after the caramel coats the crackers. The nuts add an extra layer of crunch and a buttery flavor that elevates the snack to a gourmet level.
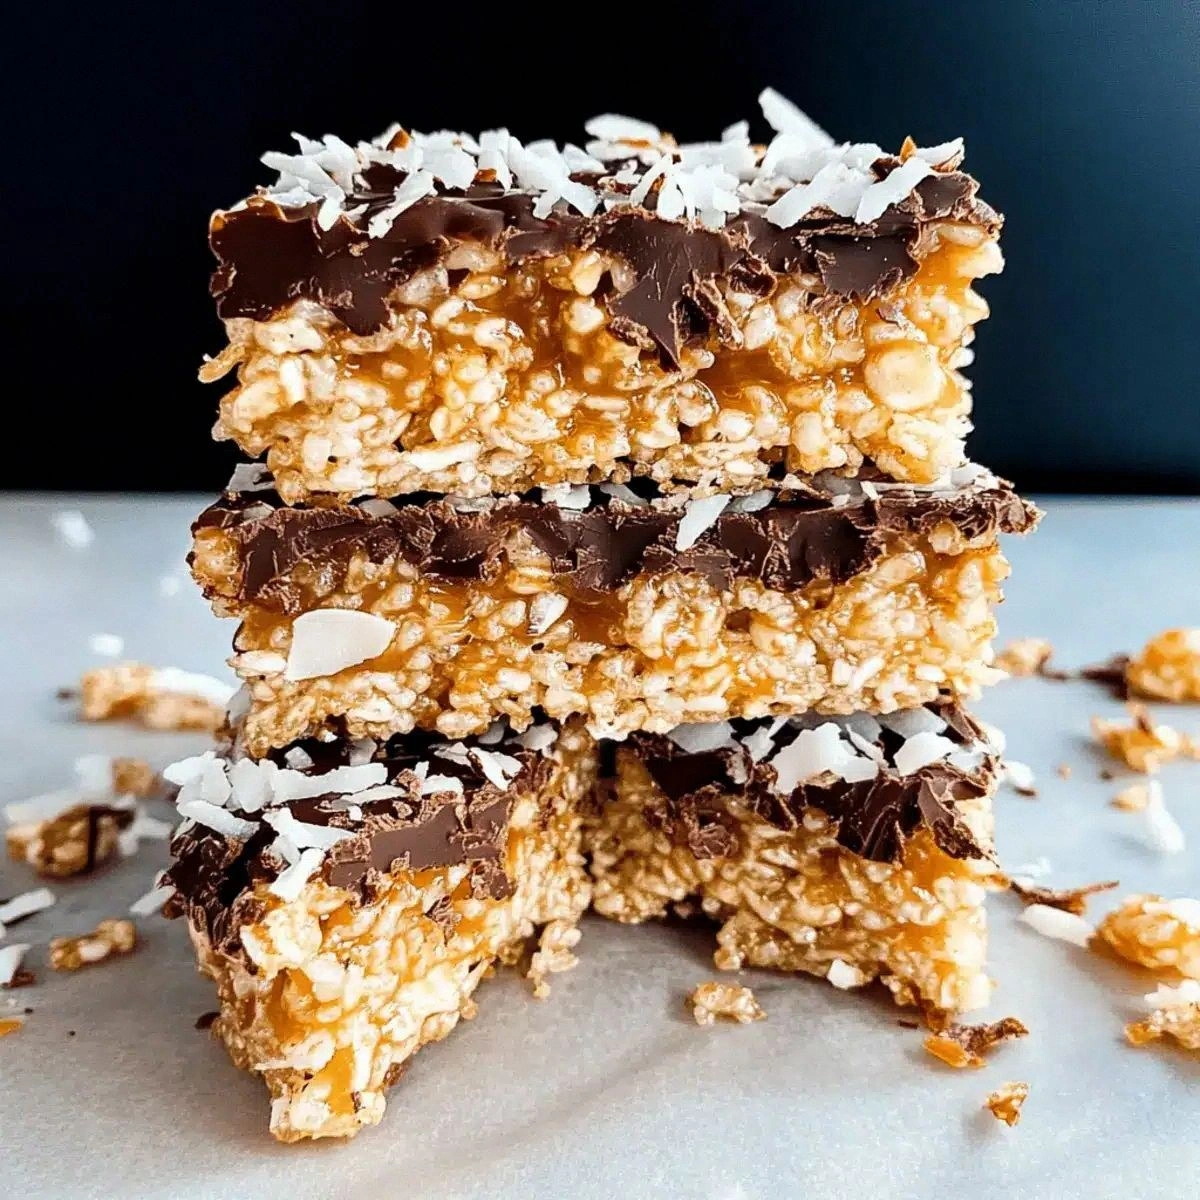
Chocolate Drizzle
Once the bites have cooled, drizzle dark chocolate over the top and let it set. The bitter chocolate balances the caramel’s sweetness and adds a sleek visual finish.
Holiday Spice
Replace the cinnamon with a pinch of pumpkin pie spice or gingerbread seasoning for a festive twist that’s perfect for winter gatherings.
Storing and Bringing It Back to Life
Fridge Storage
Place the bites in an airtight glass jar or a zip‑top bag and store them in the refrigerator for up to a week. The cool environment keeps the caramel from softening, preserving that satisfying crunch.
Freezer Friendly
For longer storage, spread the cooled bites on a parchment‑lined tray and freeze for 2‑3 hours. Transfer them to a freezer‑safe container; they’ll keep for up to three months. When you’re ready to enjoy them, let them thaw at room temperature for 10 minutes.
Best Reheating Method
To revive that fresh‑out‑of‑the‑oven crunch, preheat your oven to 300°F (150°C) and bake the frozen or refrigerated bites for 5‑7 minutes. Add a tiny splash of water to the tray before reheating; the steam helps the caramel regain its glossy sheen without becoming sticky.