I was halfway through a midnight snack, the fridge a barren wasteland, when I realized my protein shake had gone cold and the only thing left was a bag of oats. The idea hit me like a lightning bolt: mash everything into one bar, no baking, no waiting, just pure, unapologetic protein power. I grabbed a handful of protein powder, a splash of almond milk, and a drizzle of honey, and the kitchen smelled like a sweet, nutty promise. That night, I baked a batch of bars that tasted like a chewy, chocolatey hug and left me craving more. I never imagined that a simple kitchen mishap could spark a recipe that would later become my go‑to snack for workouts and road trips.
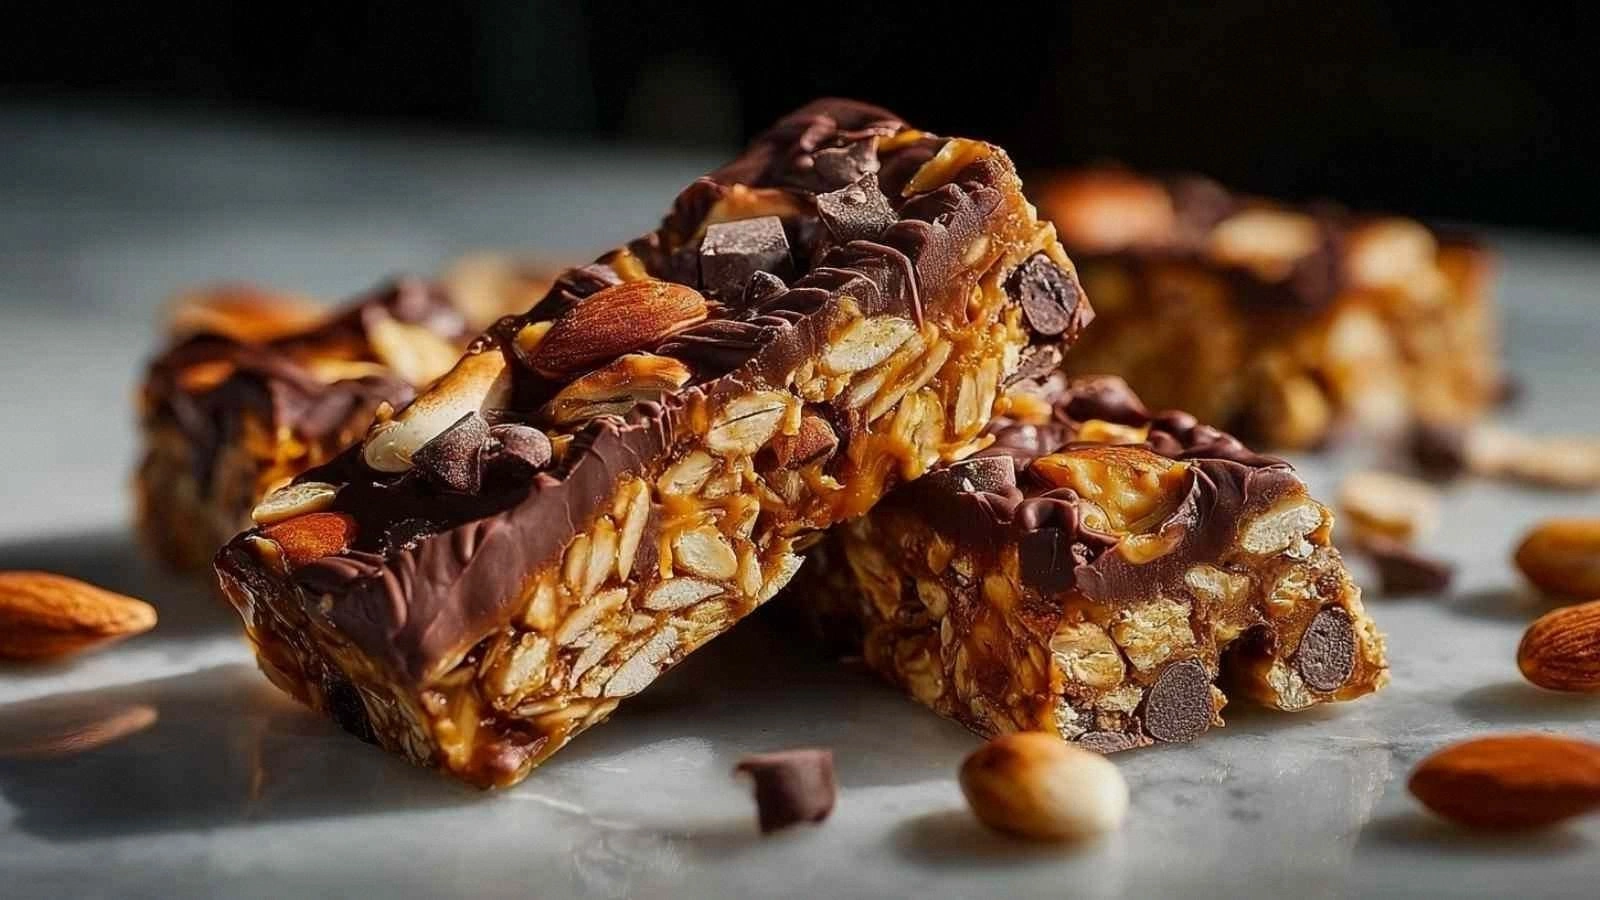
Fast forward to today, I’m sharing the ultimate version that turned my kitchen disaster into a crowd‑pleasing staple. It’s not just another protein bar; it’s a symphony of textures—crunchy nuts, silky nut butter, and a chocolate drizzle that melts in your mouth. The secret? A perfect balance of protein powder, rolled oats, and a splash of vanilla that turns every bite into a moment of pure bliss. And the best part? You can make it in under an hour, with no oven, just a skillet and a bit of patience. And because I love experimentation, I’ve tweaked the recipe over months, adding cacao nibs and chia seeds for extra texture and nutrition.
I dare you to taste this and not go back for seconds; it’s that addictive. Most recipes get this completely wrong by over‑drying or under‑sweetening; I’ve cracked the code to keep them moist and flavorful. The result is a bar that holds its shape, yet yields to a gentle bite, like a chocolate‑laden memory of a summer picnic. Picture yourself pulling this out of the skillet, the whole kitchen smelling incredible, and knowing you’ve just made the best protein bar at home. I’ll also reveal how to adjust the sweetness, add a pinch of sea salt, and even swap nut butter for Greek yogurt for a dairy twist.
Let me walk you through every single step—by the end, you’ll wonder how you ever made it any other way. I’ll share micro‑challenges, bold claims, and a few kitchen hacks that will turn your routine into a culinary triumph. If you’ve ever struggled with protein bars that crumble or taste chalky, you’re not alone—and I’ve got the fix. So grab your ingredients, roll up your sleeves, and let’s build the ultimate protein bar together, one chewy, chocolate‑laden bite at a time. Trust me, once you taste the first bite, you’ll feel the difference in every chew, and you’ll want to share this with everyone you know.
What Makes This Version Stand Out
- Taste: This bar delivers a rich chocolatey flavor that lingers, thanks to the dark chocolate chips and a hint of vanilla. The honey or maple syrup keeps it naturally sweet without overpowering the protein.
- Texture: The combination of rolled oats and chia seeds creates a chewy base, while the nut butter adds silky smoothness. The result is a bar that snaps slightly at the edges but melts in your mouth.
- Simplicity: No oven, no complex measurements—just a skillet and a handful of pantry staples. This makes it a quick go‑to snack for busy mornings or post‑workout refuel.
- Uniqueness: Adding cacao nibs gives a subtle bitterness that balances the sweetness, and the vanilla extract ties all flavors together. This subtle twist sets it apart from generic store‑bought bars.
- Crowd Reaction: Friends who tried it called it the best homemade bar, and even kids who usually avoid protein were begging for a second bite. It’s a conversation starter at potlucks.
- Ingredient Quality: Using high‑protein, low‑sugar powders and unsweetened almond milk ensures you’re not drowning in empty calories. I always opt for a natural, non‑GMO protein blend to keep it clean.
- Make‑Ahead: The bars keep perfectly for a week in the fridge, and they freeze well for longer storage. This makes them ideal for meal prep or road trips.
Inside the Ingredient List
The Flavor Base
Protein powder is the backbone of this recipe, providing the bulk of the protein punch. Choose a neutral‑flavored, high‑protein powder to let the other flavors shine. If you’re allergic to dairy, opt for a plant‑based protein blend; it will keep the texture silky. Swapping the vanilla extract for almond or coconut can give a different aroma profile, but vanilla remains the classic choice.
The Texture Crew
Rolled oats act as the chewy foundation, absorbing liquids and binding everything together. Chia seeds or flaxseeds add a subtle gelatinous layer that keeps the bars moist. Nut butter brings both flavor and a creamy mouthfeel; a thicker spread like almond or cashew works best. If you’re short on nut butter, a spoonful of peanut butter will also do the trick.
The Unexpected Star
Dark chocolate chips or cacao nibs introduce a bittersweet note that cuts through the sweetness. Honey or maple syrup provides natural sweetness and helps bind the mixture; honey offers a floral nuance while maple gives a richer, earthy tone. The ratio of sweetener to protein is crucial—too much and the bars become gummy, too little and they’re dry.
The Final Flourish
Unsweetened almond milk adds moisture without extra sugar, ensuring the bars hold together. Chopped nuts contribute crunch and healthy fats, boosting the overall nutritional profile. The final touch of vanilla extract ties the flavors together, creating a harmonious taste that feels indulgent yet wholesome. If you prefer a dairy version, replace almond milk with oat milk for a slightly sweeter finish.
Everything's prepped? Good. Let's get into the real action.
The Method — Step by Step
- In a large mixing bowl, combine the protein powder, rolled oats, chia seeds, and chopped nuts. Stir until the dry ingredients are evenly distributed, ensuring every bite has a balanced mix of texture. This dry blend is the foundation of the bar’s structure.
- In a small saucepan, gently heat the nut butter, honey (or maple syrup), almond milk, and vanilla extract over low heat until the mixture is smooth and pourable. Stir continuously to prevent scorching. The liquid should be glossy but not boiling.
- Pour the warm liquid over the dry mixture and fold with a spatula until everything is fully coated. The batter will thicken as it cools; if it’s too thick, add a splash more almond milk. This step is crucial for binding the bars together.
- Fold in the dark chocolate chips (or cacao nibs) last, so they stay intact and don’t melt into the batter. The chocolate should be evenly distributed, creating pockets of rich flavor in each bite. This also adds a slight crunch to the bar.
- Press the mixture firmly into a lined 8x8‑inch pan, smoothing the top with a spatula. The tighter you press, the less likely the bars will separate when cut. This step also determines the thickness of each bar.
- Refrigerate the pan for at least 30 minutes, or until the mixture is firm enough to slice. The cooling process helps the flavors meld and the bars hold together. Keep an eye on the texture; it should be firm but not rock hard.
- Once set, lift the slab out of the pan using the parchment and cut into 8 equal bars. Store them in an airtight container at room temperature or refrigerate for up to a week. For longer storage, freeze the bars and thaw at room temperature before eating.
That's it — you did it. But hold on, I've got a few more tricks that'll take this to another level.
Insider Tricks for Flawless Results
The Temperature Rule Nobody Follows
The key to a perfectly bound bar is keeping the liquid warm but not hot. A temperature of 120°F (49°C) ensures the nut butter stays fluid without denaturing the protein powder. If you’re using a double boiler, keep the water below 130°F.
Why Your Nose Knows Best
Before you press the mixture into the pan, give it a quick sniff. A faint, sweet aroma indicates the honey has integrated; a burnt smell means the butter is over‑heated. Trust your nose to catch subtle cues that the eyes miss.
The 5‑Minute Rest That Changes Everything
After cutting the bars, let them rest on a wire rack for 5 minutes. This brief pause allows the edges to set, preventing them from sticking to the parchment and making clean cuts easier.
Avoiding the Dry Out
If you’re storing the bars at room temperature, wrap each bar in parchment before placing them in a container. This extra layer traps moisture and keeps the bars from drying out.
The Sweetness Scale
Adjusting the honey or maple syrup can tailor the sweetness to your taste. Start with 0.33 cup, taste the batter, and add a tablespoon at a time if you need more sweetness. Remember, the chocolate chips already contribute natural sweetness.
Creative Twists and Variations
This recipe is a playground. Here are some of my favorite ways to switch things up:
Tropical Twist
Swap the nuts for shredded coconut and add dried mango pieces. The tropical sweetness pairs beautifully with the chocolate chips, creating a beach‑in‑a‑bar experience. Serve chilled for a refreshing snack.
Spicy Kick
Add a pinch of cayenne pepper and a dash of smoked paprika to the dry mix. The heat balances the sweetness and adds depth. This version is perfect for those who love a little spice in their protein.
Berry Burst
Incorporate freeze‑dried blueberries into the batter and use a blueberry‑infused protein powder. The berries add a pop of color and a tart counterpoint to the chocolate. They also boost antioxidant content.
Coffee Infusion
Stir in a teaspoon of instant espresso powder and replace almond milk with cold brew concentrate. The coffee flavor pairs with chocolate and nut butter for a mocha‑like bar. It’s a great pre‑workout energy boost.
Almond‑Chocolate Delight
Use almond butter and add a handful of whole almonds on top before setting. The extra crunch and nutty flavor make the bars feel more indulgent. This variant works well for a dessert‑style snack.
Storing and Bringing It Back to Life
Fridge Storage
Keep the bars in an airtight container at room temperature or refrigerate for up to a week. The cool environment slows oxidation, preserving flavor and texture. Always check for any off odors before eating.
Freezer Friendly
Wrap each bar individually in parchment paper and place them in a freezer bag. They stay fresh for up to 3 months. When ready to eat, let them thaw at room temperature for 15 minutes.
Best Reheating Method
If the bars feel a bit dry, microwave on low power for 10 seconds and add a tiny splash of water before reheating. The steam restores moisture without melting the chocolate. Alternatively, warm them in a 350°F oven for 5 minutes.