I’ll be honest — I ate half the batch before anyone else got to try it, and that was the moment I realized I had stumbled upon something truly unforgettable. It all began on a rainy Tuesday when a sudden craving for something silky, sweet, and just a touch buttery knocked on my kitchen door. I was half‑heartedly scrolling through endless dessert blogs, sighing at the same bland custard recipes that promised “soft” but delivered “meh.” Then a daring friend texted me, “Bet you can’t make a custard that actually feels like a cloud.” I laughed, accepted the challenge, and set out to prove her wrong. The result? A square of vanilla custard cream that practically melts on your tongue, leaving a lingering perfume of vanilla that makes the whole house feel like a patisserie.
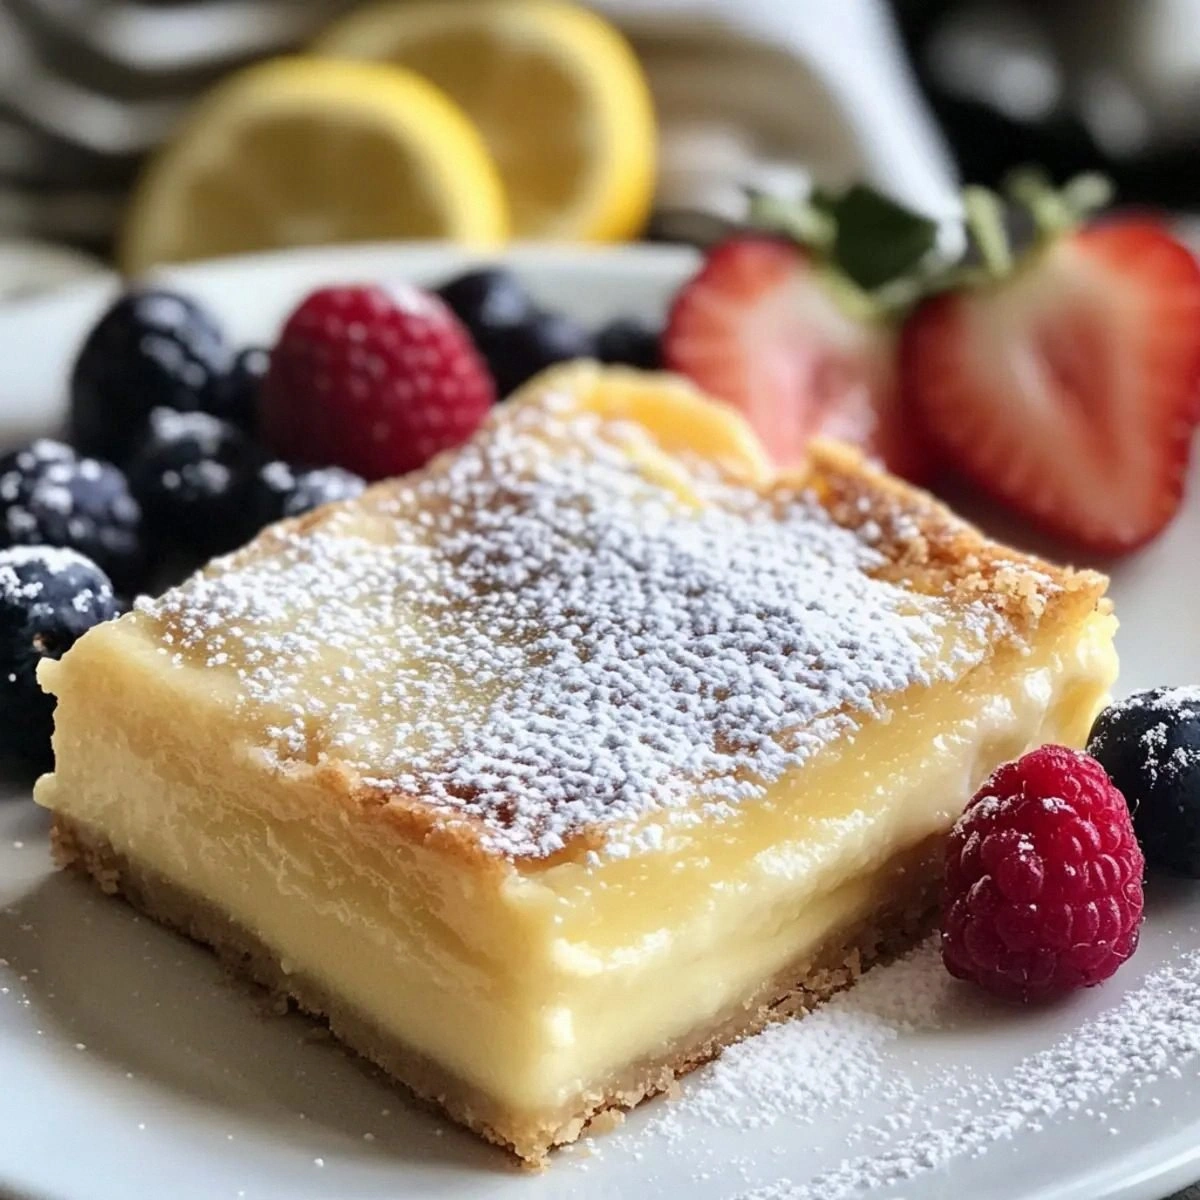
Picture yourself pulling this out of the oven, the whole kitchen smelling incredible, the golden‑brown edges just shy of caramelized, and the center shimmering like a glossy lake at sunrise. The first bite is a symphony: a buttery short‑bread base that crunches just enough to give way to a custard so smooth it slides across your palate like silk slipping through your fingers. The vanilla is bold, not shy, and the powdered‑sugar dusting on top adds a whisper of sweetness that balances the richness without overwhelming it. I dare you to taste this and not go back for seconds; the moment that custard kisses your tongue, you’ll understand why this is hands down the best version you’ll ever make at home.
Most recipes get this completely wrong. They either over‑cook the custard, turning it rubbery, or they skimp on the butter, leaving the base dry and crumbly. Here’s what actually works: a careful tempering of the egg yolks, a slow infusion of vanilla, and a secret technique of chilling the batter just enough to set the structure before the final bake. This method guarantees a custard that’s set but still jiggles ever so slightly when you nudge the pan, a texture that’s both firm and feather‑light. If you’ve ever struggled with this, you’re not alone — and I’ve got the fix, right down to the exact temperature of the milk and the precise moment to fold in the powdered sugar.
Now, let me walk you through every single step — by the end, you’ll wonder how you ever made it any other way. Okay, ready for the game‑changer? This next part? Pure magic. We’ll start with the foundation, move through the custard, and finish with a finish that looks as good as it tastes. Stay with me here — this is worth it.
What Makes This Version Stand Out
- Texture: The crust is buttery and crisp, while the custard is velvety and just‑right‑jiggle, a contrast that makes every bite an adventure.
- Flavor: Pure vanilla extract paired with a splash of whole milk creates a depth that artificial flavorings simply can’t match.
- Simplicity: Only nine core ingredients, all pantry staples, mean you won’t need a trip to the specialty store.
- Uniqueness: The double‑sugar system—granulated for the crust and powdered for the topping—gives layers of sweetness without cloying.
- Crowd Reaction: Friends call it “the best dessert you’ve ever had,” and strangers on the street will stop you to ask for the recipe.
- Ingredient Quality: Using unsalted butter lets you control the salt level, and whole milk adds richness you can’t get from low‑fat alternatives.
- Cooking Method: A two‑stage bake—first a blind bake, then a custard bake—ensures the base stays crisp while the custard sets perfectly.
- Make‑Ahead Potential: These squares store beautifully, so you can bake them ahead of a party and still serve them fresh.
Inside the Ingredient List
The Flavor Base
All‑Purpose Flour is the structural backbone of the short‑bread crust. Its gluten content provides just enough elasticity to hold the custard without turning the base gummy. If you swapped it for cake flour, you’d get a crumb that’s too tender and might collapse under the custard’s weight. Look for a flour that feels powdery to the touch; that’s a sign of good quality. Pro tip: sift the flour with the granulated sugar before mixing with butter to ensure an even distribution of sweetness.
The Texture Crew
Unsalted Butter is the star of the crust. Its fat content creates those buttery, melt‑in‑your‑mouth edges that make you want to lick the pan. Using salted butter would throw off the delicate balance, so stick with unsalted and add a pinch of sea salt if you like a subtle contrast. The 1/2 cup of granulated sugar in the crust not only sweetens but also helps the edges caramelize, giving you that golden‑brown finish that smells like toasted almond.
The Unexpected Star
Whole Milk brings a creamy richness that low‑fat milks simply can’t match. The fat molecules coat the egg yolks, preventing them from curdling during the gentle heat of the custard. If you’re out of whole milk, you can substitute with 2% milk plus a splash of heavy cream, but the texture won’t be as luscious. The 1/2 cup of granulated sugar folded into the custard balances the vanilla’s floral notes, while the powdered sugar dusted on top adds a delicate, melt‑in‑your‑mouth sweetness that’s visually stunning.
The Final Flourish
Large Egg Yolks provide the custard’s silkiness and act as an emulsifier, binding the milk and butter into a cohesive, glossy mixture. Four yolks give you that luxurious mouthfeel without making the custard too dense. Pure Vanilla Extract is the aromatic heart of this dish; a teaspoon is enough to perfume the entire batch without overpowering the natural dairy flavor. Fresh fruit, while optional, adds a bright contrast—think sliced strawberries or a handful of raspberries—making each bite a perfect balance of sweet and tart.
Everything's prepped? Good. Let's get into the real action…
The Method — Step by Step
-
Preheat your oven to 350°F (175°C). While the oven warms, line a 9‑inch square pan with parchment paper, letting the excess hang over the sides for easy removal later. This little trick saves you from a messy scrape and ensures the squares stay intact when you cut them.
Kitchen Hack: Lightly toast the parchment paper for 2 minutes; it prevents the crust from sticking and adds a subtle toasted aroma. -
Combine 1 cup of all‑purpose flour, 1/4 cup granulated sugar, and a pinch of sea salt in a mixing bowl. Toss them together with a whisk to aerate the mixture—this step is crucial for a light, airy crust.
Cut the chilled 1/2 cup unsalted butter into small cubes and add them to the dry ingredients. Using a pastry cutter or your fingertips, rub the butter into the flour until the mixture resembles coarse crumbs, with some pea‑size pieces remaining. Those buttery nuggets will melt during baking, creating pockets of crispness.
-
Press the crumb mixture firmly into the prepared pan, spreading it evenly to the edges. Use the back of a spoon or the bottom of a glass to compact it; this ensures the base won’t crumble when you slice the squares later.
Place a sheet of parchment on top of the crust and fill it with baking beans or rice to blind‑bake. This prevents the crust from puffing up and keeps it flat.
-
Slide the pan into the oven and bake for 12‑15 minutes, or until the edges turn a light golden hue. When you remove the parchment and beans, you’ll notice a faint nutty scent—sign that the crust is ready for the custard.
Watch Out: Do not over‑bake the crust; a dark edge will turn bitter and clash with the sweet custard. -
While the crust bakes, start the custard. In a saucepan, combine 2 cups whole milk and 1/2 cup granulated sugar. Heat over medium‑low, stirring until the sugar dissolves and the milk is just about to simmer—tiny bubbles should form around the edges.
In a separate bowl, whisk 4 large egg yolks with 1 teaspoon pure vanilla extract until the mixture lightens in color. This is the moment where the yolks start to look like sunshine.
-
Temper the yolks by slowly whisking in a ladleful of the hot milk mixture, a trick that prevents curdling. Once the yolks are warm, pour the entire mixture back into the saucepan.
Cook over low heat, stirring constantly with a silicone spatula, until the custard thickens enough to coat the back of the spoon. You’ll know it’s ready when a thin line drawn with your finger stays distinct for a few seconds.
Kitchen Hack: Add a pinch of cornstarch dissolved in cold water to the custard if you prefer an extra‑firm set; it won’t affect flavor. -
Once thickened, remove the custard from heat and gently fold in 1 cup powdered sugar. The sugar should melt instantly, creating a glossy sheen that looks like a light frost on a winter morning.
Pour the custard over the pre‑baked crust, spreading it with a spatula to the very edges. The custard should sit level, not sloping, ensuring even baking.
-
Return the pan to the oven and bake for an additional 20‑25 minutes, or until the custard is set but still has a gentle wobble in the center—think of a gelatin that’s just beginning to firm up.
When you tap the surface, you’ll hear a faint, springy “boing” that tells you it’s perfect. Let the squares cool completely in the pan; this cooling period allows the custard to finish setting without cracking.
-
Once cooled, lift the parchment overhang to release the entire slab, then transfer it to a cutting board. Using a sharp, warm knife, cut the slab into neat squares—four by four works beautifully for a 9‑inch pan.
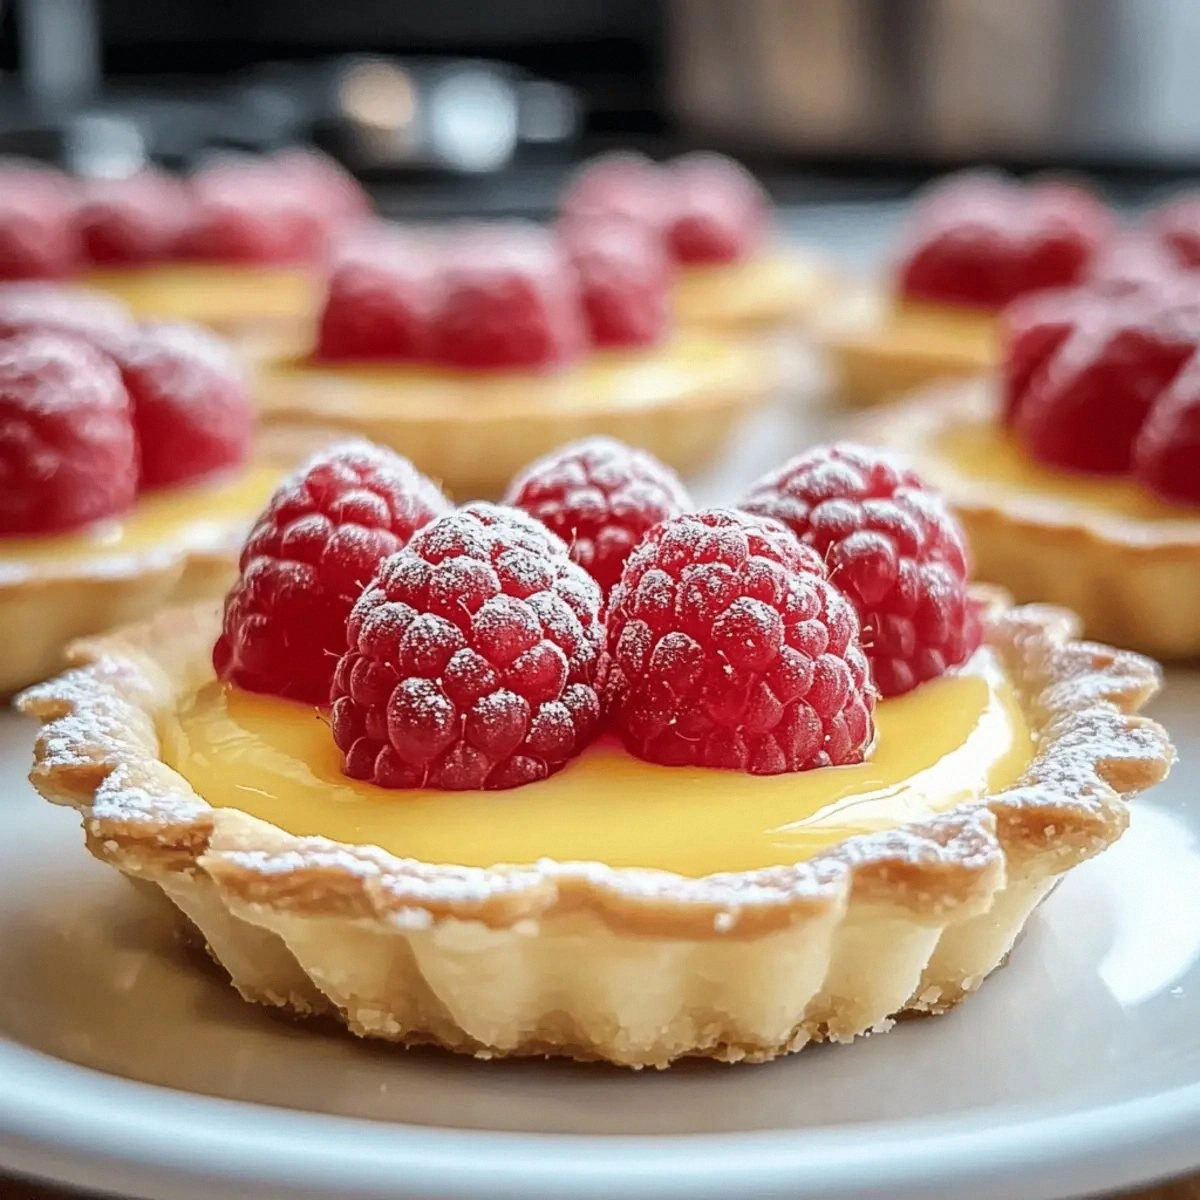
Dust each square with a light sprinkle of powdered sugar, and if you’re feeling fancy, crown them with fresh fruit. That final flourish adds a burst of color and a hint of acidity that cuts through the richness.
That’s it — you did it. But hold on, I’ve got a few more tricks that'll take this to another level…
Insider Tricks for Flawless Results
The Temperature Rule Nobody Follows
Never, ever rush the milk heating stage. Keeping the milk at a gentle simmer (around 180°F/82°C) allows the sugar to dissolve fully without scorching. I once tried to speed things up by cranking the heat, and the custard ended up with a faint burnt note that no amount of vanilla could mask. The rule of thumb: if you can feel the heat on the back of your hand, you’re good.
Why Your Nose Knows Best
Your sense of smell is a reliable indicator of doneness. When the custard starts to emit a faint, buttery aroma with a hint of vanilla, it’s approaching that perfect set point. If you rely solely on visual cues, you might over‑cook and end up with a rubbery texture. Trust that sweet, warm scent—it’s the kitchen’s way of saying “I’m ready.”
The 5‑Minute Rest That Changes Everything
After the final bake, let the squares rest for exactly five minutes before cutting. This brief pause allows the custard’s internal structure to tighten, giving you clean, crisp edges when you slice. Skipping this rest is a common mistake; the result is a smeared top and a crumbly crust.
Butter Temperature Trick
Cold butter creates pockets of steam as it melts, which translates into a flaky crust. If you’re in a hurry, you can grate the butter directly into the flour—this speeds up the cooling process and still yields that desirable texture. One of my friends tried using melted butter, and the crust turned dense and soggy. Lesson learned: keep it cold.
Fruit Pairing Precision
When adding fresh fruit, choose varieties with a natural acidity—like berries or kiwi. The acidity cuts through the custard’s richness, balancing each bite. Toss the fruit lightly with a teaspoon of powdered sugar before placing it on top; this prevents the fruit from releasing too much juice, which could make the custard soggy.
Creative Twists and Variations
This recipe is a playground. Here are some of my favorite ways to switch things up:
Lemon Zest Burst
Add the zest of one large lemon to the custard mixture before cooking. The citrus lifts the vanilla, creating a bright, summery flavor that pairs beautifully with fresh blueberries.
Coffee‑Infused Delight
Swap half of the whole milk for strong brewed espresso. The coffee’s bitterness deepens the custard, making it a perfect match for a dusting of cocoa powder on top.
Almond Joy
Stir in 1/4 cup toasted almond slivers into the crust before baking, and finish the squares with a drizzle of melted chocolate. The crunch adds a whole new dimension.
Spiced Autumn
Incorporate a pinch of ground cinnamon and a dash of nutmeg into the custard. Serve with caramelized pears for a cozy, fall‑ready dessert.
Matcha Green Tea
Blend 1 tablespoon of high‑quality matcha powder into the milk before heating. The earthy green tea flavor pairs surprisingly well with the sweet vanilla custard.
Storing and Bringing It Back to Life
Fridge Storage
Place the cooled squares in an airtight container and refrigerate for up to three days. The custard stays silky, and the crust retains its bite thanks to the sealed environment.
Freezer Friendly
Wrap each square individually in plastic wrap, then place them in a zip‑top freezer bag. They freeze beautifully for up to two months. When you’re ready to enjoy, let them thaw in the fridge overnight.
Best Reheating Method
To revive the squares, preheat your oven to 300°F (150°C), place the squares on a parchment‑lined tray, and add a tiny splash of water (about a teaspoon) to the tray. Cover loosely with foil and heat for 8‑10 minutes. The steam generated by the water restores the custard’s creaminess while the crust gently crisps again.