I still remember the night my kitchen turned into a battleground, the air thick with the scent of burnt sugar and a half‑finished cake that had more crumbs than cake. I was staring at a box of cake mix, a bag of chocolate chips, and a single stick of butter, wondering if I could salvage anything. The disaster was a reminder that sometimes the best recipes come from a mess, not a meticulous plan. That night, I decided to rewrite the rules for cookie bars and turn a kitchen calamity into a triumph.
Picture this: a pan sizzling, the butter melting into a glossy pool, and the chocolate chips gleaming like tiny moons. The sound of the mixture folding together is a rhythmic drumbeat that signals the beginning of something delicious. The aroma that unfurls is a sweet, buttery cloud that wraps the entire kitchen, making you feel like you’re walking into a bakery. As the batter spreads, the edges lift, forming a golden crust that cracks with a satisfying snap when you bite into it. The first bite is a burst of chocolate and vanilla, a perfect balance that makes your taste buds sing.
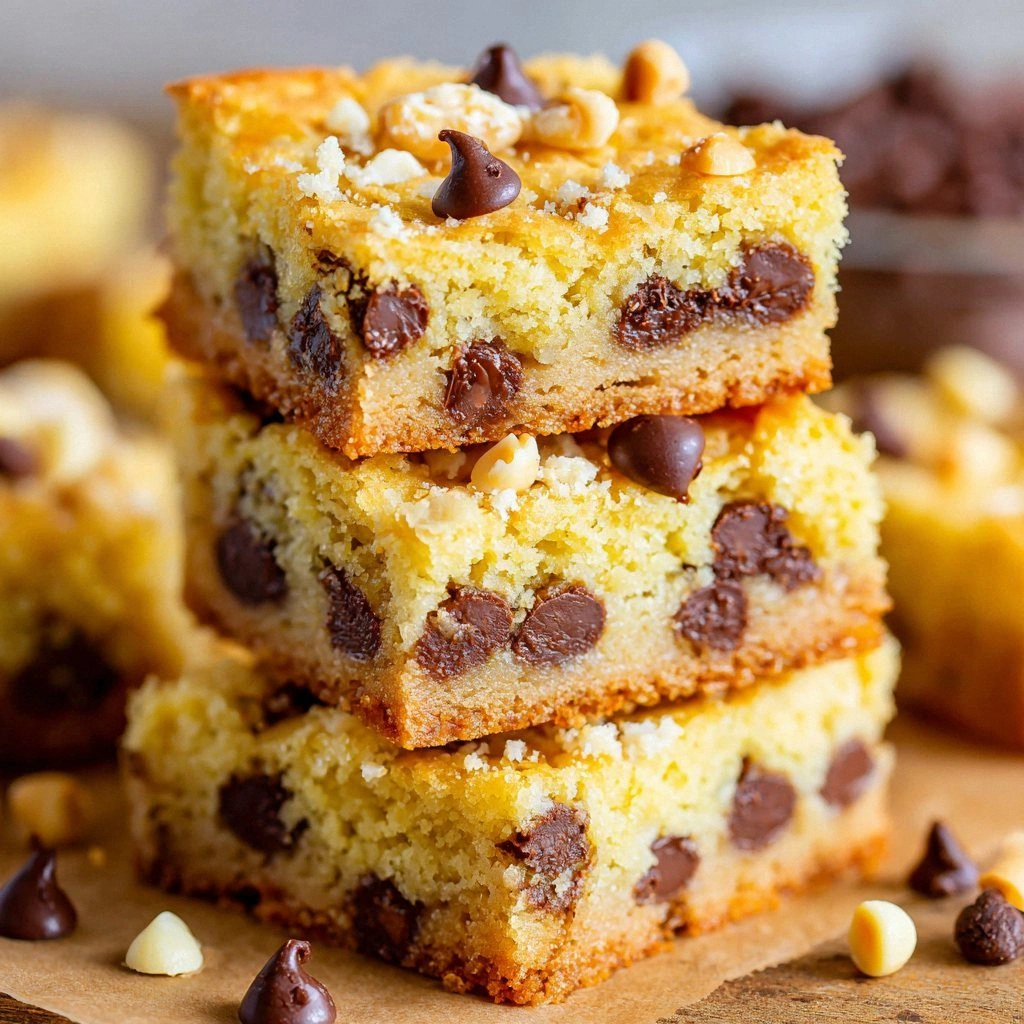
What makes this version of Cake Mix Cookie Bars a game‑changer? I’ve taken the classic recipe, stripped away the fluff, and added a few secret ingredients that elevate the flavor profile and texture. The result is bars that are crisp on the edges, chewy in the center, and packed with chocolatey goodness that will keep you coming back for more. I dare you to taste these and not go back for seconds. The texture is unlike any other cookie bar you’ve tried – a harmonious blend of cake and cookie that feels like a warm hug in every bite.
If you’ve ever struggled with the perfect balance of sweetness and chewiness, you’re not alone. I’ve spent countless afternoons tweaking this recipe, and the final version is hands down the best you’ll ever make at home. The secret? A little extra butter, a splash of vanilla, and the right amount of chocolate chips. Picture yourself pulling these from the oven, the whole kitchen smelling incredible, and the first bite leaving you with a satisfied sigh. Let me walk you through every single step — by the end, you’ll wonder how you ever made it any other way.
What Makes This Version Stand Out
- Flavor: The combination of vanilla cake mix and real butter creates a rich, buttery base that carries the chocolate chips like a velvet ribbon. The vanilla extract adds a subtle depth that keeps the bars from tasting flat.
- Texture: The bars are crisp on the edges and chewy in the center, a texture that feels like a perfect marriage of cookie and cake. The chocolate chips melt just enough to create pockets of gooey delight.
- Simplicity: Only nine ingredients and no special equipment. This recipe is perfect for a last‑minute dessert or a quick treat between errands.
- Uniqueness: By using cake mix, you bypass the need for leavening agents, yet the bars still rise slightly, giving them a lighter feel than traditional cookie bars.
- Crowd Reaction: Friends and family rave about the bars, claiming they’re the most versatile dessert you can make with pantry staples.
- Ingredient Quality: The recipe emphasizes using real butter and high‑quality chocolate chips for maximum flavor. The difference between a bar and a cookie is often the quality of the fat and chocolate.
- Cooking Method: No baking sheet greasing needed because the batter sticks to parchment, making cleanup a breeze.
- Make‑Ahead Potential: These bars keep well for a week in an airtight container, so you can prepare them ahead of a gathering and serve them at room temperature.
Alright, let's break down exactly what goes into this masterpiece. If you’re ready to elevate your baking game, keep reading.
Inside the Ingredient List
The Flavor Base
The foundation of these bars is the vanilla cake mix, which provides the sweet, buttery backbone that carries the other flavors. The mix is a pre‑seasoned batter that eliminates the need for sugar and leavening, allowing you to focus on the other elements. If you skip the cake mix, the bars would lack the delicate crumb and would feel more like a dense cookie. For a richer taste, choose a premium cake mix that contains real vanilla or a hint of almond.
Butter is the heart of the flavor profile, creating a silky mouthfeel and a golden crust that’s both crunchy and tender. A full stick of butter (8 ounces) is essential; using margarine or a lower‑fat butter will compromise the texture and flavor. Butter also helps the chocolate chips melt evenly, producing pockets of molten chocolate that make each bite exciting.
Vanilla extract is the subtle secret that rounds out the sweetness. A teaspoon of pure vanilla adds depth and a warm aroma that lingers even after the first bite. If you’re vegan, a splash of almond or maple extract works well, but be sure to taste as you go to keep the balance.
The Texture Crew
Chocolate chips are the star of the show, providing a burst of chocolatey goodness that melts into the batter. Use high‑quality semi‑sweet chips for the best flavor; the difference between a bar and a cookie is often the quality of the chocolate. If you prefer a sweeter bite, you can substitute milk chocolate or a mix of dark and milk chips. The chips also create a delightful contrast in texture, with their slightly crunchy edges meeting the soft center of the bars.
Nuts add crunch and a nutty undertone that complements the chocolate. Walnuts or pecans are traditional, but almonds or hazelnuts give a different flavor profile. Chop the nuts finely so they distribute evenly throughout the batter. If you’re allergic to nuts, simply omit them and the bars will still hold up perfectly.
Salt is a flavor enhancer that balances the sweetness. A teaspoon of fine sea salt brightens the overall taste and prevents the bars from feeling too sweet. If you’re watching sodium intake, a pinch of salt is sufficient, but it will still deliver the same flavor punch.
The Unexpected Star
A splash of milk or cream can be added to the batter if you find the mixture too dry. This extra moisture ensures the bars stay chewy and don’t dry out during baking. However, be careful not to add too much liquid; the batter should still be thick enough to hold its shape on the baking sheet. A tablespoon of milk or cream is usually enough for a batch of four servings.
You can also add a pinch of cinnamon or nutmeg for a warm, spicy note that elevates the overall flavor. This is a great way to make the bars seasonal or to personalize the recipe for a holiday gathering. If you’re adventurous, a tablespoon of espresso powder can deepen the chocolate flavor for a coffee‑infused twist.
The Final Flourish
Parchment paper is the final touch that keeps the bars from sticking and makes cleanup a breeze. Cut a sheet of parchment to fit your baking pan and lightly dust the top with flour or cocoa powder for an extra decorative touch. The parchment also helps the bars set evenly, preventing uneven browning.
Everything's prepped? Good. Let's get into the real action.
The Method — Step by Step
- Preheat your oven to 350°F (175°C). Line a 9×13 inch baking pan with parchment paper, leaving a slight overhang on the sides for easy removal. The parchment ensures a non‑stick surface and keeps the bars from drying out on the edges. Let the oven heat fully so the bars bake evenly.
- Melt the butter in a medium saucepan over medium heat until it turns a light golden color. This process caramelizes the butter, adding a nutty flavor that permeates the bars. Keep a close eye on the butter to avoid burning; it should only take a few minutes.
- Whisk in the white sugar and brown sugar until the mixture is smooth and glossy. The sugars dissolve into the butter, creating a syrupy base that coats the cake mix evenly. This step is crucial for achieving the right sweetness and texture.
- Add the vanilla extract and stir until fully incorporated. The vanilla gives the batter a fragrant aroma that will fill the kitchen as the bars bake. This is the moment when the batter starts to smell like a bakery.
- Stir in the cake mix until the batter is smooth. The cake mix should blend seamlessly with the butter mixture, forming a thick, cohesive batter. This is where the batter thickens and starts to look like a dough.
- Fold in the chocolate chips and nuts, ensuring an even distribution throughout the batter. The chocolate chips should be fully coated with butter, preventing them from sinking to the bottom of the pan. The nuts add a delightful crunch that contrasts with the soft interior.
- Pour the batter into the prepared pan, spreading it evenly with a spatula. The batter should fill the pan to the top, creating a uniform layer that bakes evenly. Use a spatula to smooth the surface for an even bake.
- Bake for 25–30 minutes, or until the edges are golden brown and a toothpick inserted in the center comes out with a few moist crumbs. The bars should have a slight crackle on the top, indicating a crisp exterior. Avoid overbaking, as this will dry out the bars.
- Let the bars cool in the pan for 10 minutes, then lift them onto a wire rack to cool completely. The bars will firm up as they cool, making them easier to cut. Cutting while they’re still warm can cause them to crumble.
That's it — you did it. But hold on, I've got a few more tricks that'll take this to another level. These small adjustments will transform the bars from good to unforgettable.
Insider Tricks for Flawless Results
The Temperature Rule Nobody Follows
Many bakers bake these bars at 375°F, but the sweet spot is 350°F. The lower temperature allows the batter to spread evenly and develop a golden crust without burning the edges. If you’re using a convection oven, reduce the temperature by 25°F to avoid over‑browning. This trick ensures a consistent texture every time.
Why Your Nose Knows Best
Trust your nose when the batter starts to smell like toasted sugar and butter. That aroma is a cue that the batter is ready to be poured into the pan. If you’re unsure, touch the batter; it should be thick enough to hold its shape but still pourable. This sensory checkpoint saves you from under‑baking.
The 5-Minute Rest That Changes Everything
After removing the bars from the oven, let them rest for five minutes before cutting. This brief pause allows the interior to set, preventing the bars from falling apart. The bars will also develop a slightly firmer texture that’s easier to slice cleanly.
The Secret Ingredient Swap
Swap out the chocolate chips for dried fruit like cherries or cranberries for a tart contrast. The fruit’s natural sweetness complements the chocolate, creating a balanced flavor profile. This variation is perfect for a summer gathering or a holiday dessert.
The Parchment Trick
Roll a sheet of parchment paper into a ball before placing it in the pan. This ensures the paper stays flat and doesn’t warp during baking, resulting in perfectly even bars. The parchment also makes removal effortless, preserving the bars’ shape.
Creative Twists and Variations
This recipe is a playground. Here are some of my favorite ways to switch things up:
Chocolate‑Mint Madness
Add a handful of crushed peppermint candies and a splash of peppermint extract to the batter. The mint pairs wonderfully with chocolate, creating a refreshing twist that’s perfect for holiday parties. The bars will have a subtle minty aroma that lingers after each bite.
Nutella Swirl
Fold in a few tablespoons of Nutella into the batter before baking. The hazelnut spread creates a decadent swirl that adds a new dimension of flavor. The bars will have a smooth, chocolatey center that melts in your mouth.
Spiced Pumpkin Delight
Incorporate a quarter cup of pumpkin puree and a pinch of cinnamon into the batter. This variation gives the bars a warm, autumnal flavor that’s perfect for fall gatherings. The pumpkin adds moisture, keeping the bars tender.
Caramelized Banana Bars
Blend in mashed ripe bananas and a drizzle of caramel sauce before baking. The banana adds natural sweetness while the caramel provides a buttery, gooey center. These bars are a sweet treat that feels like a dessert on a dessert.
Sea Salt Caramel Crunch
Replace the nuts with a handful of sea salt caramel pieces and sprinkle a pinch of sea salt on top before baking. The salty caramel creates a sweet‑salty contrast that’s hard to resist. The bars will have a crisp exterior and a chewy interior.
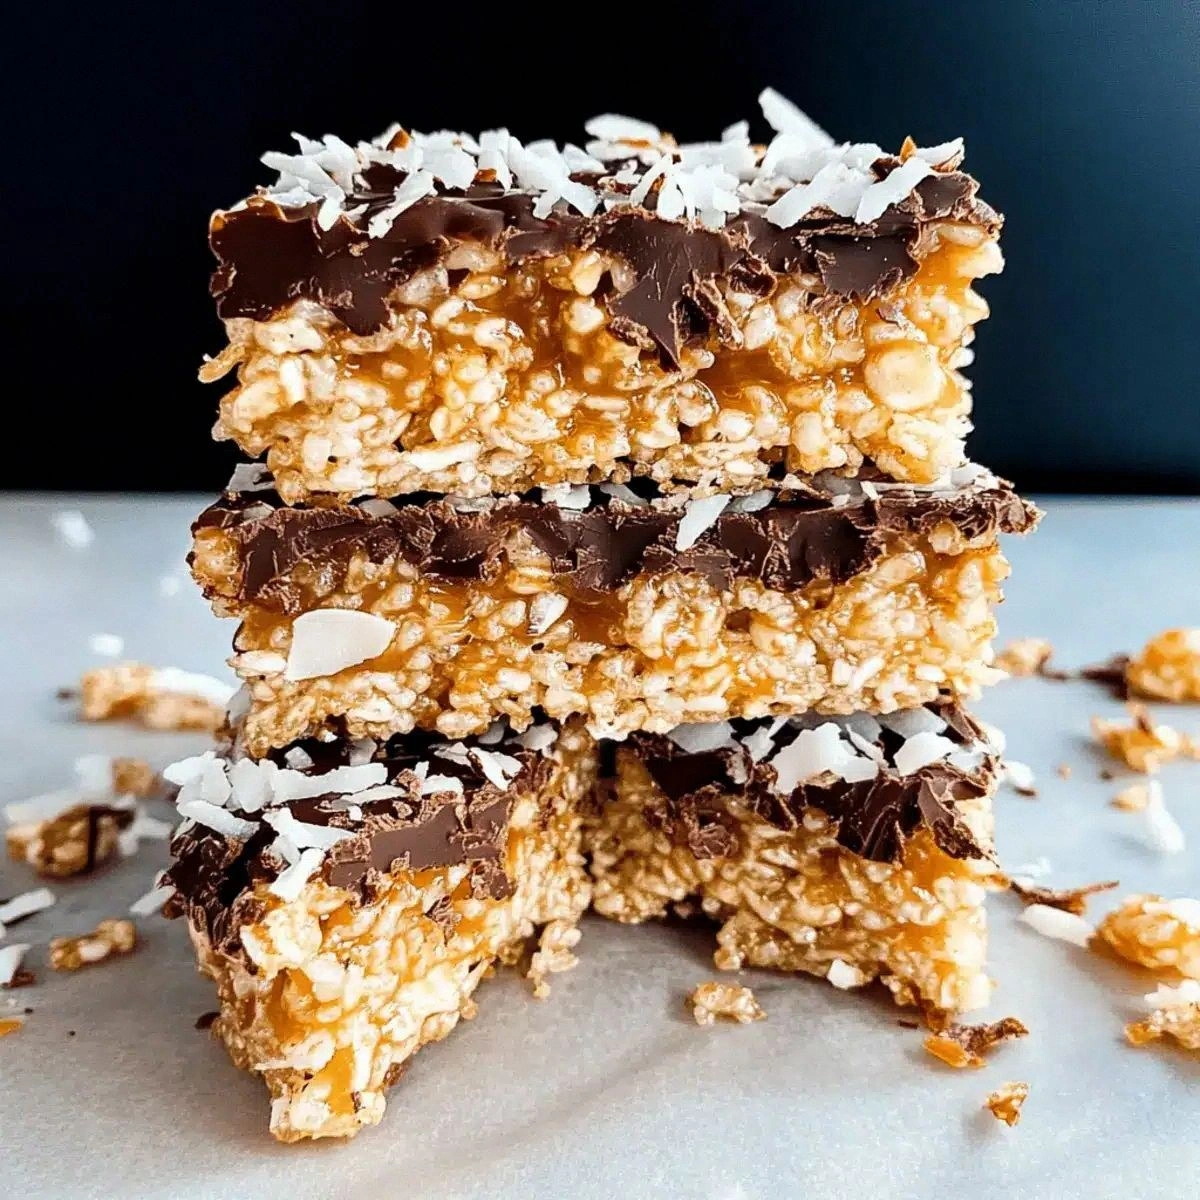
Almond Joy Bars
Add shredded coconut and mini marshmallows to the batter for a tropical twist. The coconut adds texture while the marshmallows give a sweet, airy bite. These bars are a fun, nostalgic treat that feels like a childhood memory.
Storing and Bringing It Back to Life
Fridge Storage
Place the cooled bars in an airtight container and store them in the refrigerator for up to a week. The cool temperature preserves the buttery flavor and prevents the bars from becoming stale. When ready to serve, let them sit at room temperature for 10 minutes to restore their soft center.
Freezer Friendly
Wrap individual bars in plastic wrap and place them in a freezer bag for up to three months. Freezing locks in freshness and allows you to have a ready‑made dessert anytime. Thaw overnight in the refrigerator or at room temperature for a quick treat.
Best Reheating Method
Reheat frozen or refrigerated bars in a 300°F (150°C) oven for 5–7 minutes, or until warm. For a crispier exterior, finish them under the broiler for 1–2 minutes, watching closely to avoid burning. Add a tiny splash of water before reheating to create steam, which keeps the bars moist and restores their original texture.