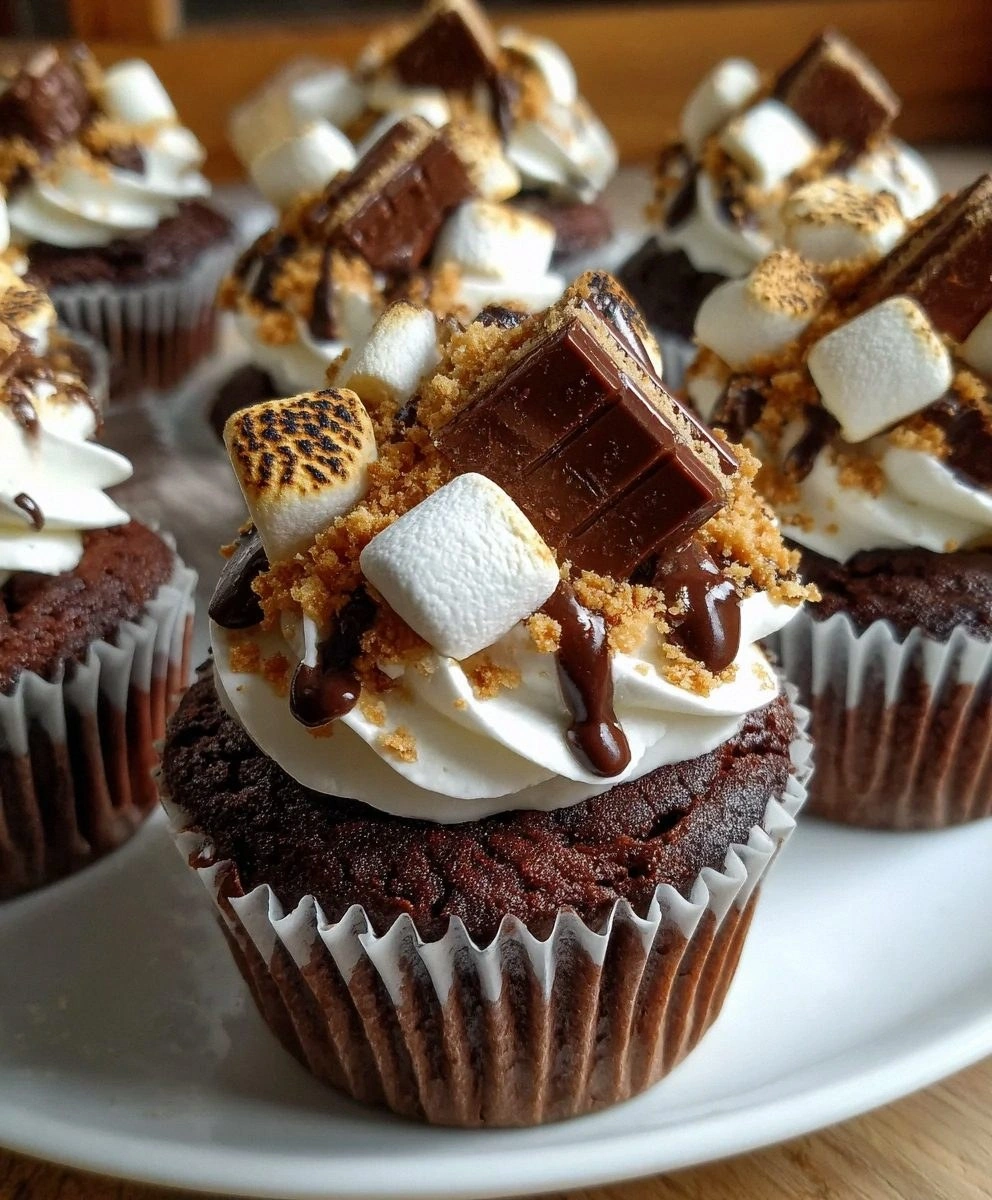
Picture this: it's 11:37 p.m., the house is quiet, and you're hit with a craving so fierce it feels like a tiny campfire-obsessed goblin is doing cartwheels in your stomach. You want s'mores—no, you need s'mores—but it's raining, the backyard firepit is a soggy mess, and your stash of graham crackers has somehow turned into a sad pile of cardboard dust. Been there? I have, and it ended in a chocolate-smeared epiphany: why should crackling flames get all the fun when we can trap every last molecule of toasted-mallow nostalgia inside a cupcake that delivers the exact gooey campfire high without the smoke in your hair or mosquitoes treating you like an all-you-can-eat buffet. That midnight scramble—complete with a scorched saucepan, marshmallow cobwebs stretching across my kitchen ceiling, and one very judgmental cat—produced the cupcake I'm about to shove into your life: towering domes of dark cocoa sponge hiding molten marshmallow cores, crowned with a swirl of toasted meringue and shards of honey-kissed graham streusel that snap like thin ice under your teeth.
Fast-forward past three months of obsessive tweaking—twelve pounds of chocolate, one minor marshmallow volcano, and a neighbor who now waves whenever he smells burnt sugar—I've landed on the ultimate s'mores chocolate marshmallow cupcake. This isn't some cutesy Pinterest fail that tastes like a vaguely chocolate-ish sponge with a sad supermarket marshmallow plopped on top. Nope. This is the full campfire orchestra: a deeply fudgy cake that stays impossibly moist for days (if your batch lasts that long, which—confession—I have never managed), a surprise lava flow of real melted chocolate and gooey marshmallow that erupts when you warm the cake for eight seconds, and a toasted cloud of Italian meringue that tastes like someone captured summer nights in edible form. The secret? A two-temperature bake that sets the outside while keeping the center molten, and a quick broil trick that gives you those campfire-charred blisters without torching your eyebrows.
Before you panic about specialty equipment or terrifying pastry school jargon, breathe. You need one bowl, a hand mixer (or a whisk and a decent bicep), and a muffin pan—nothing fancy. Most of the magic happens while you're licking chocolate off the spoon and dancing around the kitchen to whatever guilty-pleasure playlist gets you moving. I wrote this recipe for real kitchens: uneven ovens, toddlers tugging your pajama pants, dogs hoping you drop a nugget of chocolate (don't worry, we keep them safe). Every step is tested in my own slightly chaotic, always lived-in kitchen, because if I can nail these cupcakes while simultaneously refereeing a Mario Kart rematch, you can absolutely crush it on a relaxed Saturday afternoon.
Ready for the game-changer? We're sneaking a mini marshmallow and a square of milk chocolate into the heart of each cupcake after the batter is in the tins—no cutting, no stuffing, just a quick press that creates a molten pocket. When you bite in, the marshmallow stretches into Instagram-worthy strands and the chocolate puddles like liquid velvet. Stick with me here—this next part is worth it—because I'm about to walk you through every single detail, from choosing cocoa that tastes like actual chocolate (not brown dust) to getting those bakery-style domed tops that make people swear you bought these from some boutique patisserie at an offensive price. Let me walk you through every single step—by the end, you'll wonder how you ever made it any other way.
What Makes This Version Stand Out
- Flavors on Fire: We bloom the cocoa with hot coffee, unlocking deep smoky notes that mimic toasted graham edges and make the chocolate taste like it just emerged from a campfire sing-along.
- Texture Tango: A whisper of cornstarch in the batter gives you the softest crumb—think somewhere between brownie and cloud—so the cakes squish instead of crumble when you peel the wrapper.
- Molten Core Magic: Instead of a dry marshmallow chunk that bakes into taffy, we insert it mid-bake so it stays stretchy and lava-like, a built-in sauce that surprises first-time tasters every single time.
- One-Bowl Ease: No creaming butter, no alternating dry-to-wet circus. Dump, whisk, pour, done—because your time should be spent eating cupcakes, not washing dishes.
- Burnt-Sugar Halo: The meringue is stabilized with a quick honey syrup, meaning you can torch it hours ahead and it won't weep into a sad puddle, perfect for parties or clandestine midnight snacking.
- Make-Ahead Hero: Freeze the naked cakes for up to a month; when the craving hits, warm them in a low oven, inject the gooey center, and top with fresh meringue. Instant summer in February.
- Crowd-Psychology Approved: I dare you to set a tray of these down at a cookout and watch them vanish faster than free beer—people lose all dignity when chocolate, marshmallow, and nostalgia collide.
Alright, let's break down exactly what goes into this masterpiece...
Inside the Ingredient List
The Flavor Base
Dutch-process cocoa is non-negotiable here. Natural cocoa tastes thin and metallic, like someone waved a chocolate bar over the bowl and called it a day. Dutching mellows acidity and deepens color, giving you that almost-black hue that makes people assume you used fancy European chocolate. If you absolutely must swap, add a teaspoon of espresso powder to natural cocoa to fake the depth—but honestly, spring for the good stuff; it costs pennies per cupcake and the flavor upgrade is like switching from a flip phone to 4K streaming. Store it in the freezer and it'll stay potent for a year, ready whenever the late-night baking bug bites.
Dark brown sugar isn't just sweet—it's the quiet genius carrying molasses notes that whisper "campfire" without shouting. Granulated sugar gives you bland sweetness; brown sugar brings toffee, smoke, and that chewy softness that keeps these cupcakes tasting fresh on day three (though they've never survived that long in my house). Pack it firmly when measuring; those extra crystals are flavor insurance. If your brown sugar has petrified into a geological artifact, revive it with a damp paper towel in the jar and twenty seconds in the microwave, then fluff with a fork. Crisis averted, cupcakes saved.
The Texture Crew
Buttermilk might sound pretentious, but it's the undercover agent reacting with baking soda to create carbon-dioxide bubbles that lift the crumb and keep it plush. No buttermilk? Fake it by stirring a tablespoon of lemon juice into regular milk and let it sit five minutes until it looks like science-project goo. The acidity tenderizes gluten, so you get tenderness without the dreaded dense hockey-puck cupcake. Full-fat yogurt thinned with a splash of water works too, but the tang of buttermilk plays beautifully against sweet marshmallow—think of it as the snappy come-back in a rom-com banter.
Vegetable oil keeps these cakes moister than a midnight fog. Butter tastes great but firms when cold, giving you day-two cupcakes that bounce off the floor. Oil stays liquid at room temp, so even refrigerated leftovers feel fresh-baked. Use a neutral oil like canola or grapeseed—save the fancy olive oil for salads where its flavor can shine rather than competing with chocolate. Measure it in the same cup you used for the buttermilk and the residual acid helps the oil slide out in one glossy plop instead of stubbornly clinging.
The Unexpected Star
Mini marshmallows aren't just cute; their higher surface-to-mass ratio means they melt faster, creating that Instagram-pull without turning into rubber. Standard big marshmallows stay stubbornly cube-shaped, while minis dissolve into silky threads that lace through the chocolate core. If you only have jumbo campfire marshmallows, snip them into pea-sized pieces with kitchen shears dusted in powdered sugar—no sticky nightmare, no tears. And please, avoid the pastel-colored cereal marshmallows; they taste like sweetened styrofoam and will betray you in the flavor department faster than you can say "artificial dye."
The Final Flourish
Graham crackers are more than nostalgia—they bring honey-wheat crunch that anchors all the sugar with a whisper of whole-grain healthiness (let's pretend, okay?). Pulverize them in a food processor until they look like sandy beach, then toss with melted butter and a pinch of salt to form a streusel you can sprinkle both inside and on top. If you're gluten-free, crushed rice Chex mixed with a teaspoon of honey and a dash of cinnamon mimic that toasty flavor shockingly well. Store the streusel in an airtight jar and you'll find yourself sprinkling it on yogurt, ice cream, or straight into your mouth at 2 a.m.—don't say I didn't warn you.
Everything's prepped? Good. Let's get into the real action...
The Method — Step by Step
- Preheat like you mean it. Crank your oven to 400 °F (205 °C) first—ovens lie about temperature, and you want the walls blazing so when you drop it to 350 °F later, the residual heat creates that high dome. While it heats, line a 12-cup muffin tin with parchment squares or paper liners; give each cavity a quick spritz of non-stick spray for insurance. Whisk your dry ingredients—flour, Dutch cocoa, brown sugar, cornstarch, baking soda, salt—until the mixture looks like midnight beach sand. This distributes the leavening so you don't get one volcanic cupcake and eleven sad pancakes.
- Bloom the cocoa. Pour hot coffee (or hot water with a teaspoon of instant espresso) over the cocoa mixture and whisk until it turns into a glossy, almost-black lava. This is the moment of truth: the heat unlocks flavonoids and kills any dull, dusty notes. Let it stand two minutes; it should smell like a chocolate factory had a baby with a campfire. Stir in the oil and buttermilk; the batter will loosen and gleam like liquid brownie mix—resist drinking it, you're halfway to greatness.
- Add the eggs—gently now. Lightly beat the eggs and vanilla together, then fold them into the chocolate sludge just until the batter looks like melted ice cream with a slight sheen. Over-mixing activates gluten and you'll end up with rubbery domes that could double as tennis balls. The batter should pour off your whisk in thick ribbons that hold their shape for three Mississippi-count before melting back into the bowl. If it looks curdled, your buttermilk was too cold; warm the bowl over a pan of hot water while whisking and watch it smooth into satin.
- Fill and create the secret pocket. Divide the batter among the muffin cups, filling each about two-thirds—an ice-cream scoop guarantees uniform size and keeps your fingers clean. Now here's the fun part: drop a single mini marshmallow and a ½-inch square of milk chocolate right onto the surface of each cup. Don't push yet; let them sit like tiny astronauts waiting for launch. The weight plus oven spring will draw them into the center, forming that molten core without splitting the cake.
- The two-temp bake. Slide the tin onto the middle rack and bake at 400 °F for exactly 5 minutes—this blast of heat lifts the crown. Without opening the door, drop the temperature to 350 °F and bake another 12–14 minutes. You'll know they're ready when the tops look set, a few moist crumbs cling to a toothpick inserted at the edge (avoid the center pocket), and the kitchen smells like Willy Wonka's backyard barbecue. Remove and cool five minutes in the pan; any longer and condensation will sog your bottoms—nobody wants a soggy-bottomed cupcake.
- Graham crunch time. While the cakes cool, stir together graham cracker crumbs, melted butter, pinch of salt, and a teaspoon of brown sugar until it resembles wet sand. Spread on a sheet pan and bake at 350 °F for 6 minutes, stirring once, until it smells like toasty honey and turns a shade darker. Let it cool; it crisps as it cools, so resist nibbling until fully set (good luck with that).
- Meringue that won't weep. In a small saucepan, combine ¼ cup honey with 2 tablespoons water and heat to 240 °F (soft-ball). Meanwhile, whip two egg whites with a pinch of cream of tartar to soft peaks. Slowly drizzle the hot syrup down the side of the bowl while whipping; keep beating until the bowl is barely warm and the meringue holds glossy peaks that look like marshmallow creme—because that's essentially what it is, minus the cornstarch. This syrup stabilizes the foam, so you can torch it hours ahead and it stays proud.
- Assemble the dream. Peel the cooled cupcakes from their liners and place on a wire rack. Using a star tip, pipe a dramatic swirl of meringue onto each cake, building height like a mini mountain. Sprinkle a generous pinch of your graham streusel around the base of the swirl for crunch contrast. Now grab a kitchen torch and wave the flame 2 inches above the meringue until it blisters and smells like campfire toasting. Rotate quickly so you don't melt the frosting off—this next part is pure magic.
- Serve with flair. Plate the cupcakes on a wooden board dusted with extra graham crumbs for rustic vibes. If you want the full lava effect, microwave each cake for 8–10 seconds—the marshmallow core liquefies and the chocolate puddles, mimicking that first messy s'mores bite. Watch your guests' eyes widen as they pull the cupcake apart and the hidden center oozes like edible lava. I dare you to taste this and not go back for seconds.
That's it—you did it. But hold on, I've got a few more tricks that'll take this to another level...
Insider Tricks for Flawless Results
The Temperature Rule Nobody Follows
Room-temperature eggs and buttermilk aren't just culinary snobbery; they emulsify faster, trapping air for a lighter crumb. Cold eggs seize the batter, creating speckled chocolate omelets—delicious but decidedly un-cupcake. Pull dairy and eggs out 30 minutes before baking, or cheat by placing cold eggs in warm (not hot) water for 5 minutes. Same with buttermilk: nuke it 10 seconds, stir, and you're golden. Your batter will blend into silky unity, and the rise will be so proud you'll swear the cakes are showing off.
Why Your Nose Knows Best
Ignore the clock at your peril—ovens vary, but smell is universal. When the aroma of chocolate changes from raw cocoa to rich, nutty fudge, start checking for doneness. That scent shift happens about two minutes before the cakes over-bake, giving you a built-in alarm system. A friend tried skipping this step once—let's just say it didn't end well, and her dog still won't look at a cupcake. Trust your olfactory instincts; they're older than any kitchen timer.
The 5-Minute Rest That Changes Everything
Once cooled, stash the naked cupcakes in a lidded container for five hours—or overnight—before topping with meringue. This rest allows the crumb to hydrate fully, deepening flavor and preventing the dreaded wrapper-peel where half your cake clings to the paper like a toddler to mom's leg. I discovered this accidentally when I ran out of time for a party; the next-day batch tasted so much richer that now I plan to bake ahead. Future pacing: picture yourself pulling this out of the oven, the whole kitchen smelling incredible, and you haven't even started the frosting yet.
Creative Twists and Variations
This recipe is a playground. Here are some of my favorite ways to switch things up:
Peanut Butter Campfire
Swap the milk chocolate square for a frozen mini peanut-butter cup before baking. The peanut butter melts into salty-sweet lava that marries marshmallow fluff like Elvis and jelly. Top the meringue with crushed honey-roasted peanuts for crunch. Reese's lovers will propose marriage; you've been warned.
Spicy Mexican Mocha
Add ½ teaspoon cinnamon and a pinch of cayenne to the dry mix, then bloom the cocoa with hot coffee spiked with a tablespoon of Kahlúa. The gentle heat sneaks up after the chocolate melts, like a cozy blanket that suddenly turns electric. A dash of chili-lime seasoned graham streusel keeps the theme going.
Salted Caramel Cowboy
Replace the marshmallow with a soft caramel candy and sprinkle flaky sea salt over the meringue before torching. The caramel oozes into buttery ribbons, and the salt amplifies every chocolate note like turning up the bass on your favorite song. Caramel plus chocolate plus smoke equals grown-up s'mores sophistication.
Gluten-Free Glacier
Substitute the all-purpose flour with a 1:1 gluten-free blend and add ¼ teaspoon xanthan gum for structure. Use gluten-free rice Chex for the streusel. The result is so indistinguishable from the original that my celiac cousin cried actual tears—partly from joy, partly because she ate four in a row and realized the limit did not exist.
Triple Chocolate Thunder
Fold ½ cup mini chocolate chips into the batter for pockets of melted chocolate, use a dark-chocolate square in the center, and finish with chocolate-shaving-dusted meringue. This is for days when one form of chocolate simply will not suffice. Bonus: the chips add little craters that grip the graham streusel like lunar landing sites.
Boozy Bourbon Bonfire
Stir a tablespoon of bourbon into the meringue syrup while it's hot; the alcohol cooks off but leaves smoky vanilla notes that scream campfire. Serve these at adult parties and watch everyone suddenly become best friends. If you've ever struggled with making friends at gatherings, you're not alone—and I've got the fix.
Storing and Bringing It Back to Life
Fridge Storage
Because of the gooey marshmallow core, these babies need refrigeration after day one. Place cooled, unfrosted cupcakes in an airtight container lined with a paper towel to absorb moisture; they'll stay moist for up to four days. Add the meringue just before serving—nobody wants fridge-flavored foam. If already assembled, store under a cake dome for 24 hours; beyond that, the sugar in the meringue starts sucking up fridge odors like a culinary sponge.
Freezer Friendly
Flash-freeze naked cupcakes on a tray until solid, then transfer to zip bags with the air sucked out. They keep for a month without flavor loss. To serve, thaw overnight in the fridge, then warm in a 300 °F oven for 8 minutes to revive the chocolate lava. Top with freshly made meringue and torch. Future you will thank present you when a surprise craving hits and all you need is ten minutes to dessert nirvana.
Best Reheating Method
Microwave an unfrosted cupcake for 8–10 seconds—any longer and the marshmallow overheats and turns into taffy. If it's already topped, use a 275 °F oven for 5 minutes with a tiny cup of hot water on the side; the steam revives the crumb and sets the meringue without melting it into soup. Add a fresh sprinkle of graham streusel after warming for maximum crunch revival.