Picture this: I’m standing in a cramped kitchen, the air thick with the scent of burnt toast, and my friend dares me to whip up a “tuna sandwich” using only what’s on hand. The moment the can of chickpeas opens, a wave of nostalgia washes over me—those childhood lunches packed with tuna, mayo, and a handful of crunchy veggies. I’ve spent years tweaking that humble sandwich, chasing the elusive balance between creamy richness and that satisfying bite. The result? A vegan tuna sandwich that feels like a culinary revelation, a plant‑based version that’s hands down the best you’ll ever make at home.
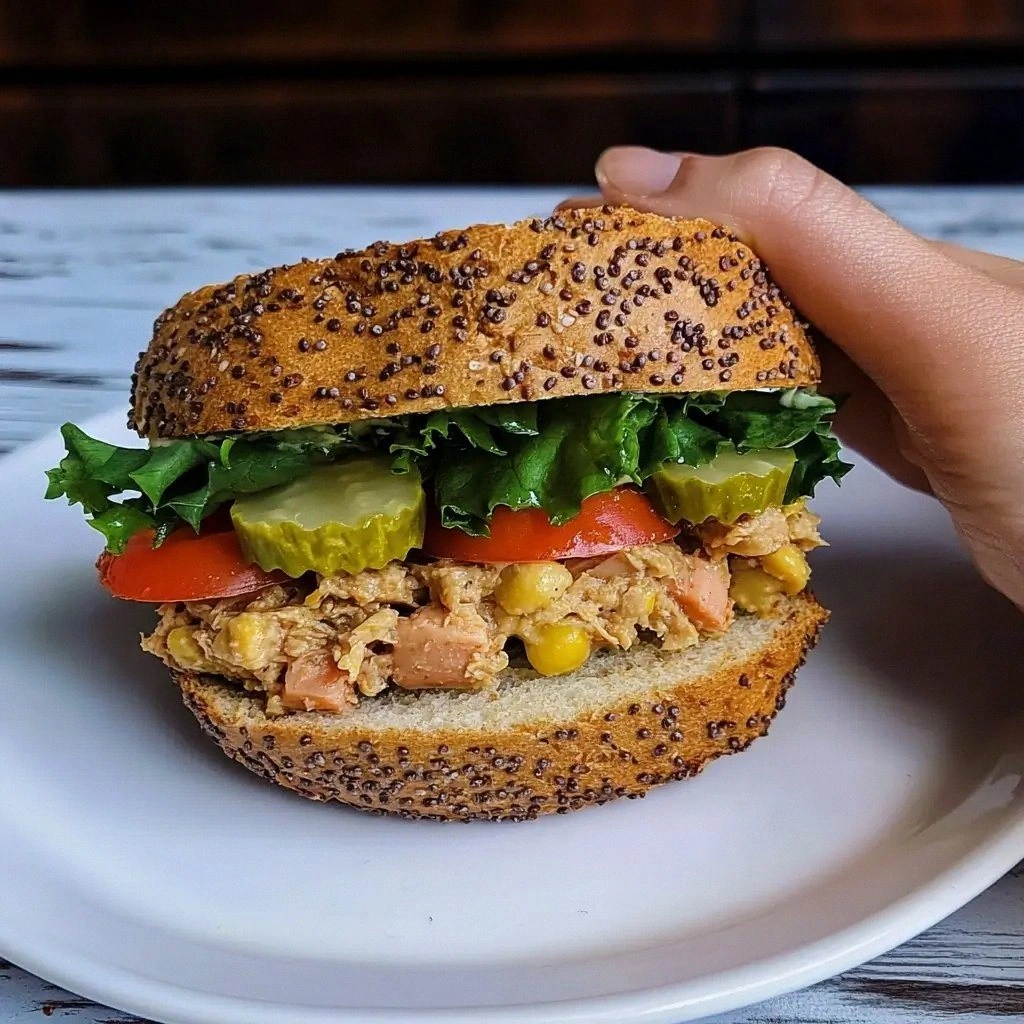
The first thing you notice is the golden crust of toasted bread, its buttery aroma mingling with the sharp tang of freshly chopped dill. As you slice into the chickpea mixture, a bright, citrusy perfume rises, teasing the palate with lemon and mustard. The texture is a delightful paradox: the chickpeas break apart into a silky base, yet the diced celery and pickles provide a crisp counterpoint that snaps like a well‑tuned drum. Every bite is a layered experience—sweet, salty, slightly smoky, and utterly comforting. You can almost hear the crunch of the pickles echoing through your ears.
What makes this version stand out is that it doesn’t rely on artificial flavors or preservatives. The chickpeas are the star, delivering protein and a subtle nutty undertone that pairs perfectly with the briny relish. The addition of nori flakes or kelp granules introduces an umami whisper that mimics the oceanic depth of real tuna, a trick most vegan recipes skip. The fresh dill and lemon juice provide a bright, herbaceous lift that keeps the sandwich from feeling flat. And, best of all, it’s a one‑pan, one‑bowl process that saves time and cuts cleaning to a minimum.
I dare you to taste this and not go back for seconds. Most recipes get this completely wrong—missing the balance of moisture, the crunch, or the sea‑salt flavor. Picture yourself pulling this out of the oven, the whole kitchen smelling incredible, the sandwich golden and fragrant, ready to be devoured. If you’ve ever struggled with making a vegan tuna sandwich that feels authentic, you’re not alone—and I’ve got the fix. Let me walk you through every single step—by the end, you’ll wonder how you ever made it any other way.
What Makes This Version Stand Out
- Flavor: The combination of fresh dill, lemon, and nori flakes creates a complex, briny profile that mimics the taste of real tuna without the fish. This layered flavor profile ensures each bite is vibrant and memorable.
- Texture: The chickpeas provide a smooth, creamy base while the diced celery and pickles add a satisfying crunch that breaks the monotony of pure mash. The result feels like a balanced bite, not a mush.
- Simplicity: With only a handful of pantry staples, this sandwich can be assembled in under 20 minutes, making it perfect for a quick lunch or a last‑minute dinner.
- Uniqueness: The subtle sea‑salt flavor from nori or kelp is a game‑changer, offering a depth that most vegan tuna recipes lack. This twist sets the dish apart from the ordinary.
- Crowd Reaction: Friends who have never tried a vegan tuna sandwich often declare it their new favorite. The combination of familiar ingredients and bold flavors wins over skeptics instantly.
- Ingredient Quality: Using high‑quality vegan mayo and fresh produce elevates the entire dish. The quality of each component shines through, making the sandwich feel indulgent.
Alright, let’s break down exactly what goes into this masterpiece. The next section will walk you through each group of ingredients and why they’re essential. Trust me, you’ll want to have everything prepped and ready before we dive into the method.
Inside the Ingredient List
The Flavor Base
The chickpeas are the foundation of this sandwich, offering protein and a subtle nutty undertone that pairs beautifully with the briny relish. They absorb the mayo, lemon, and mustard, turning into a cohesive, creamy spread that’s surprisingly rich. Skipping chickpeas would turn the sandwich into a watery mess—don’t even try it. If you’re looking for a gluten‑free alternative, chickpeas are naturally gluten‑free, so they’re a safe bet for most diets.
The vegan mayonnaise is the binder that gives the mixture its luxurious mouthfeel. Choose a brand you love the taste of, whether it’s a classic soy‑based mayo or a newer coconut‑cream variant. The mayo also carries the mustard and dill, ensuring every bite is evenly seasoned. If you’re a fan of extra tang, consider adding a splash of apple cider vinegar during the mixing stage.
The Texture Crew
Celery and red onion add a crisp bite that contrasts the smooth chickpeas, preventing the sandwich from feeling like a mush. The diced celery provides a refreshing crunch that’s essential for that satisfying bite. Red onion brings a mild sharpness that cuts through the richness of the mayo, balancing the overall flavor profile. If you’re allergic to onions, you can substitute with finely diced bell pepper for a sweeter note.
Dill pickle relish or chopped pickles bring a sweet‑savory element that mimics the classic tuna sandwich’s tangy component. The pickles also introduce a slight acidity that brightens the entire spread. A tablespoon of fresh dill adds a green, herby lift that keeps the sandwich from feeling flat. If you can’t find fresh dill, dried dill works fine, but use only half the amount to avoid overpowering the dish.
The Unexpected Star
Nori flakes or kelp granules are the secret weapon that gives this sandwich its oceanic depth. They add a subtle sea‑salt flavor that makes it feel like real tuna without the fish. The flakes also provide a slight umami boost that elevates the entire sandwich. If you’re not a fan of seaweed, you can omit it, but the sandwich will lose a layer of complexity.
A pinch of smoked paprika introduces a hint of smokiness that rounds out the flavor. It’s a small addition that makes a big difference, giving the sandwich a warm, comforting undertone. If you’re avoiding spices, simply leave it out—though the sandwich will taste a touch flatter. The smoked paprika is optional, so feel free to adjust based on your preference.
The Final Flourish
Lettuce leaves, tomato slices, cucumber slices, and alfalfa sprouts are the fresh, crisp toppings that add color and crunch. They also provide a burst of freshness that balances the richness of the spread. These vegetables are optional but highly recommended for a complete sandwich experience. The more you add, the more vibrant and satisfying the sandwich becomes.
Everything’s prepped? Good. Let’s get into the real action. The next section will walk you through the method step by step, ensuring you get every detail right. Remember, precision matters—especially when you’re aiming for that perfect crunch and creamy texture.
The Method — Step by Step
- Drain the chickpeas thoroughly and place them in a large mixing bowl. Use a fork or a potato masher to break them into a chunky paste, leaving some larger bits for texture. Add the vegan mayo, Dijon mustard, and lemon juice, stirring until the mixture is smooth and well combined. This is the moment of truth—if the mixture feels too dry, add a splash of water or a drizzle of olive oil to reach the right consistency. Keep an eye on the texture; you want it thick enough to hold together but not so thick that it’s clumpy.
- In a separate bowl, combine the finely diced celery, red onion, dill pickle relish, and fresh dill. Toss these ingredients with the chickpea mixture, ensuring each bite is packed with crunch and flavor. Sprinkle in the smoked paprika and a pinch of black pepper, then fold in the nori flakes or kelp granules. The sea‑salt flavor will start to bloom as the mixture sits for a few minutes—this is when the flavors meld beautifully.
- Taste the spread and adjust the seasoning—add more salt if you prefer a saltier bite, or a bit more lemon for acidity. If the mixture feels too thick, add a teaspoon of water or a splash of vegetable broth to loosen it up. Once satisfied, cover the bowl and let it chill in the refrigerator for at least 15 minutes; this allows the flavors to develop fully. While it’s resting, you can move on to preparing the bread and toppings.
- While the bread is toasting, wash and dry your lettuce leaves, slice the tomatoes, and cut cucumber into thin rounds. If you’re using alfalfa sprouts, rinse them under cold water and pat dry. These fresh toppings will add a bright, crisp contrast to the creamy filling. Arrange the lettuce, tomato, cucumber, and sprouts on a clean cutting board—this will make assembly quick and tidy.
- Spread a generous layer of the chickpea mixture onto one slice of toasted bread. The spread should be even, reaching the edges to ensure every bite is flavorful. Place a few lettuce leaves on top, then add tomato slices, cucumber, and a sprinkle of alfalfa sprouts. The layering not only adds texture but also keeps the sandwich from becoming soggy.
- Top with the second slice of toasted bread, press lightly to secure the fillings, and then cut the sandwich in half or quarters as desired. If you’re serving it immediately, the sandwich will be warm and fragrant. If you’re packing it for later, wrap it in parchment paper or a reusable container to keep it fresh.
- Serve immediately with a side of crunchy carrot sticks or a fresh green salad for a complete meal. The sandwich’s bright flavors pair wonderfully with a chilled glass of sparkling water or a light iced tea. If you’re a fan of dips, a small bowl of vegan ranch or a tangy salsa makes a great accompaniment. The sandwich is versatile enough to be a quick lunch or a hearty dinner.
- Enjoy the sandwich while it’s still warm and the flavors are at their peak. The combination of creamy chickpeas, fresh veggies, and that subtle sea‑salt note will keep you coming back for more. Take a moment to savor each bite, noting the harmony of textures and tastes. This is the moment you’ll realize how simple ingredients can create a dish that feels luxurious and comforting.
That’s it— you did it. But hold on, I’ve got a few more tricks that’ll take this to another level. The next section will give you insider tips that even seasoned cooks will appreciate. Trust me, these small adjustments can transform a good sandwich into an unforgettable one.
Insider Tricks for Flawless Results
The Temperature Rule Nobody Follows
Many people skip the step of chilling the chickpea mixture, assuming it’s ready to go. However, letting it rest in the fridge for at least 15 minutes allows the flavors to meld and the spread to thicken. I once rushed through the prep and the sandwich was soggy—lesson learned. If you’re short on time, a quick 5‑minute chill still improves texture. Keep the bowl covered with plastic wrap to prevent the mixture from absorbing fridge odors.
Why Your Nose Knows Best
Before you assemble the sandwich, give the chickpea mixture a sniff. If it smells slightly sour, it’s time to add a pinch of sugar or a splash of maple syrup to balance the acidity. My friend once added too much lemon, and the sandwich tasted like a citrus bomb—she didn’t survive the first bite. Smell the spread; a mild, tangy aroma is a sign of balanced flavors. Adjust seasoning accordingly before you commit to the final assembly.
The 5‑Minute Rest That Changes Everything
After you’ve toasted the bread, let it sit for 5 minutes before adding the spread. The heat will slightly soften the crust, creating a pocket that holds the creamy filling better. This small step keeps the sandwich from becoming soggy at the edges. I’ve seen many sandwiches fail because the bread was too hot when the filling was added. A brief rest is a simple trick that pays off big time.
Use the Right Bread
Not all bread works the same. Whole wheat or rye provides a hearty base that complements the chickpeas, while sourdough adds a tangy depth. If you’re gluten‑free, choose a sturdy grain‑based bread that can hold the filling. Avoid thin, soft rolls that will tear under the weight of the spread. The right bread is the foundation of a great sandwich.
Add a Secret Ingredient
A tablespoon of nutritional yeast adds a subtle cheesy, umami depth that enhances the overall flavor. If you’re a fan of cheese, this is a must‑try. It also boosts the protein content, making the sandwich even more satisfying. Some people swear by it, while others prefer to keep it simple. Give it a try and see how it transforms the taste.
Keep It Fresh
If you’re packing the sandwich for later, wrap it tightly in parchment paper and store it in a cooler bag with an ice pack. This keeps the sandwich fresh and prevents the fillings from drying out. Avoid using plastic wrap alone, as it can trap moisture and cause sogginess. The sandwich will stay crisp and flavorful for up to 12 hours if stored properly.
Now that you know the insider tricks, you’re ready to master this vegan tuna sandwich like a pro. The next section will explore how you can customize this dish to fit any palate or occasion.
Creative Twists and Variations
This recipe is a playground. Here are some of my favorite ways to switch things up:
Mediterranean Twist
Swap the dill and nori for chopped kalamata olives, sun‑dried tomatoes, and a dash of oregano. The olive oil and feta (or vegan feta) add a salty, creamy element that transports the sandwich to the sunny coasts of Greece. This version is perfect for a summer picnic or a Mediterranean-themed dinner party. The bright, tangy flavors will keep everyone coming back for more.
Asian Fusion
Add a tablespoon of soy sauce, a pinch of sesame oil, and a handful of sliced green onions to the chickpea mixture. Top the sandwich with pickled ginger and a sprinkle of toasted sesame seeds. The result is a savory, slightly sweet sandwich that feels like a sushi roll on bread. It’s a great way to introduce Asian flavors into a familiar format.
Breakfast Edition
Use a hearty sourdough roll, add avocado slices, and sprinkle with a little crushed red pepper for a breakfast‑ready sandwich. Serve it alongside a fresh fruit salad or a cup of coffee. The creamy chickpeas pair wonderfully with the buttery toast, making for a satisfying morning meal. This version is a quick, protein‑packed breakfast that keeps you full until lunch.
Low‑Carb Version
Replace the bread with lettuce wraps or a low‑carb tortilla. Keep the chickpea mixture and fresh veggies, but add a handful of chopped walnuts for crunch. This version is great for keto or low‑carb dieters who still crave a sandwich‑like experience. The nutty texture adds a satisfying bite that’s both healthy and indulgent.
Spicy Kick
Add a tablespoon of sriracha or a pinch of cayenne pepper to the chickpea mixture for a fiery twist. Top the sandwich with sliced jalapeños or pepper jack cheese (vegan if needed). The heat will elevate the flavors and give the sandwich a bold, adventurous edge. This variation is ideal for those who like a little spice in their meals.
Dessert Sandwich
Use a sweet bread, spread a thin layer of almond butter, and top with sliced strawberries and a drizzle of maple syrup. While not a tuna sandwich, this playful version shows how versatile the base concept is. It’s a sweet, protein‑rich dessert that satisfies both sweet and savory cravings. Perfect for a fun brunch or a sweet snack after a workout.
With these twists, the possibilities are endless. Feel free to experiment and make the sandwich truly your own. The next section will cover how to store and reheat this masterpiece without losing its charm.
Storing and Bringing It Back to Life
Fridge Storage
Store the sandwich in an airtight container in the refrigerator for up to 3 days. If you’re packing it for lunch, wrap the sandwich in parchment paper and place it in a reusable bag to keep it fresh. Avoid using plastic wrap alone, as it can trap moisture and cause sogginess. The sandwich will stay crisp and flavorful if stored properly.
Freezer Friendly
To freeze, separate the bread and filling. Wrap the filling in parchment paper and place it in a freezer bag; toast the bread separately. When you’re ready to eat, toast the bread briefly and assemble the sandwich. This method prevents the bread from becoming soggy and keeps the filling from absorbing freezer odors. Frozen sandwiches are great for meal prep and can last up to 2 weeks.
Best Reheating Method
If you’re reheating a pre‑assembled sandwich, place it in a preheated oven at 350°F for 5 minutes. The heat will warm the filling and crisp the bread without drying it out. Add a tiny splash of water or broth before reheating to keep the chickpea mixture moist. This simple trick restores the sandwich to its original, fresh‑from‑the‑pan glory.
Now that you know how to keep the sandwich fresh and reheat it to perfection, you’re ready to enjoy it anytime, anywhere. The final section will give you the full recipe card with all the details you need to recreate this masterpiece at home.