Picture this: I was standing in a cramped kitchen, the scent of melted chocolate dancing off the counter, when my roommate shouted, “You have to try this!” She had just whipped up a batch of what she called a “triple chocolate cake” and swore it was the best thing she’d ever tasted. I laughed, thinking it was another one of those over‑the‑top, “gourmet” desserts that taste like a chocolate bar with a side of sugar. But when the first bite hit my tongue, the world shifted. The cake was a velvet‑like, silky mouthfeel, a symphony of bittersweet, milk, and dark chocolate that melted in my mouth like a chocolate fountain in a summer breeze. I was hooked, and I knew I had to share the secret with anyone who had ever felt the urge to indulge in a chocolate fix that doesn’t feel guilty or cloying.
I remember that moment as if it were yesterday. The kitchen was dimly lit, the only illumination coming from the oven’s amber glow. I could hear the faint crackle of the batter as it settled into the pan, the gentle hiss of steam rising. The air was thick with the aroma of cocoa, vanilla, and a hint of roasted coffee beans that had been tucked into the mix. I took a tentative bite, and the cake released a burst of chocolate that was simultaneously rich and airy, a texture that made me think of a cloud made of chocolate. It wasn’t just the flavor; it was the way the cake held itself together, the way the layers lifted in unison, the way the chocolate chips melted into the batter, creating pockets of gooey delight. That single bite was the beginning of a culinary obsession that would become my go‑to dessert for parties, holidays, and even quiet Sunday afternoons.
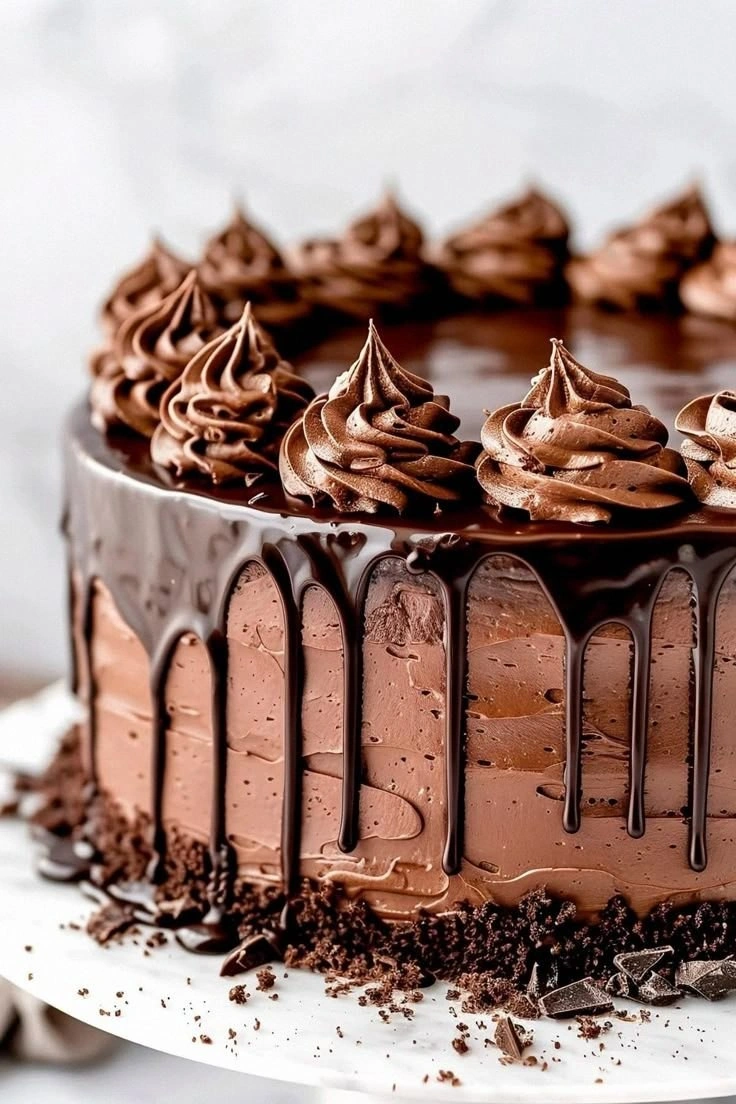
What sets this version apart is not just the triple layers of chocolate; it’s the meticulous balance of ingredients that create a cake that is moist, yet firm enough to hold its own. The secret is in the blend of cocoa powders, the subtle addition of boiling water, and the use of both melted chocolate and chocolate chips to create a multi‑textured experience. It’s a cake that satisfies the sweet tooth without the heaviness that often plagues chocolate desserts. The batter is light, airy, and yet dense enough to deliver that satisfying bite. And the finish? A glossy, chocolate ganache that coats the cake like a velvet curtain, leaving a lingering, bittersweet aftertaste that keeps you coming back for more.
I dare you to taste this and not go back for seconds. I promise you, this is hands down the best version you’ll ever make at home. If you’ve ever struggled with a cake that turns out either too dry or too soggy, you’re not alone—and I’ve got the fix. Picture yourself pulling this out of the oven, the whole kitchen smelling incredible, the batter rising like a dream, and the first slice sliding out of the pan like a chocolate waterfall. Stay with me here — this is worth it. Let me walk you through every single step — by the end, you’ll wonder how you ever made it any other way.
What Makes This Version Stand Out
- Flavor Depth: The combination of dark, milk, and semi‑sweet chocolate creates a layered taste profile that evolves with each bite. The chocolate chips add a crunchy contrast to the silky batter, while the ganache provides a rich, glossy finish.
- Texture Mastery: The batter is airy yet dense, thanks to the precise balance of leavening agents and the addition of boiling water that activates the cocoa and creates a tender crumb.
- Ingredient Quality: Using high‑grade cocoa powder and premium chocolate ensures that the natural bitterness of dark chocolate isn’t masked by artificial sweetness.
- Simplicity in Execution: Despite its indulgent name, the recipe requires only a few steps and a single pan, making it accessible for both beginners and seasoned bakers.
- Make‑Ahead Friendly: The cake can be assembled up to 48 hours in advance, and the ganache can be prepared a day ahead, allowing you to focus on the presentation on the day of the event.
- Versatile Serving: Whether you serve it as a single slice for a coffee break or cut it into cubes for a dessert platter, the cake’s structure holds up beautifully.
Inside the Ingredient List
The Flavor Base
The foundation of this cake starts with a blend of all‑purpose flour, unsweetened cocoa powder, baking powder, baking soda, and a pinch of salt. The flour provides structure, while the cocoa powder delivers the deep chocolate flavor. Baking powder and soda work together to give the cake a light rise, and salt balances the sweetness, allowing the chocolate to shine. If you skip the salt, the cake will taste overly sweet and lose some of its depth.
The Texture Crew
Eggs, milk, and vegetable oil form the moisture component, giving the batter a silky consistency. Eggs act as a binder, holding everything together, while the oil keeps the crumb tender. Milk adds a subtle richness and helps dissolve the dry ingredients. If you substitute milk with almond or oat milk, the cake will still rise, but the flavor will shift slightly toward a nuttier profile.
The Unexpected Star
Boiling water is the unsung hero that unlocks the cocoa’s full potential. By pouring hot water over the dry ingredients, the cocoa rehydrates, releasing its flavors and creating a smoother batter. Skipping this step will result in a drier texture and a less intense chocolate taste. A quick tip: use a kettle that reaches at least 212°F (100°C) to ensure maximum extraction.
The Final Flourish
Melted dark chocolate and semi‑sweet chocolate chips are folded into the batter, creating pockets of molten chocolate that melt into the cake as you bite. Milk chocolate pieces are added on top before baking, forming a glossy, caramelized crust. The ganache, made from heavy cream and chocolate, is poured over the cooled cake to seal the layers together and add a glossy finish. If you’re craving a different twist, try swapping the milk chocolate for white chocolate for a sweet, creamy contrast.
Everything's prepped? Good. Let's get into the real action...
The Method — Step by Step
- Preheat and Prep: Heat your oven to 350°F (175°C) and line a 9‑inch round cake pan with parchment paper. Grease the pan lightly with butter or oil to ensure easy release. This is the moment of truth; any misstep here will ripple through the entire cake. Keep the oven rack centered to allow even baking.
- Dry Mix: In a large bowl, whisk together flour, cocoa powder, baking powder, baking soda, and salt until fully blended. The dry mixture should be fine and free of clumps. This creates a smooth base that will absorb the liquids without becoming lumpy.
- Wet Mix: In a separate bowl, combine sugar, brown sugar, eggs, milk, vegetable oil, and vanilla extract. Beat with an electric mixer on medium speed until the mixture is light and airy, about 2–3 minutes. The batter should look glossy and hold a slight sheen.
- Combine: Gradually pour the dry mix into the wet mix, alternating with the boiling water. Start with a small amount of water to loosen the batter, then finish with the rest. Stir gently with a spatula until the batter is just combined; over‑mixing will make the cake tough.
- Add the Chocolate: Fold in the melted dark chocolate and semi‑sweet chocolate chips. The batter will thicken slightly, which is normal. This step is pure magic; the chocolate chips will create pockets of molten chocolate that will burst with each bite.
- Prepare the Top: Chop the milk chocolate into small chunks and sprinkle them evenly over the batter. Press them gently into the surface so they melt into the cake as it bakes. This will give the cake a caramelized, glossy crust.
- Bake: Pour the batter into the prepared pan, smoothing the top with a spatula. Bake for 30–35 minutes, or until a toothpick inserted in the center comes out with a few moist crumbs. The cake should have a slightly domed top and a glossy appearance.
- Cool: Let the cake cool in the pan for 10 minutes, then turn onto a wire rack to cool completely. This prevents the cake from becoming soggy from steam. The cake should feel firm to the touch and not stick to the pan.
- Ganache: While the cake cools, heat the heavy cream in a saucepan until it just begins to simmer. Remove from heat, add the chopped dark chocolate, and stir until smooth. Let the ganache cool slightly before pouring over the cake, ensuring it coats the layers evenly.
- Finish: Once the ganache has set to a thick but pourable consistency, spread it over the top, allowing it to drip down the sides for an elegant look. Chill the cake for 20 minutes to set the ganache. Slice and serve with a dusting of cocoa powder or a drizzle of espresso for extra depth.
That's it — you did it. But hold on, I've got a few more tricks that'll take this to another level.
Insider Tricks for Flawless Results
The Temperature Rule Nobody Follows
Most bakers bake at a single temperature, but this cake benefits from a two‑stage bake. Start at 350°F for the first 20 minutes to set the structure, then reduce to 325°F for the final 10–15 minutes. This gentle temperature drop helps the cake rise evenly and prevents a cracked top. I once tried baking straight at 350°F and the top cracked like a brittle shell.
Why Your Nose Knows Best
Before you even pull the cake out of the oven, sniff the batter. It should smell like roasted chocolate and a hint of vanilla. If it smells flat, the batter likely needs more leavening or a touch of espresso to awaken the chocolate. Trust your nose; it’s a reliable guide to the cake’s readiness.
The 5‑Minute Rest That Changes Everything
After removing the cake from the oven, let it rest in the pan for exactly 5 minutes before transferring it to the wire rack. This brief rest allows the cake to set, making it easier to remove without breaking. It also lets the internal heat continue cooking the batter gently, ensuring a moist crumb.
Don’t Skip the Parchment
Using parchment paper on the bottom of the pan is a non‑negotiable hack. It prevents the cake from sticking and makes the cleanup a breeze. If you’re a purist who prefers a direct metal contact, at least line the pan with parchment before greasing.
Let the Ganache Set Just Right
The ganache should be thick enough to hold its shape but still pourable. If it’s too thin, it will run down the sides; too thick, it won’t spread. The trick is to let it cool for about 10 minutes after mixing, then stir it gently before pouring.
Creative Twists and Variations
This recipe is a playground. Here are some of my favorite ways to switch things up:
Nutty Crunch
Add chopped walnuts or pecans to the batter for a nutty crunch. The nuts pair wonderfully with the chocolate, adding a subtle earthy note that balances the sweetness.
Espresso Boost
Replace the vanilla extract with a tablespoon of strong espresso. The coffee deepens the chocolate flavor and adds a subtle bitterness that makes the cake feel more sophisticated.
Minty Surprise
Fold in a teaspoon of peppermint extract and sprinkle crushed peppermint candies on top before baking. The mint will give the cake a refreshing twist that’s perfect for holiday parties.
Caramel Swirl
Swirl caramel sauce into the batter before baking. The caramel pockets melt into the cake, adding a sweet, buttery undertone that contrasts beautifully with the chocolate.
Sea‑Salted Caramel Ganache
Add a pinch of sea salt to the ganache. The salt enhances the chocolate’s richness and creates a delightful salty‑sweet contrast.
Vegan Version
Use plant‑based milk, flaxseed eggs, and coconut oil. The texture will be slightly denser, but the flavor remains as decadent as the original.
Storing and Bringing It Back to Life
Fridge Storage
Store the cooled cake in an airtight container in the refrigerator for up to 5 days. Wrap the ganache‑covered cake in parchment to prevent moisture from altering the glaze. When ready to serve, let the cake sit at room temperature for 30 minutes to restore its softness.
Freezer Friendly
For longer storage, wrap the cake tightly in plastic wrap and then place it in a freezer bag. Freeze for up to 3 months. To thaw, leave the cake in the refrigerator overnight, then let it come to room temperature before slicing.
Best Reheating Method
Reheat the cake in a preheated oven at 300°F (150°C) for 10 minutes, or until warmed through. Add a splash of water or milk before reheating; the liquid steams the cake, restoring its moist crumb and keeping the ganache silky.